EEEK! / BOO!
*German version below | Deutsche Version unten*
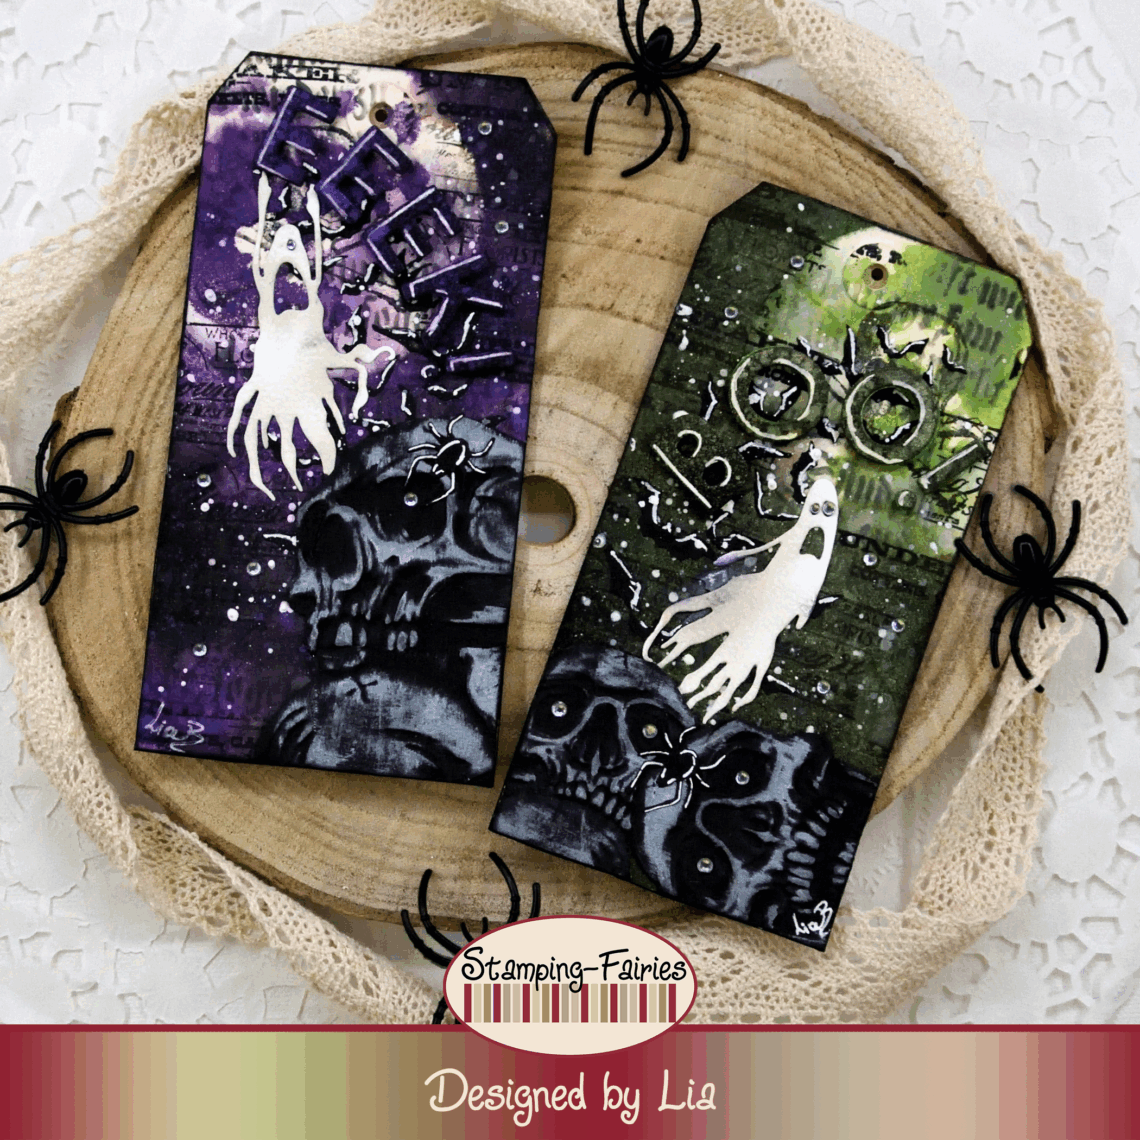
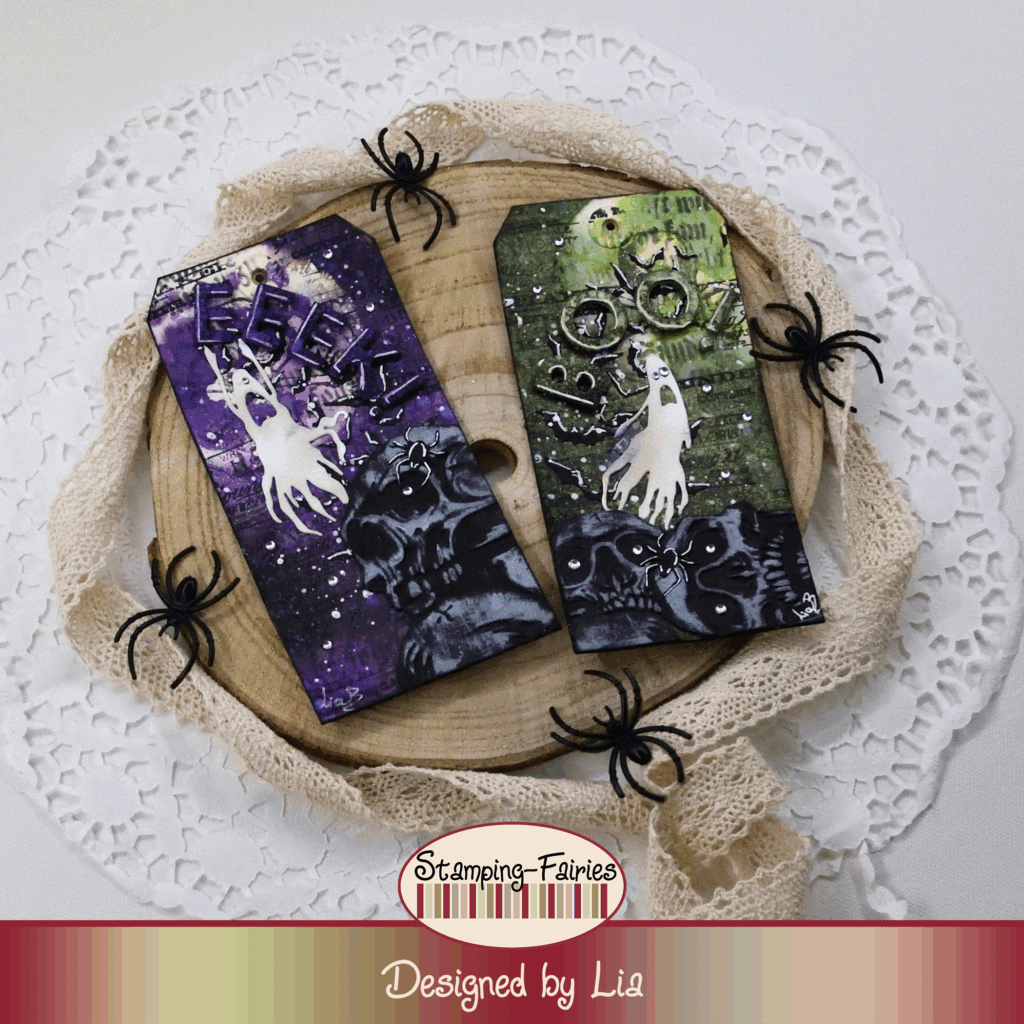
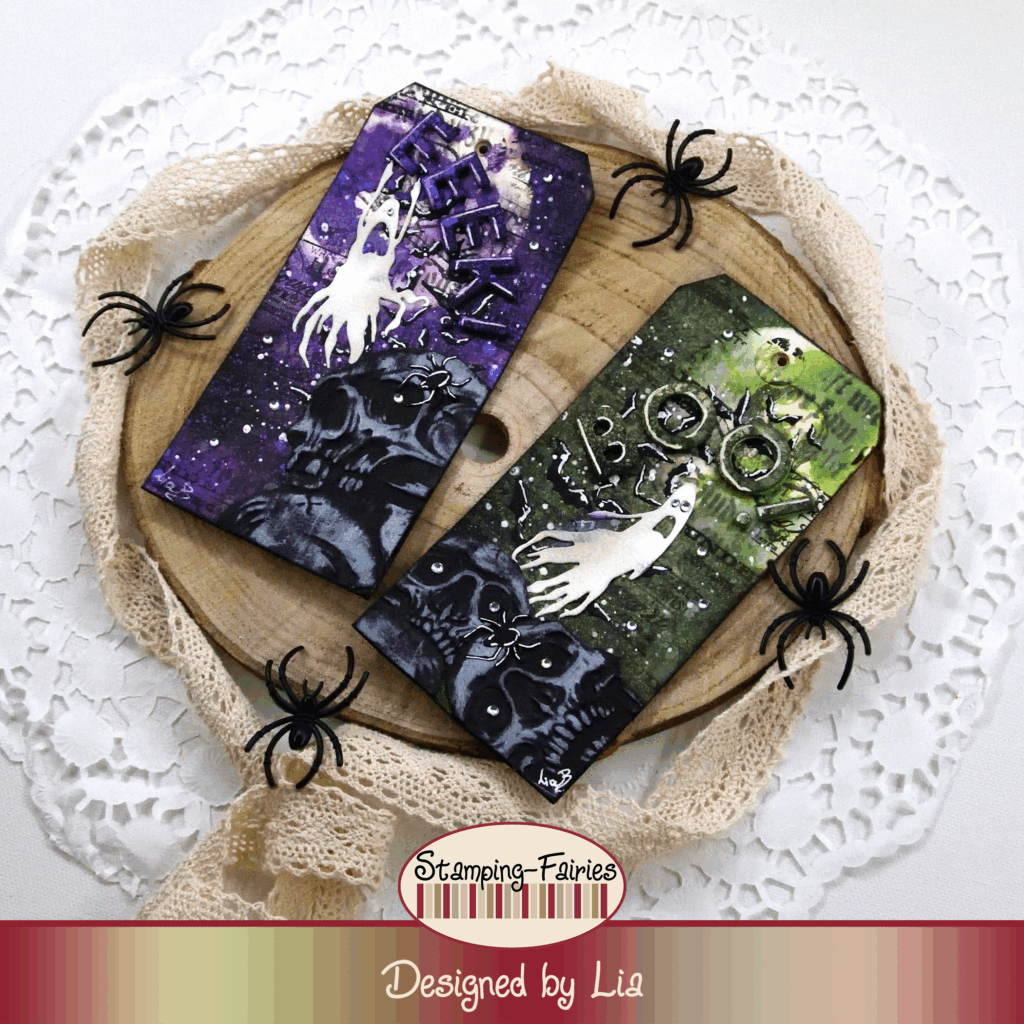
Hello everyone! Welcome back to another Mixed Media project. This is my first Halloween project for Stamping Fairies, and I decided to be bold! I made two ghostly tags for you. Let’s start with the materials I used:
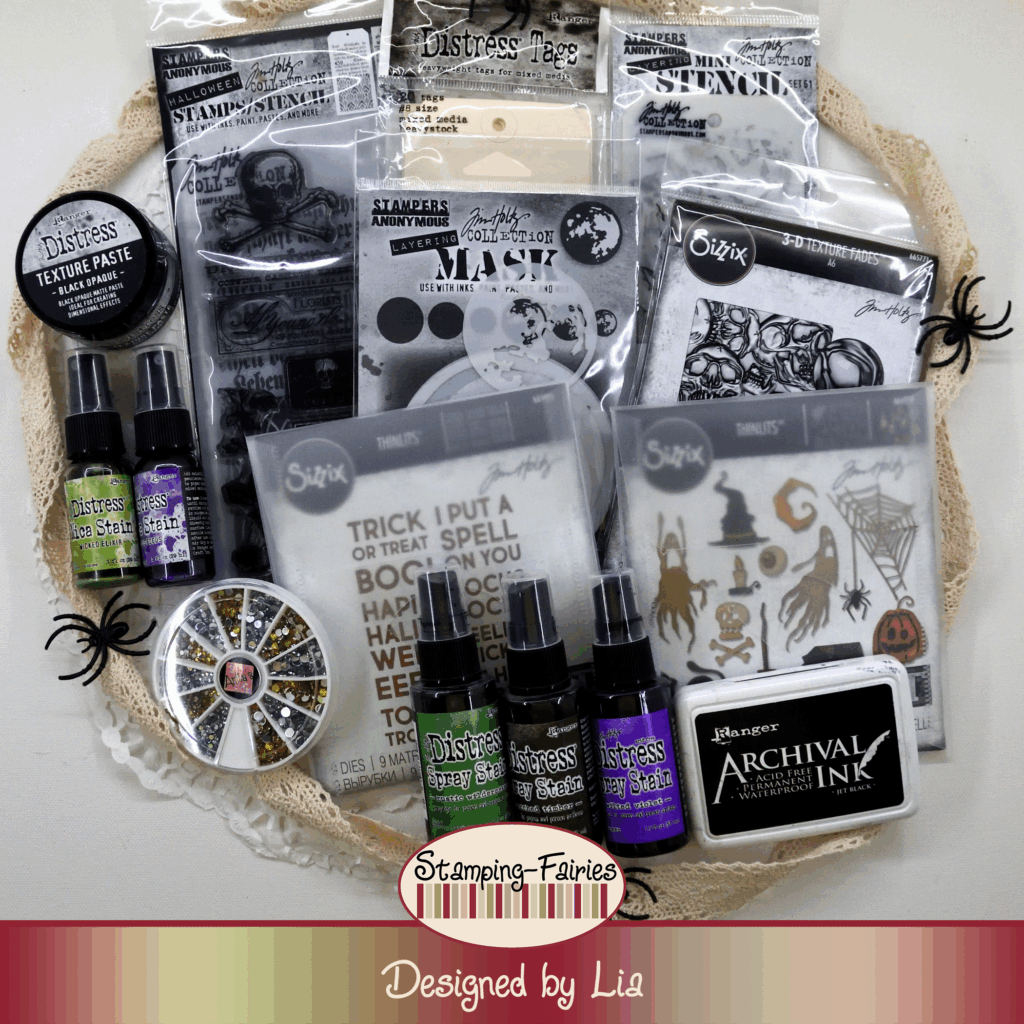
Materials
(If something is not in stock,
please simply click on “Product reminder”/ “Produkterinnerung”)
- Tim Holtz Distress Heavystock Tags #8 – 20 Stk.
- Tim Holtz Layering Mask – Moon Mask
- Distress Spray Stains
- Distress Mica Stain
- Tim Holtz Layering Stamps/Stencil – Rest in Peace
- Ranger – Tim Holtz Distress Oxide Pads – Black Soot – Lost Shadow
- Archival Ink – Jet Black
- Tim Holtz Mini Layering Stencil Collection – Set 61
- Tim Holtz Texture Paste – Black Opaque
- Distress Paint – Picket Fence
- Sizzix Tim Holtz – 3-D Texture Fades – Skulls
- Sizzix Tim Holtz DIE Set – Frightful Things
- Sizzix Tim Holtz Thinlits – Bold Text Halloween
- Anita`s Rhinestones Set
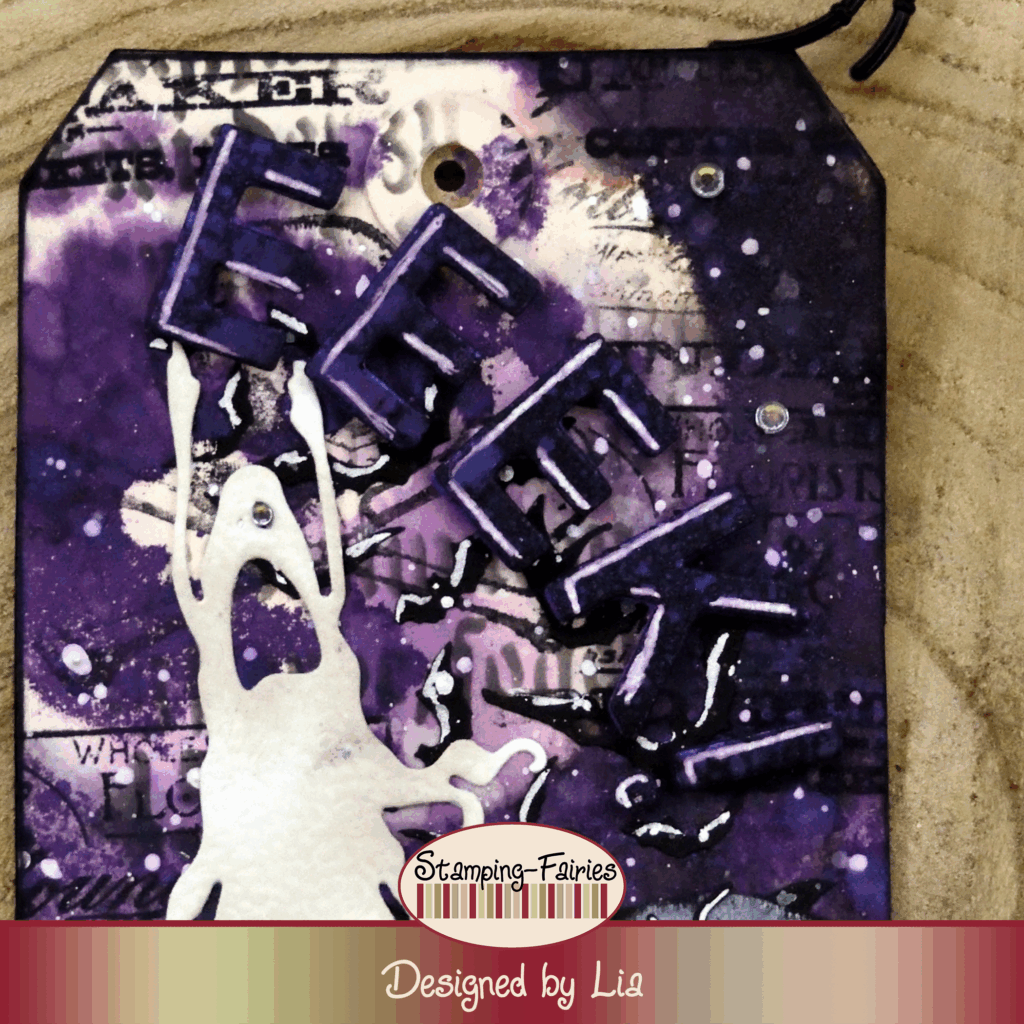
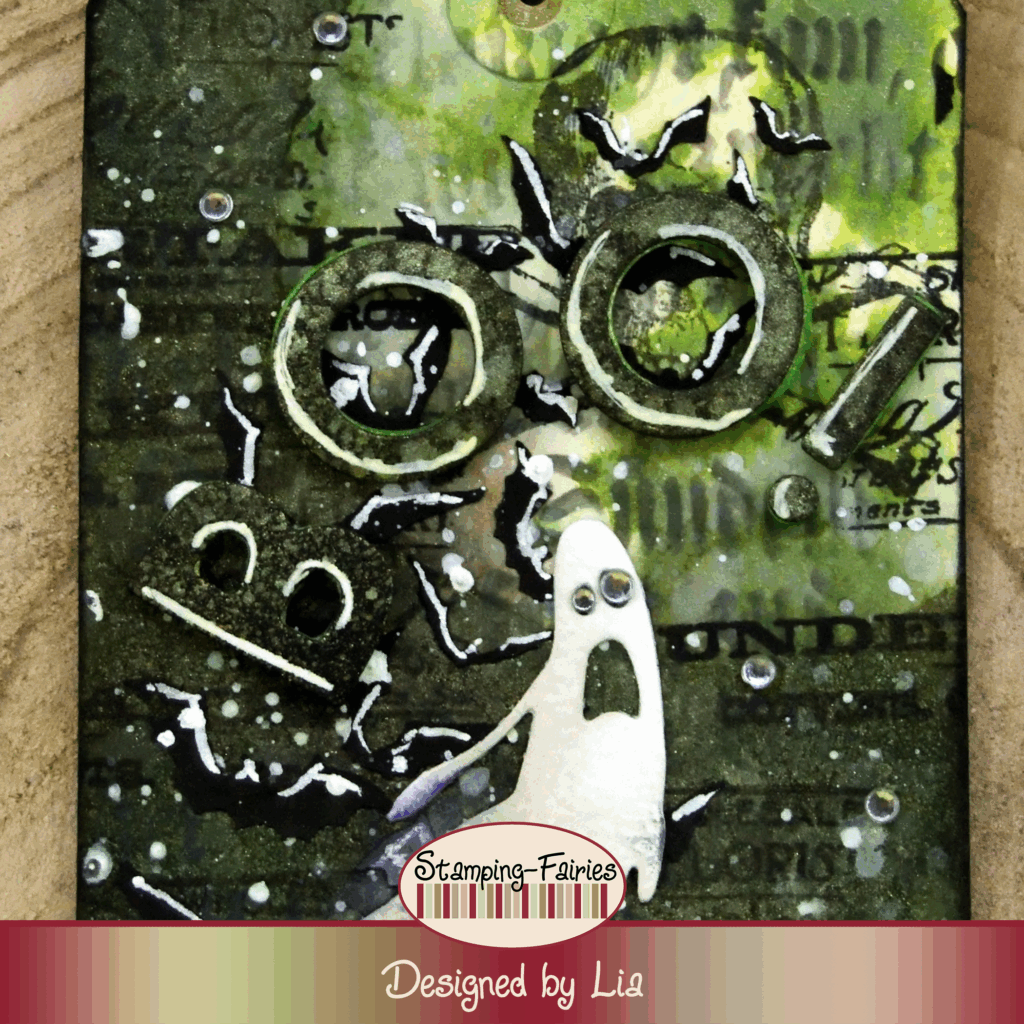
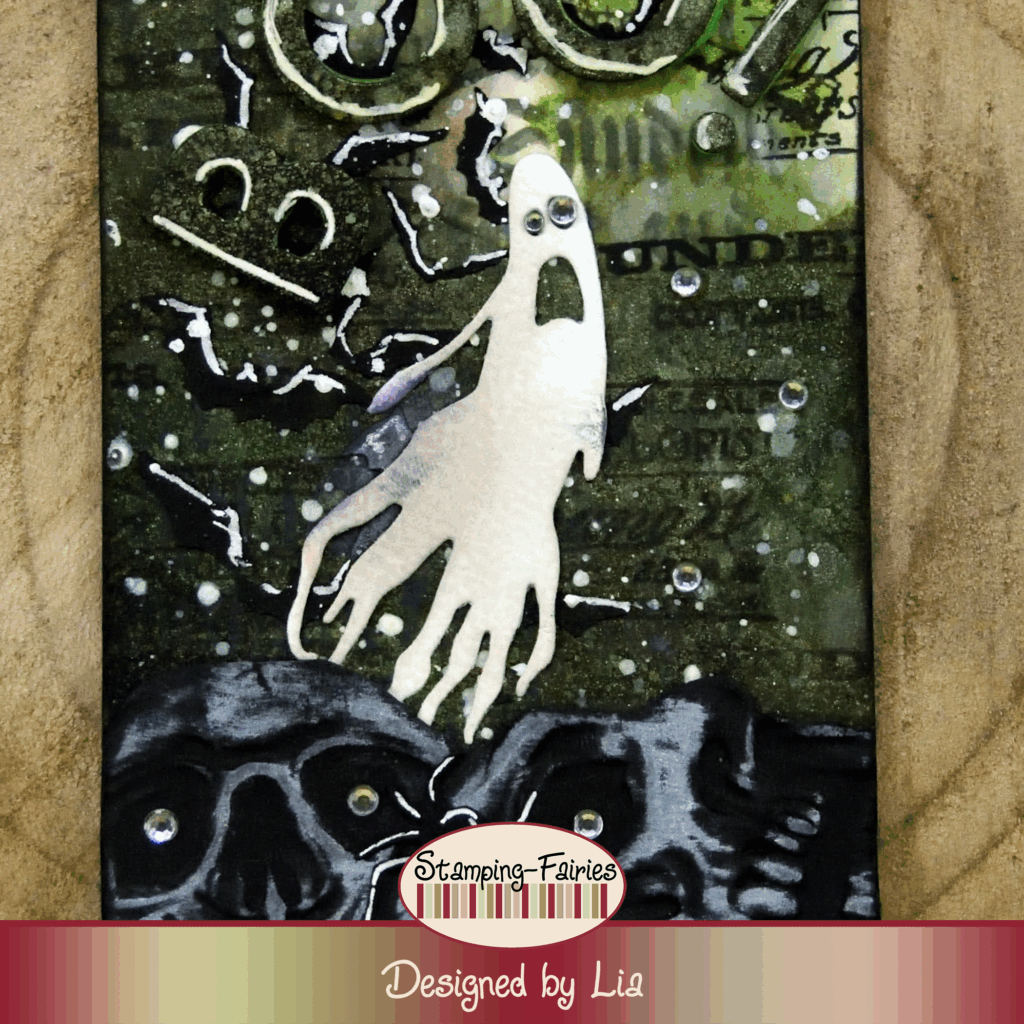
For this project, I worked on two Distress Heavyweight Mixed Media Tags. I did not use Gesso this time, mostly because I was so excited with the idea I had, and I forgot. That was not a problem with these Tags. Distress Heavystock can take a lot. I wanted a moon in the background, so I used the middle size moon from the Layering Moon Mask and stencil set to create it. First, I used the moon mask, and I covered the area where I wanted the moon to be. Then I added colour. For one of the Tags, I used Scorched Timber and Wilted Violet (purple) Distress Spray Stains, and for the other Scorched Timber and Rustic Wilderness (green) Distress Spray Stains. By the way, both Tags are made the same way, just the colours are different. Back to the project, I removed the moon mask, dried the inks and then I covered the moon with the moon stencil, and I sprayed over it with the Hocus Pocus (for the purple) and the Wicked Elixir (for the green) Distress Mica Stain Sprays. The colours turned out a little dark but I love all the sparkle from the Mica! To add more interest I used the „Rest in Peace“ Layering Stamps/Stencil set. First, I used the text part of the stencil with Black Soot Distress Oxide ink, and I added the design all over the Tags. Then I used some of the stamps of the set, with Jet Black Archival ink, and I added more text, mostly around the edges of the Tags. I also added the Skull to the center of the moon. This is a Halloween night scene, so we need some bats. I used the stencil with the bats from the Mini Layering Stencil Collection – Set 61 with Ranger Black Opaque Texture Paste to add my bats. I left the Paste to dry and then I splattered the Tags with Picket Fence (white) Distress Paint. I darkened the edges of the Tags, using Black Soot Distress Oxide ink, and the backgrounds were done!
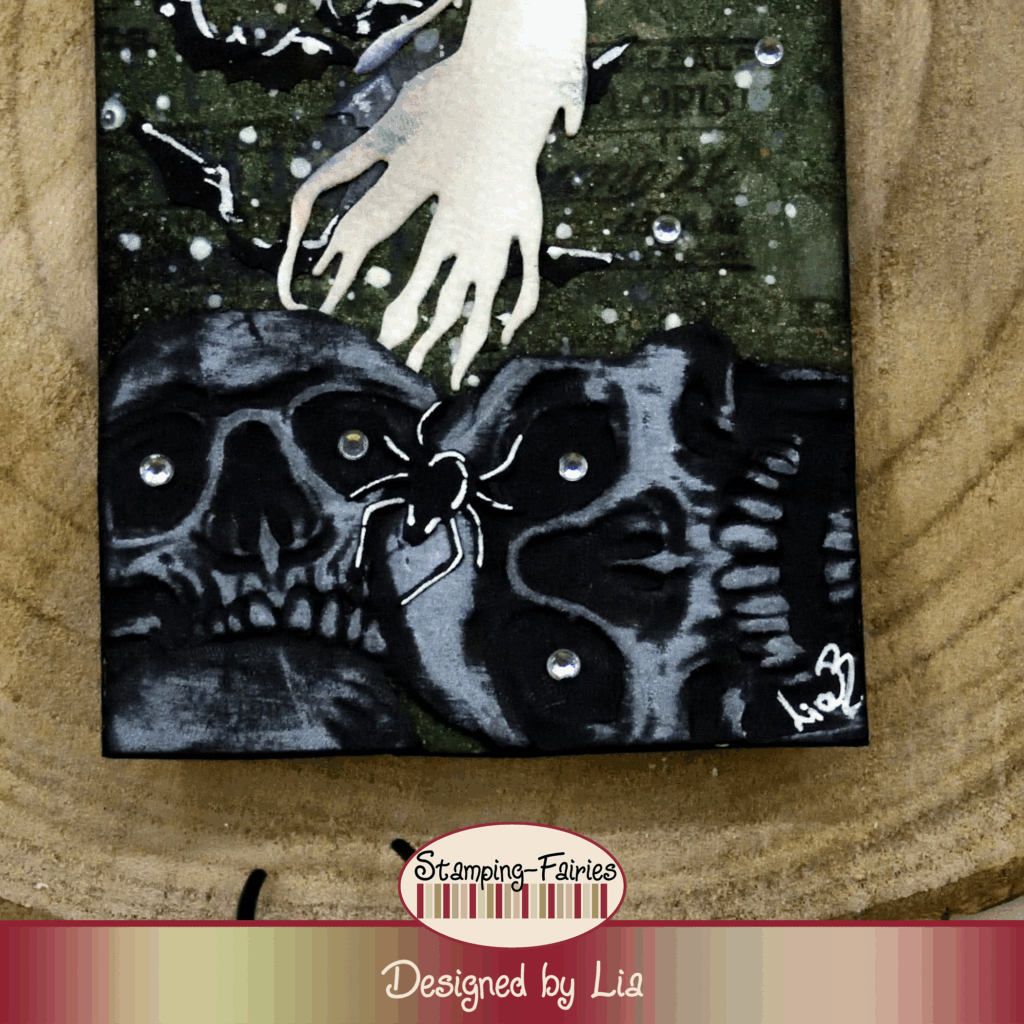
Time to prepare my images! First, I made the skulls. I used the Sizzix Skulls 3D Texture Fades embossing folder with black cardstock. Once the design was embossed on the paper, I used the Lost Shadow Distress Oxide ink pad and I rubbed it on the paper. The raised parts of the designs got coloured. This folder creates a panel as big as a standard card, but I only wanted some parts of it. So I cut out the parts I wanted to use. My ghosts and the little spiders are cut with cutting dies from the Sizzix Frightfull Things Thinlits set. I cut the ghosts out of white cardstock and then I added some grey ink on them (yes, I left a partial purple fingerprint on one of them…. I didn’t even notice until the end :-P). My spiders are made out of black cardstock. I like how they are so small, you can almost miss them, but they are there!
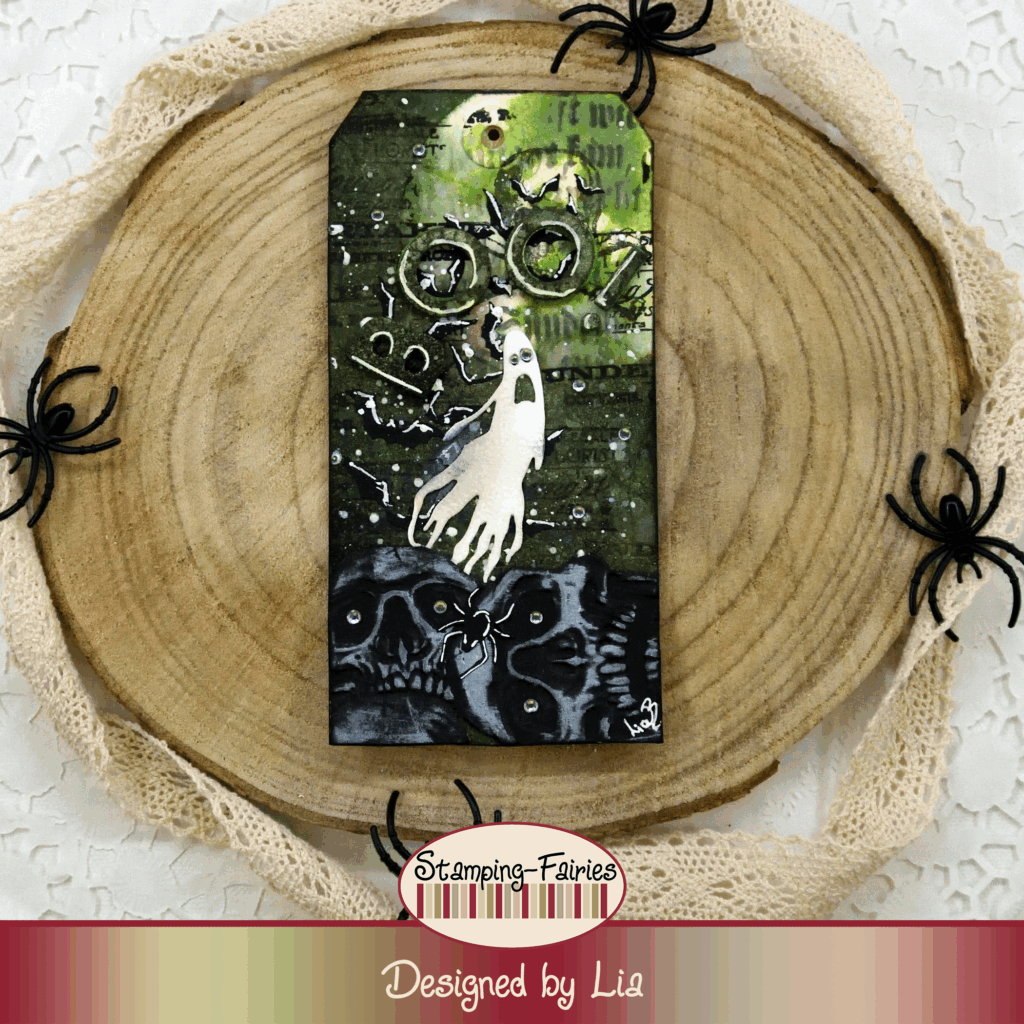
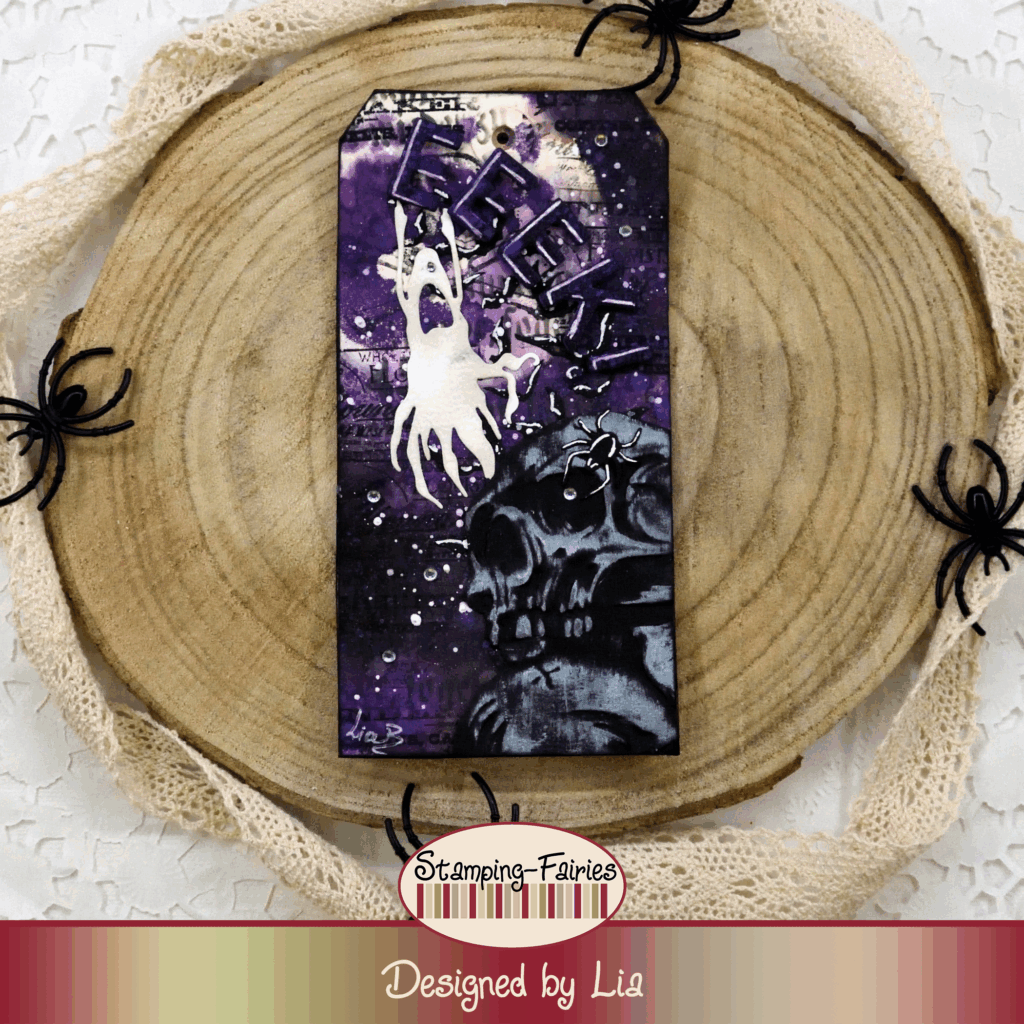
My sentiments are cut with cutting dies from the Sizzix Bold Text Halloween Thinlits set. I cut them both out of black cardstock and then I sprayed them with my Mica Stain Sprays. Then I cut the sentiments again, this time out of fun foam in coordinating colours with the Mica Stains, so one purple and one green. I stacked the cardstock and the fun foam sentiments. Now if you look the Tags from above, you see the black cardstock with the Mica on it, but when you look from the side, you see the colour of the fun foam. I like it! The sentiments are pretty simple. One says „EEEK! and the other says „BOO!“ and I find them perfect for my Tags! As a last little bit of embellishment, I added some gems from Anita’s Rhinestones pack.
And that was the project for today! I love making for Halloween! it is one of my favourite seasons. Halloween projects can be more messy and fun then usual. That is very freeing! What do you think? I really hope you like today’s project! I hope you got inspired! We will see each other again next Monday! Until then, stay creative and have fun!
*Deutsche Version*
Hallo zusammen! Willkommen zurück zu einem weiteren Mixed-Media Projekt. Dies ist mein erstes Halloween Projekt für Stamping Fairies und ich habe mich entschieden, laut zu sein! Ich habe zwei gespenstische Tags für euch gebastelt. Beginnen wir mit den Materialien, die ich verwendet habe:
Materialien
(wenn etwas nicht auf Lager ist,
bitte einfach auf „Produkterinnerung“ klicken)
- Tim Holtz Distress Heavystock Tags #8 – 20 Stk.
- Tim Holtz Layering Mask – Moon Mask
- Distress Spray Stains
- Distress Mica Stain
- Tim Holtz Layering Stamps/Stencil – Rest in Peace
- Ranger – Tim Holtz Distress Oxide Pads – Black Soot – Lost Shadow
- Archival Ink – Jet Black
- Tim Holtz Mini Layering Stencil Collection – Set 61
- Tim Holtz Texture Paste – Black Opaque
- Distress Paint – Picket Fence
- Sizzix Tim Holtz – 3-D Texture Fades – Skulls
- Sizzix Tim Holtz DIE Set – Frightful Things
- Sizzix Tim Holtz Thinlits – Bold Text Halloween
- Anita`s Strasssteine Set
Für dieses Projekt habe ich an zwei Distress Heavyweight Mixed Media Tags gearbeitet. Dieses Mal habe ich kein Gesso verwendet, hauptsächlich, weil ich von meiner Idee so begeistert war und es vergessen hatte. Bei diesen Tags war das kein Problem. Distress Heavystock hält einiges aus. Ich wollte einen Mond im Hintergrund haben, also habe ich den mittelgroßen Mond aus dem Layering Moon Mask and Stencil Set verwendet, um ihn zu erstellen. Zuerst habe ich die Mondmaske verwendet und den Bereich abgedeckt, in dem der Mond sein sollte. Dann habe ich Farbe hinzugefügt. Für einen der Tags habe ich Scorched Timber und Wilted Violet (lila) Distress Spray Stains verwendet, für den anderen Scorched Timber und Rustic Wilderness (grün). Beide Tags sind übrigens gleich gemacht, nur die Farben sind unterschiedlich. Zurück zum Projekt: Ich habe die Mondmaske entfernt, die Tinten getrocknet, den Mond mit der Mondschablone abgedeckt und ihn mit den Distress Mica Stain Sprays Hocus Pocus (für das Lila) und Wicked Elixir (für das Grün) besprüht. Die Farben sind etwas dunkel geworden, aber ich liebe das Funkeln des Micas! Um das Ganze interessanter zu gestalten, habe ich das „Rest in Peace“ Layering Stempel/Schablonen Set verwendet. Zuerst habe ich den Textteil der Schablone mit Black Soot Distress Oxid Tinte verwendet und das Design auf die Etiketten aufgetragen. Anschließend habe ich einige der Stempel aus dem Set mit Jet Black Archivtinte verwendet und weiteren Text hinzugefügt, hauptsächlich an den Rändern der Etiketten. Außerdem habe ich den Totenkopf in die Mitte des Mondes gesetzt. Dies ist eine Halloween Nachtszene, also brauchen wir ein paar Fledermäuse. Ich habe die Schablone mit den Fledermäusen aus der Mini Layering Schablonen Kollektion – Set 61 mit Ranger Black Opaque Texture Paste verwendet, um meine Fledermäuse hinzuzufügen. Ich habe die Paste trocknen lassen und dann die Etiketten mit Picket Fence Distress Paint (weiß) bespritzt. Die Ränder der Etiketten habe ich mit Black Soot Distress Oxid Tinte abgedunkelt, und fertig sind die Hintergründe!


Zeit, meine Bilder vorzubereiten! Zuerst habe ich die Totenköpfe gemacht. Ich habe den Sizzix Skulls 3D Texture Fades Prägefolder mit schwarzem Karton verwendet. Nachdem das Design auf das Papier geprägt war, habe ich das Lost Shadow Distress Oxide Stempelkissen verwendet und es auf das Papier gerieben. Die erhabenen Teile der Designs wurden eingefärbt. Dieser Folder erzeugt ein Panel so groß wie eine Standardkarte, aber ich wollte nur Teile davon. Also habe ich die Teile ausgeschnitten, die ich verwenden wollte. Meine Geister und die kleinen Spinnen habe ich mit Stanzformen aus dem Sizzix Frightfull Things Thinlits Set ausgestanzt. Ich habe die Geister aus weißem Karton ausgestanzt und dann etwas graue Tinte darauf aufgetragen (ja, auf einem von ihnen habe ich einen violetten Fingerabdruck hinterlassen … das habe ich erst am Ende bemerkt :-P). Meine Spinnen sind aus schwarzem Karton. Ich mag es, wie klein sie sind: Man übersieht sie fast, aber sie sind da!
Meine Sprüche habe ich mit Stanzformen aus dem Sizzix Bold Text Halloween Thinlits Set ausgestanzt. Ich habe sie beide aus schwarzem Karton ausgeschnitten und dann mit meinen Mica Stain Sprays besprüht. Dann habe ich die Sprüche noch einmal ausgestanzt, diesmal aus Fun Foam in passenden Farben zu den Mica Stains, also einmal lila und einmal grün. Ich habe den Karton und die Fun Foam-Sprüche übereinandergelegt. Wenn man die Tags von oben betrachtet, sieht man den schwarzen Karton mit dem Mica darauf, aber von der Seite sieht man die Farbe des Fun Foam. Gefällt mir! Die Sprüche sind ziemlich simpel. Auf dem einen steht „EEEK!“ und auf dem anderen „BOO!“ und ich finde, sie passen perfekt zu meinen Tags! Als letzte kleine Verzierung habe ich ein paar Schmucksteine aus Anitas Strassstein Paket hinzugefügt.
Und das war das Projekt für heute! Ich liebe es, für Halloween zu basteln! Es ist eine meiner Lieblingsjahreszeiten. Halloween Projekte können chaotischer und lustiger sein als sonst. Das ist sehr befreiend! Was meint ihr? Ich hoffe sehr, dass euch das heutige Projekt gefällt! Ich hoffe, ihr habt euch inspirieren lassen! Wir sehen uns nächsten Montag wieder! Bis dahin bleibt kreativ und habt Spaß!

Skull ATC