Inspire
*German version below | Deutsche Version unten*
Hello everyone! Welcome back to another Mixed Media project. I started the month with a Stamperia project and I am going to end the month the same way. We have a new Stamperia collection in the shop and I could not wait to play with it! Let’s start with the materials I used:
Materials
(If something is not in stock,
please simply click on “Product reminder”/ “Produkterinnerung”)
- Prima Marketing – Art Basics – Gesso Clear
- Ranger Texture Paste Opaque Crackle
- Tim Holtz Layering Stencil – Clockwork and Argyle
- Distress Oxide Sprays
- Ranger – Tim Holtz Distress Oxide Pads
- Tim Holtz Stamp Set – Flower Shop
- Stamperia Master of Magic – Paper Pack – Washi Pad – Die Cuts
- Tim Holtz Stamp Set – Etcetera
- Archival Ink – Jet Black
- Distress Paint – Picket Fence
- Craft Consortium Essential Adhesive Pearls – Natural

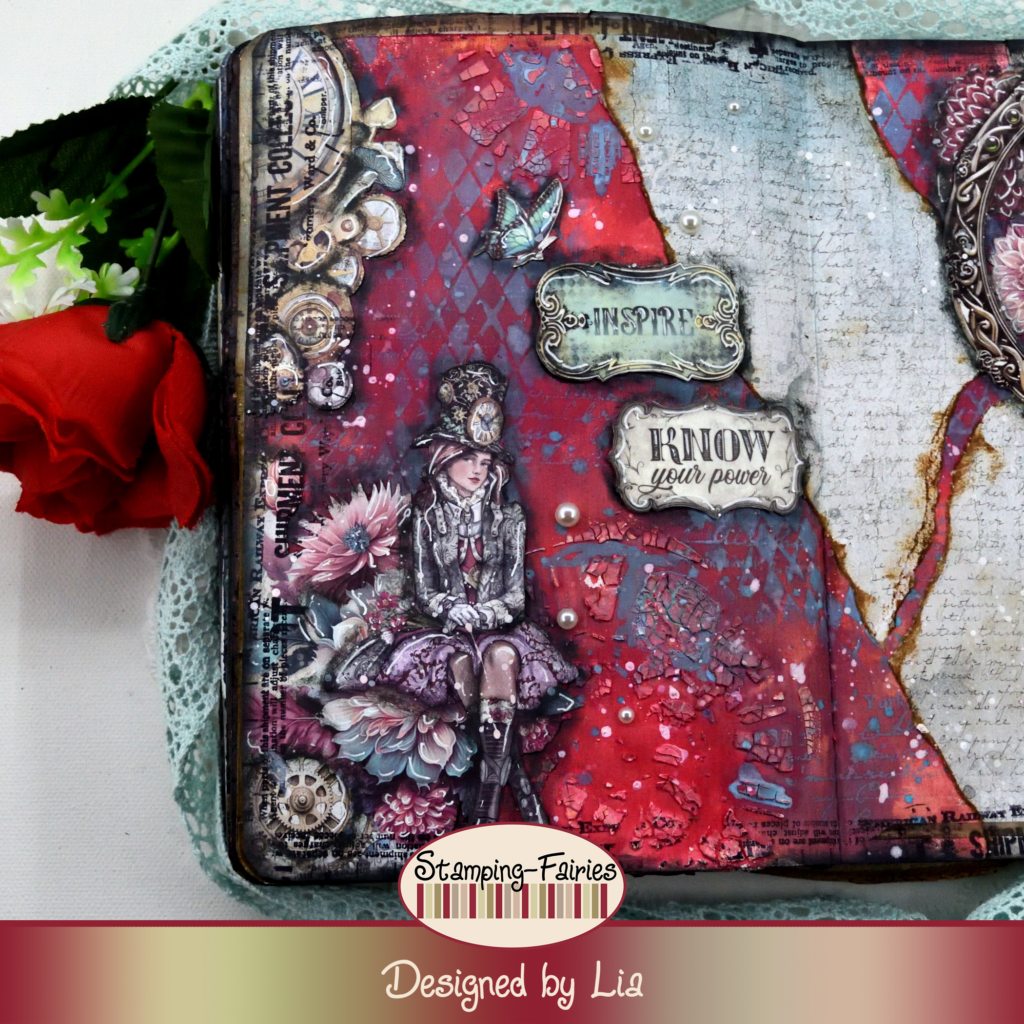
I made this project in my Stamperia mixed media art journal. I knew I was going to use my sprays and I needed to protect my pages. So, I started with a good layer of clear Gesso. Moving on, I used my all time favourite, Ranger Texture Crackle Paste with the Clockwork Layering stencil, on some spots around my pages. My Paste was quite dry, so the stencil design did not transfer as I wanted to, but that does not bother me at all. I still have some really good texture! Next is adding colour, using Distress Oxide Sprays. I used the colours Lumberjack Plaid and Aged Mahogany, I sprayed them together and then I sprayed a little bit of water, just to help them blend. I dried the pages and then I added some more stencil details, using the Argyle Layering stencil with Salvaged Patina Distress Oxide ink. I splattered the pages with the Salvaged Patina Distress Oxide Spray and I dried them. I still wanted some text details, so I used the text stamp from the Tim Holtz Flower Shop stamp set, with Salvaged Patina Distress Oxide ink and I added the text details to my project. And with that, my background was mostly done.
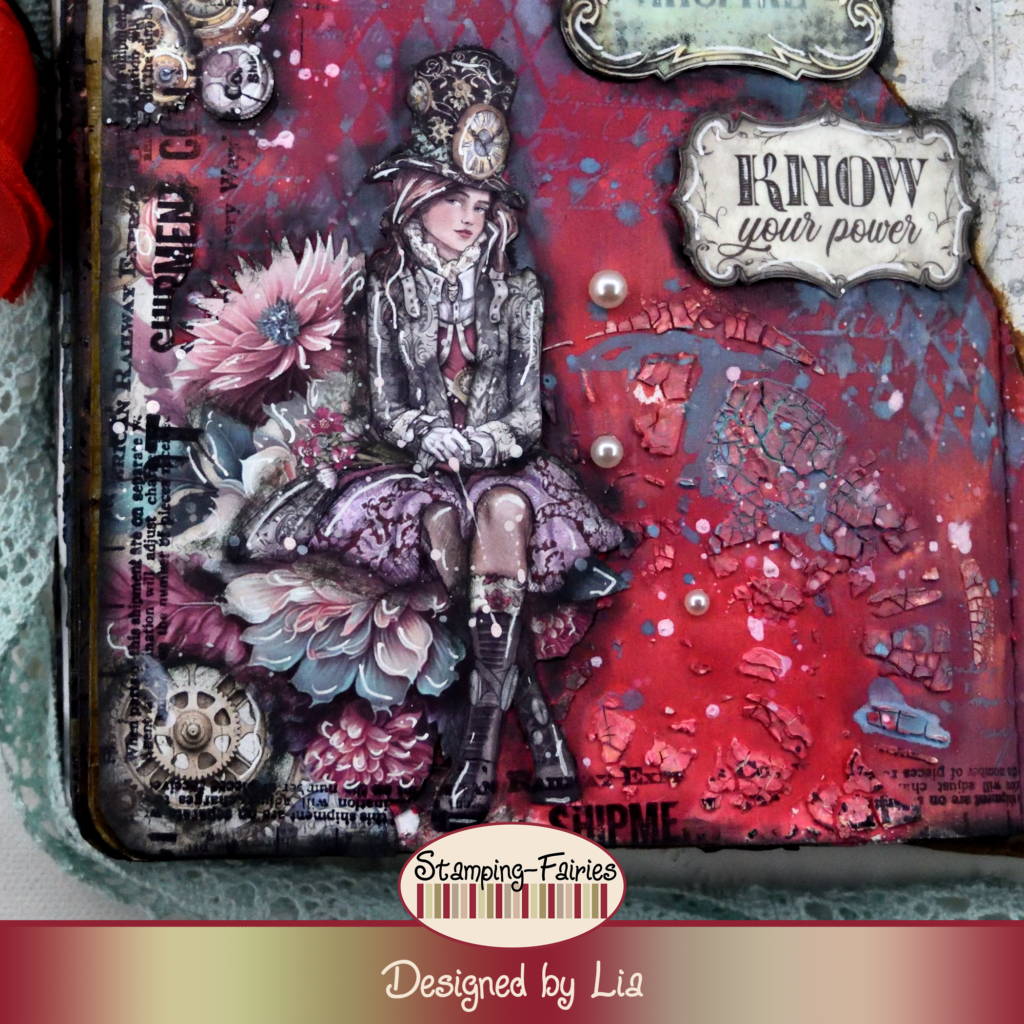
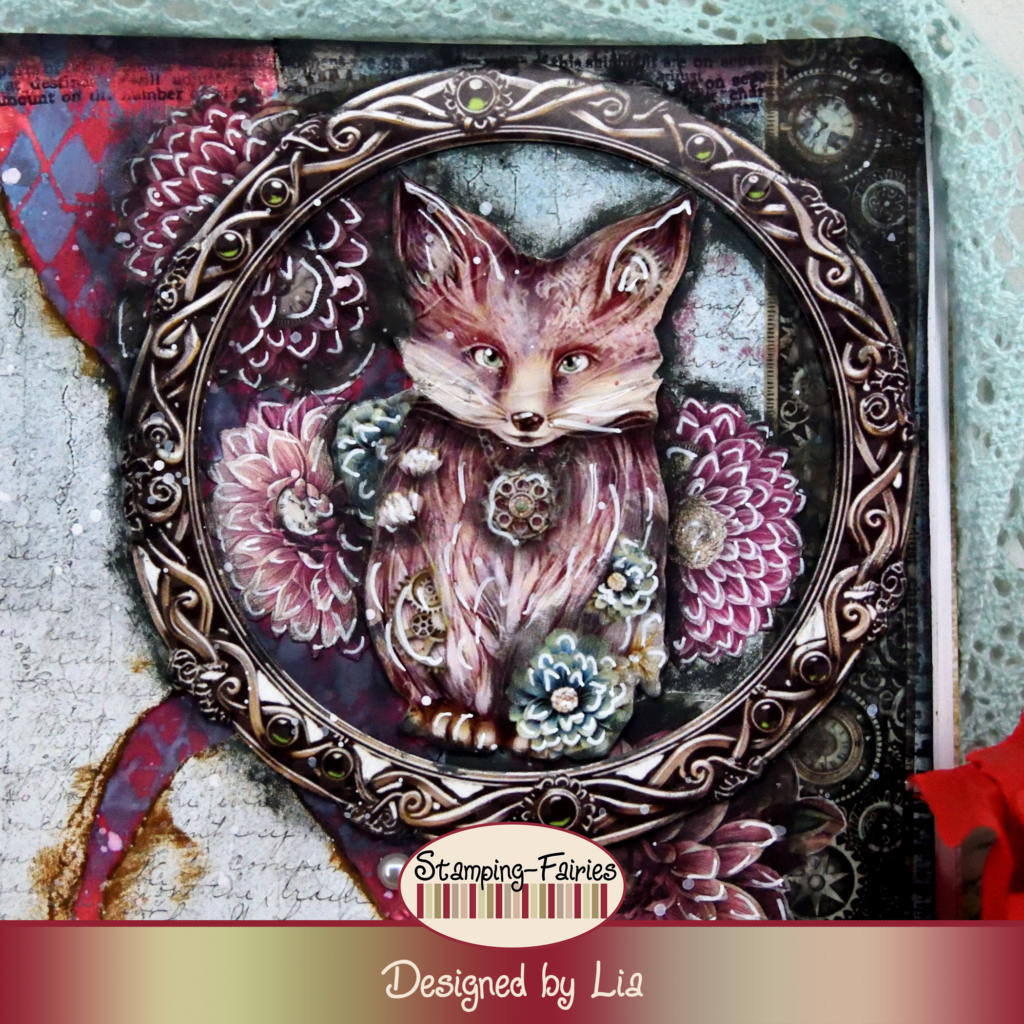
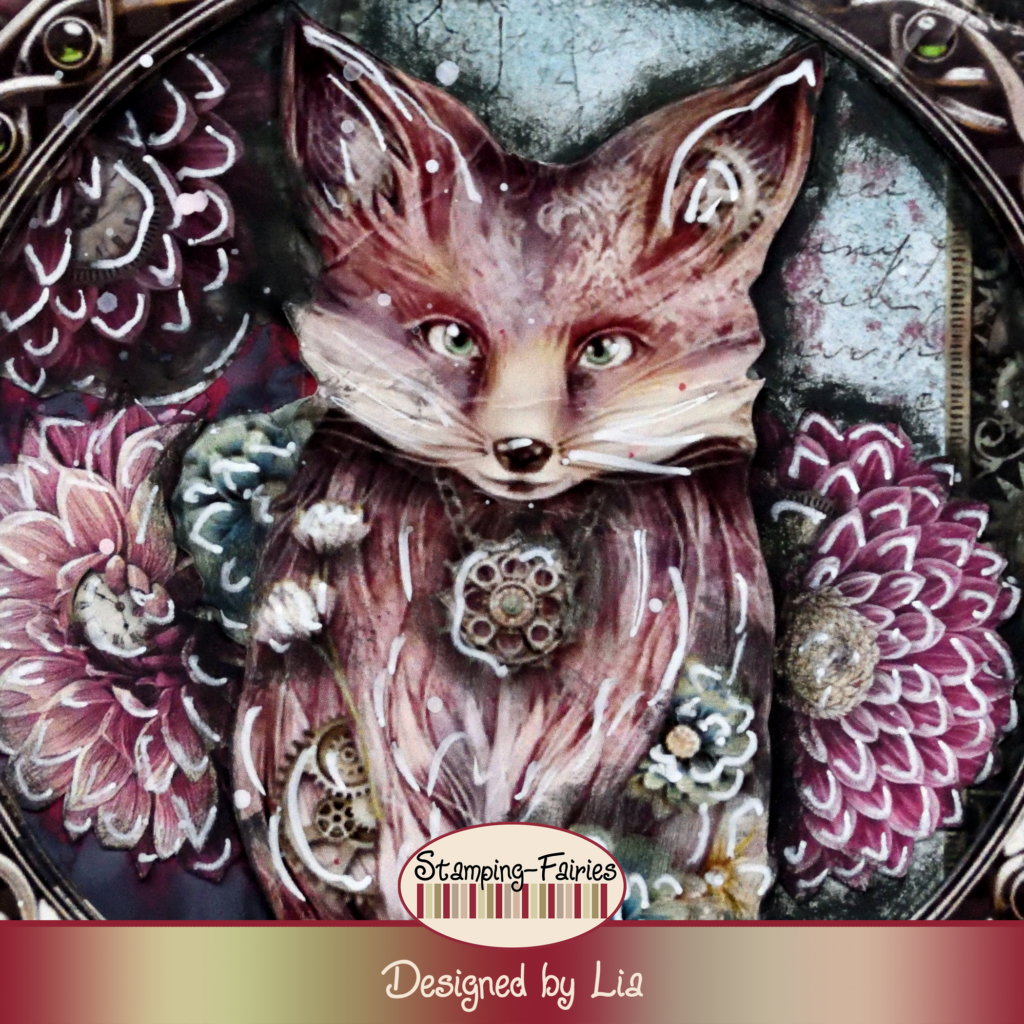
Time to prepare my images. I used the Stamperia Master of Magic collection. I cut the girl and the gears from the paper pad and I used the rest of that page in the middle and the corners of my project. I also used a strip of gears and some flowers from the Washi pad. The fox and the ring around it come from the Die Cut pack. I placed everything on my project and then I added some black text details all around the edges of my pages, using text stamps from the Tim Holtz Etcetera stamp set with Jet Black Archival ink. I used Black Soot Distress Oxide ink to darken the edges of my pages. I also used the same ink with a stiff brush, to add some shadows around my images. In the end, I splattered my project with Picket Fence Distress Paint (white).
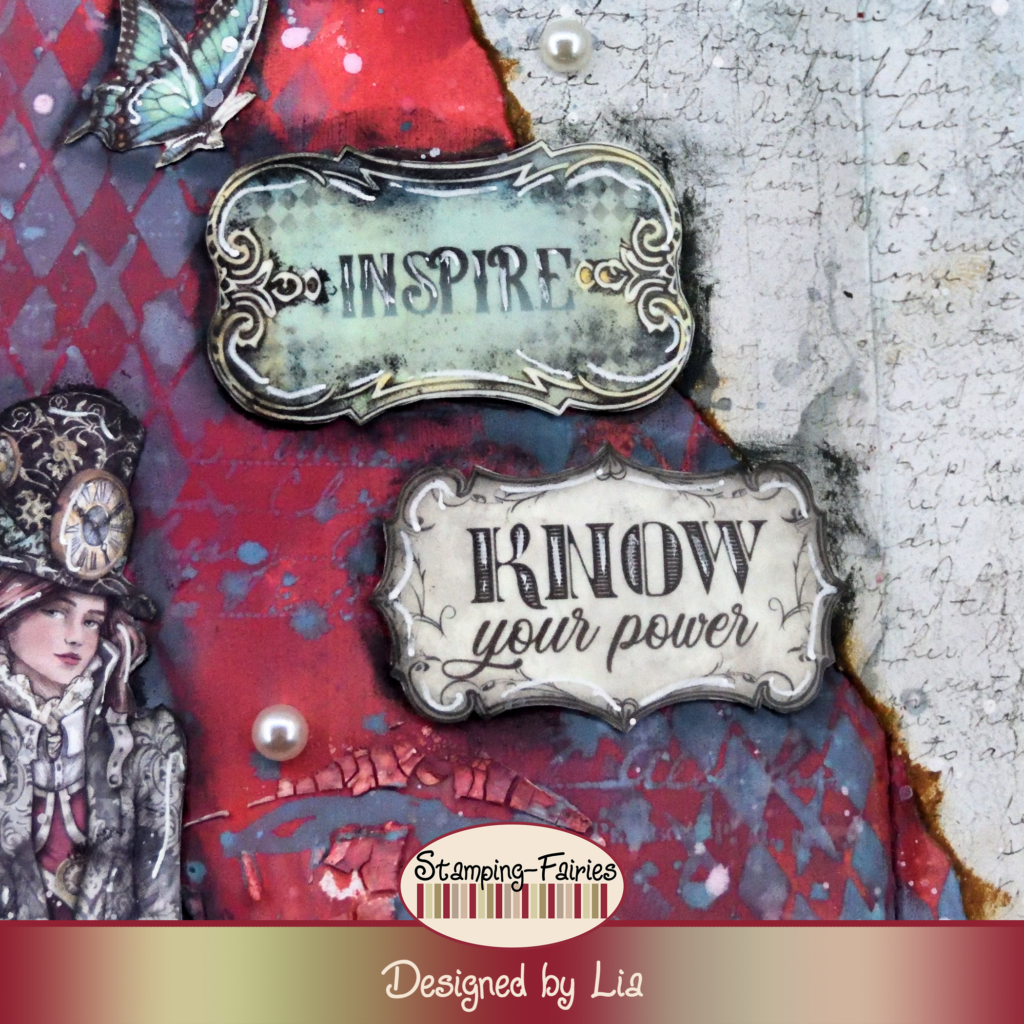
My sentiment, as well as the butterfly above it, come from the Washi pad. I chose two pieces for my sentiment and cut them out. I attached them to white cardstock and cut them out again. I placed them on my project, along with the butterfly, and I added shadows around them, using Black Soot Distress Oxide ink. The sentiment says: „Inspire. Know your power“. This is a notion I struggle with, but I am learning! As a last little bit of embellishment, I added some Craft Consortium Pearls.
And that was the project for today! The Master of Magic is the continuation of the Sir Vagabond. When Antonis Tzanidakis (the designer of Sir Vagabond) introduced this collection, he explained the story of this girl. She is supposed to be Sir Vagabond’s assistant, whom he transformed into a fox and then he could not turn her back into a girl. This story is the reason I used these two images together. I love it when the creators explane the stories behind their designs! I really hope you like today’s project! I hope you got inspired! We will see each other again next Monday! Until then, stay creative and have fun!
*Deutsche Version*
Hallo zusammen! Willkommen zurück zu einem weiteren Mixed-Media Projekt. Ich habe den Monat mit einem Stamperia Projekt begonnen und werde ihn genauso beenden. Wir haben eine neue Stamperia Kollektion im Shop und ich konnte es kaum erwarten, damit zu spielen! Beginnen wir mit den Materialien, die ich verwendet habe:
Materialien
(wenn etwas nicht auf Lager ist,
bitte einfach auf „Produkterinnerung“ klicken)
- Prima Marketing – Art Basics – Gesso Clear
- Ranger Texture Paste Opaque Crackle
- Tim Holtz Layering Stencil – Clockwork and Argyle
- Distress Oxide Sprays
- Ranger – Tim Holtz Distress Oxide Pads
- Tim Holtz Stamp Set – Flower Shop
- Stamperia Master of Magic – Paper Pack – Washi Pad – Die Cuts
- Tim Holtz Stamp Set – Etcetera
- Archival Ink – Jet Black
- Distress Paint – Picket Fence
- Craft Consortium Essential Adhesive Pearls – Natural

Ich habe dieses Projekt in meinem Stamperia Mixed-Media Art-Journal gemacht. Ich wusste, dass ich meine Sprays verwenden würde und meine Seiten schützen musste. Also habe ich mit einer dicken Schicht klarem Gesso begonnen. Anschließend habe ich meine Lieblingspaste, die Ranger Texture Crackle Paste, mit der Clockwork Layering-Schablone an einigen Stellen meiner Seiten verwendet. Meine Paste war ziemlich trocken, sodass das Schablonendesign nicht wie gewünscht übertragen wurde, aber das stört mich überhaupt nicht. Die Textur ist immer noch sehr gut! Als Nächstes habe ich Farbe mit Distress Oxide Sprays hinzugefügt. Ich habe die Farben Lumberjack Plaid und Aged Mahogany verwendet, sie zusammen gesprüht und dann ein wenig Wasser aufgesprüht, damit sie sich besser vermischen. Ich habe die Seiten getrocknet und dann einige weitere Schablonendetails mit der Argyle Layering Schablone und Salvaged Patina Distress Oxide Tinte hinzugefügt. Ich habe die Seiten mit dem Salvaged Patina Distress Oxide Spray bespritzt und sie getrocknet. Ich wollte noch ein paar Textdetails, also habe ich den Textstempel aus dem Stempelset „Flower Shop“ von Tim Holtz mit Salvaged Patina Distress Oxide Tinte verwendet und meinem Projekt die Textdetails hinzugefügt. Damit war mein Hintergrund größtenteils fertig.

Zeit, meine Bilder vorzubereiten. Ich habe die Stamperia Master of Magic Kollektion verwendet. Ich habe das Mädchen und die Zahnräder aus dem Papierblock ausgeschnitten und den Rest der Seite in der Mitte und den Ecken meines Projekts verwendet. Außerdem habe ich einen Streifen Zahnräder und einige Blumen vom Washi-Block verwendet. Der Fuchs und der Ring darum stammen aus dem Die Cut Pack. Ich habe alles auf meinem Projekt platziert und dann rund um die Seitenränder schwarze Textdetails hinzugefügt. Dazu habe ich Textstempel aus dem Tim Holtz Etcetera Stempelset und Jet Black Archival Tinte verwendet. Mit Black Soot Distress Oxide Tinte habe ich die Ränder meiner Seiten abgedunkelt. Die gleiche Tinte habe ich außerdem mit einem steifen Pinsel verwendet, um Schatten um meine Bilder zu erzeugen. Zum Schluss habe ich mein Projekt mit Picket Fence Distress Paint (weiß) bespritzt.
Mein Spruch und der Schmetterling darüber stammen vom Washi-Block. Ich habe zwei Teile für meinen Spruch ausgewählt und ausgeschnitten. Ich habe sie auf weißen Karton geklebt und erneut ausgeschnitten. Ich habe sie zusammen mit dem Schmetterling auf mein Projekt gelegt und mit Black Soot Distress Oxide Tinte Schatten um sie herum hinzugefügt. Der Spruch lautet übersetzt: „Inspiriere. Kenne deine Kraft.“ Mir fällt das schwer, an meine eigene Kraft zu glauben, aber ich lerne dazu! Als letzte Verzierung habe ich einige Perlen von Craft Consortium hinzugefügt.

Und das war das Projekt für heute! Die „Master of Magic“ Kollektion ist die Fortsetzung von „Sir Vagabond“. Als Antonis Tzanidakis (der Designer von „Sir Vagabond“) diese Kollektion vorstellt hatte, hat er erzählt die Geschichte dieses Mädchens. Sie soll Sir Vagabonds Assistentin sein, die er in einen Fuchs verwandelt hatte und dann nicht mehr in ein Mädchen verwandeln konnte. Diese Geschichte ist der Grund, warum ich diese beiden Bilder zusammen verwendet habe. Ich liebe es, wenn die Schöpfer die Geschichten hinter ihren Designs erzählen! Ich hoffe sehr, dass euch das heutige Projekt gefällt! Ich hoffe, ihr habt euch inspirieren lassen! Wir sehen uns nächsten Montag wieder! Bis dahin bleibt kreativ und habt Spaß!

Eierverpackung zu Ostern

Wishing you a lovely day
Das könnte dich auch interessieren
You give the best hugs
Light Up Atc’s