Happy Easter
*German version below | Deutsche Version unten*
Hello everyone! Welcome back to another Mixed Media project. Easter is right around the corner and I decided to welcome it with a colourful project. This was so much fun to make! Let’s start with the materials I used:
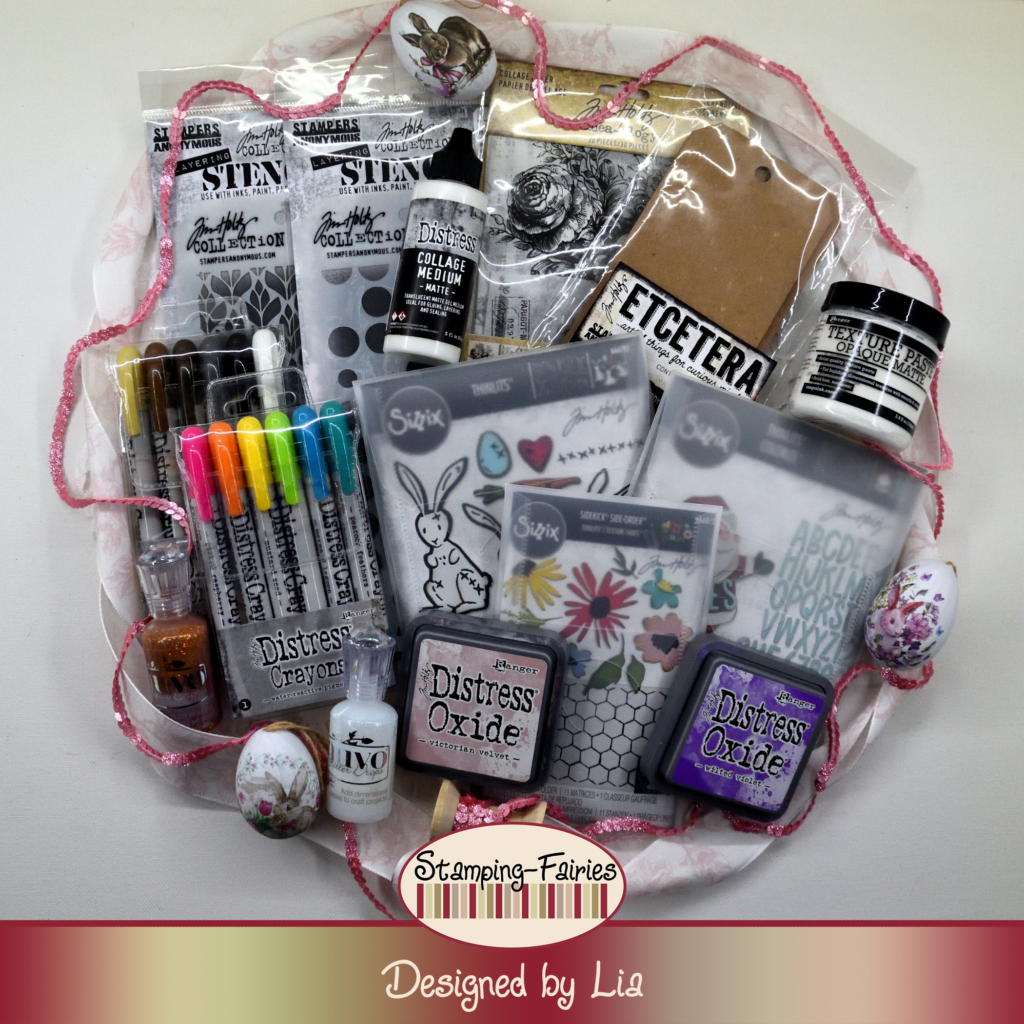
Materials
(If something is not in stock,
please simply click on “Product reminder”/ “Produkterinnerung”)
- Tim Holtz – Thickboard Tag #8
- Tim Holtz Collage Paper – Serendipity
- Distress Collage Medium
- Tim Holtz Distress Crayons
- Tim Holtz Layering Stencils – Spots and Deco Floral
- Ranger Texture Paste – Opaque Matte
- Coloured Cardstock
- Sizzix Sidekick Side-Order Thinlits/ Texture Fades – Vault Floristry
- Ranger – Tim Holtz Distress Oxide Pads
- Sizzix Tim Holtz Thinlits – Bunny Stitch
- Sizzix Tim Holtz Thinlits – Santa Greetings, Colorize
- Nuvo Glitter Drops
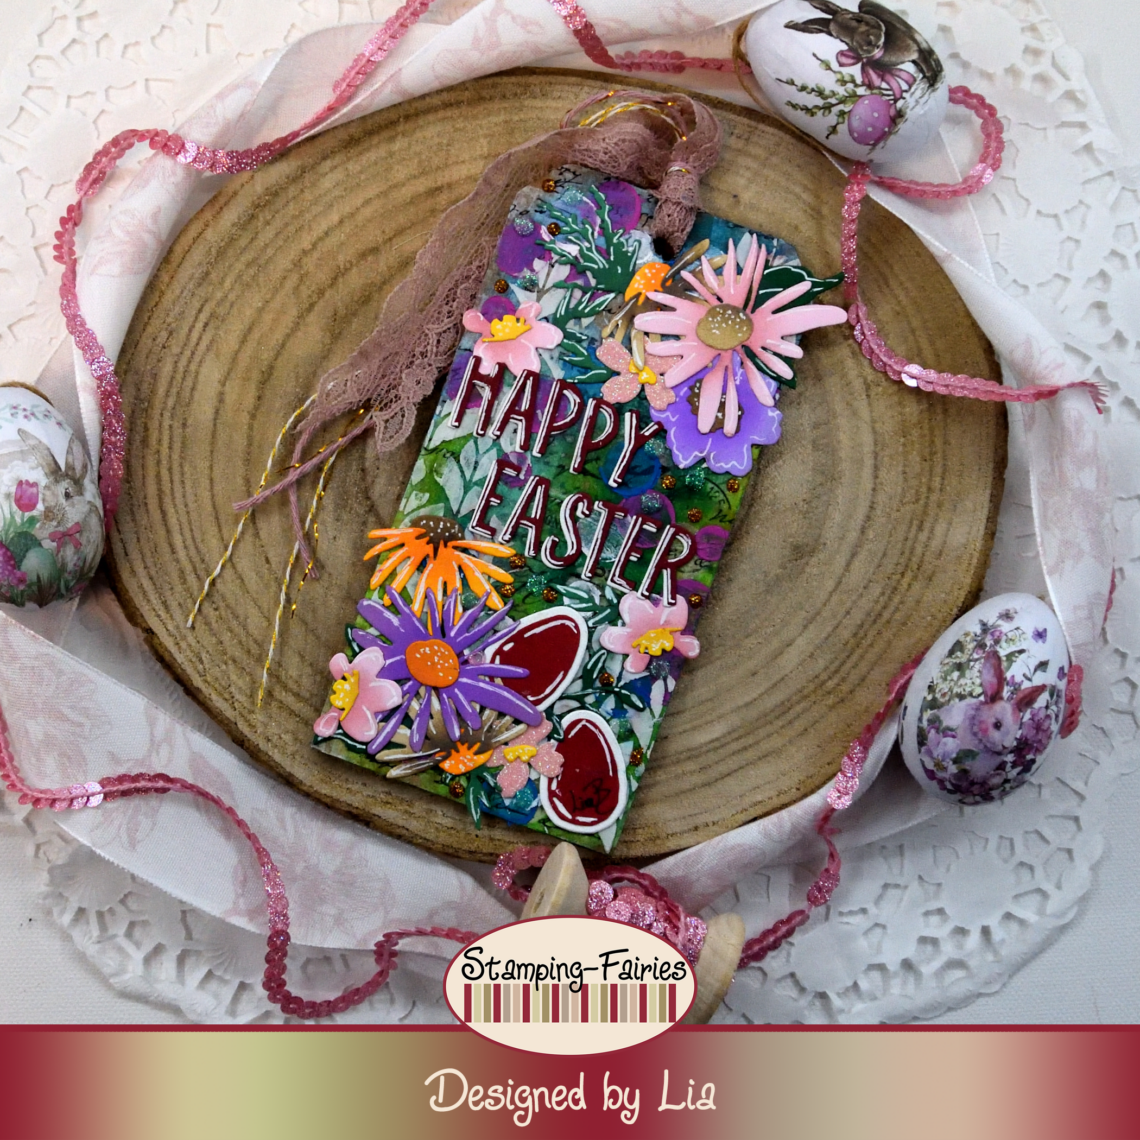
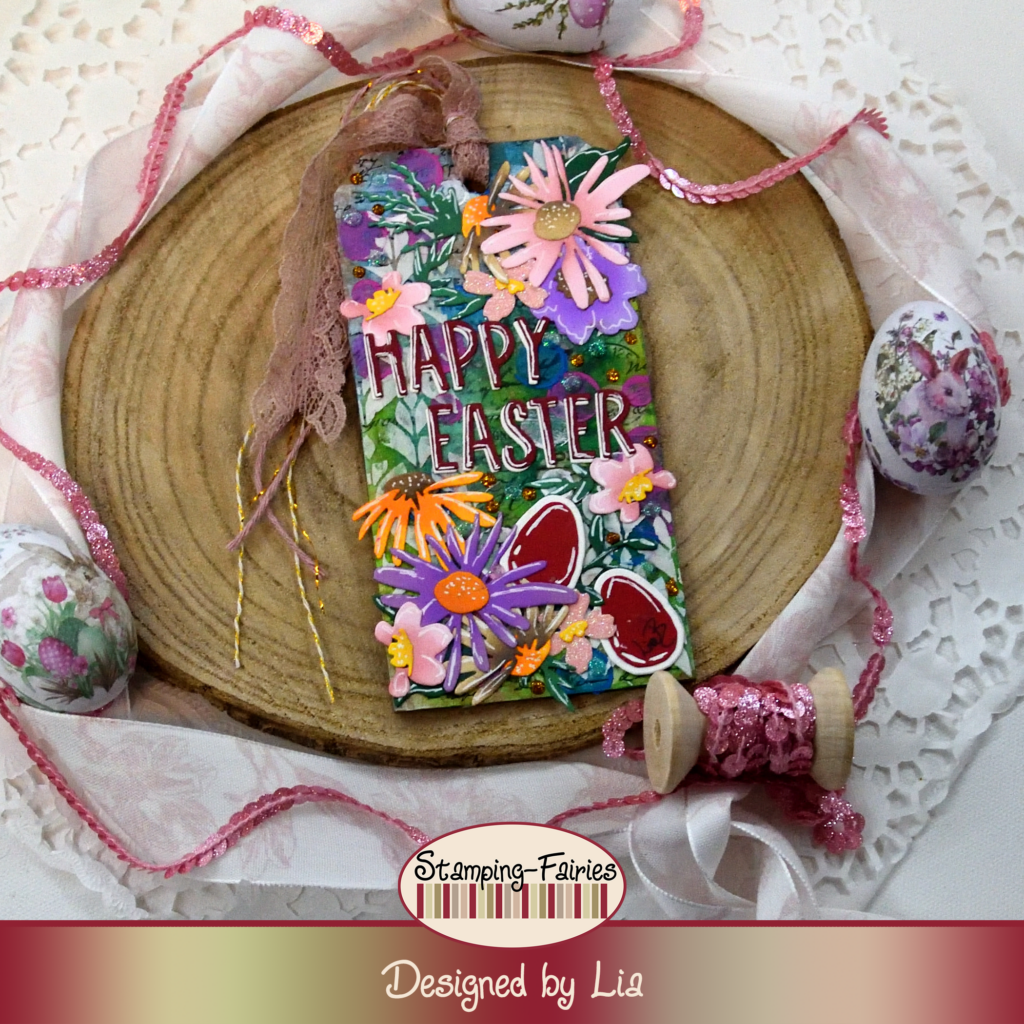
For this project, I worked on a #8 Etcetera Tag. These Tags are made out of Thickboard and they are a nice and sturdy surface to work on. Normally, I would cover the Tag with white Gesso, to cover the kraft colour and prepare my surface. But not this time. I used a piece of collage paper from the Idea-Ology Serendipity Collage Paper pack, with Distress Collage Medium, and I covered the Tag. I dried the Collage Medium and then I added colour, using Distress Crayons, in colours Peacock Feathers, Mermaid Lagoon, Twisted Citron and Picket Fence (white). I just applied the Crayons on the Tag and then smudged them with my finger, keeping the green colours on the bottom and the blue on the top of the Tag. Then I added some Worn Lipstick Distress Oxide ink. I applied the ink on an acetate sheet, sprayed it with some water and then smooshed it on the Tag. This part is not really visible in the end, but that doesn’t matter! I was just having fun! I dried the Tag and then I added some details. First, I used the Spots Layering stencil with a baby wipe and I lifted some of the crayon colour. Then I added circle details with the same stencil and the Crayons. I applied the Mermaid Lagoon and Picked Raspberry Crayons through the stencil and then smudged them with my finger. This creates colourful little circles. I repeated this same thing, with the Picket Fence Crayon (white), just to bring some more light into the project. Next, I used the Deco Floral Layering stencil with Ranger Texture Paste, on some spots of the Tag, to bring some more texture on my project. I left the Paste to dry and my background was done.

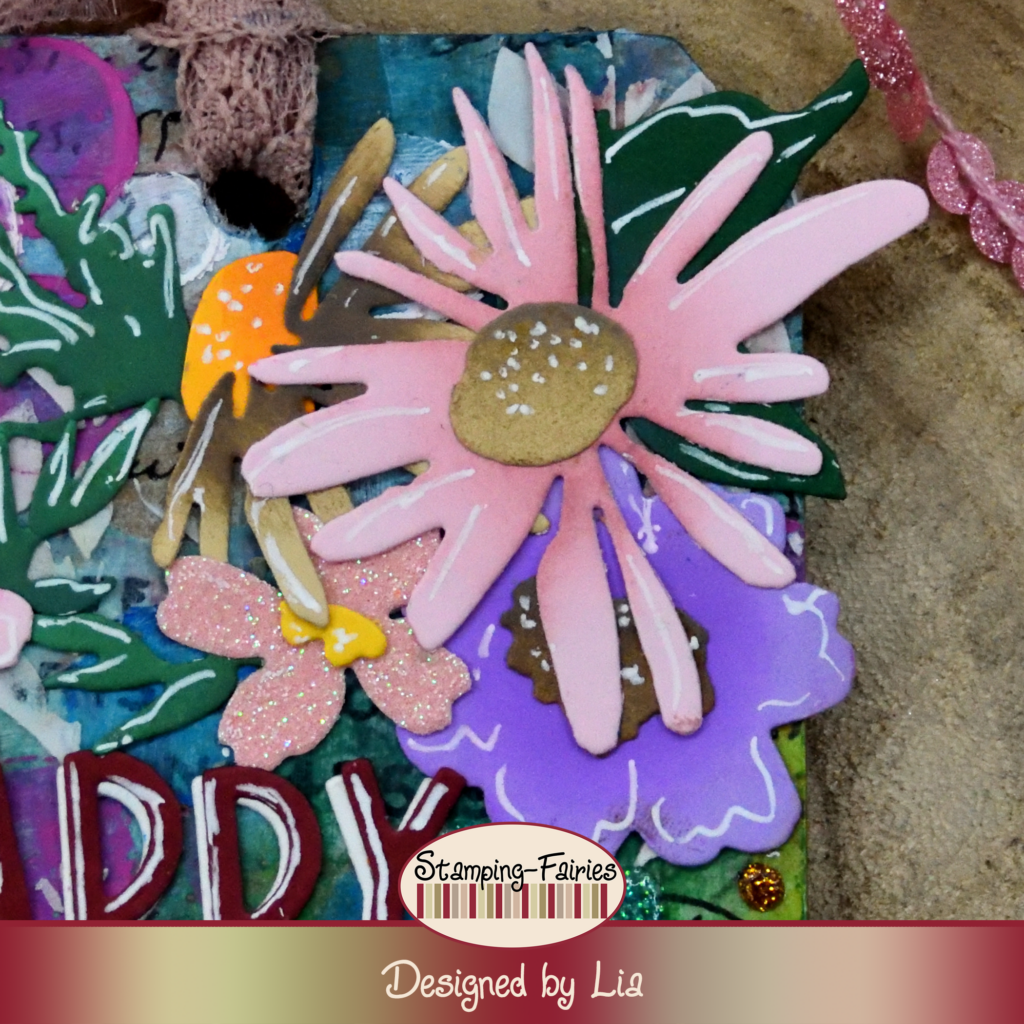
Time to prepare my images. I cut all of my flowers and greenery out of colourful cardstocks, using the Sizzix Vault Floristry Sidekick Side Order set. Before I put the flowers together, I added some darker colour on their centers, using Distress Oxide inks in the colours that matched. I also cut some red eggs, using the egg dies from the Sizzix Bunny Stitch Thinlits set. I placed the flowers on the top and the bottom part of the Tag, leaving space in the middle. I placed the eggs on the bottom part of the Tag.
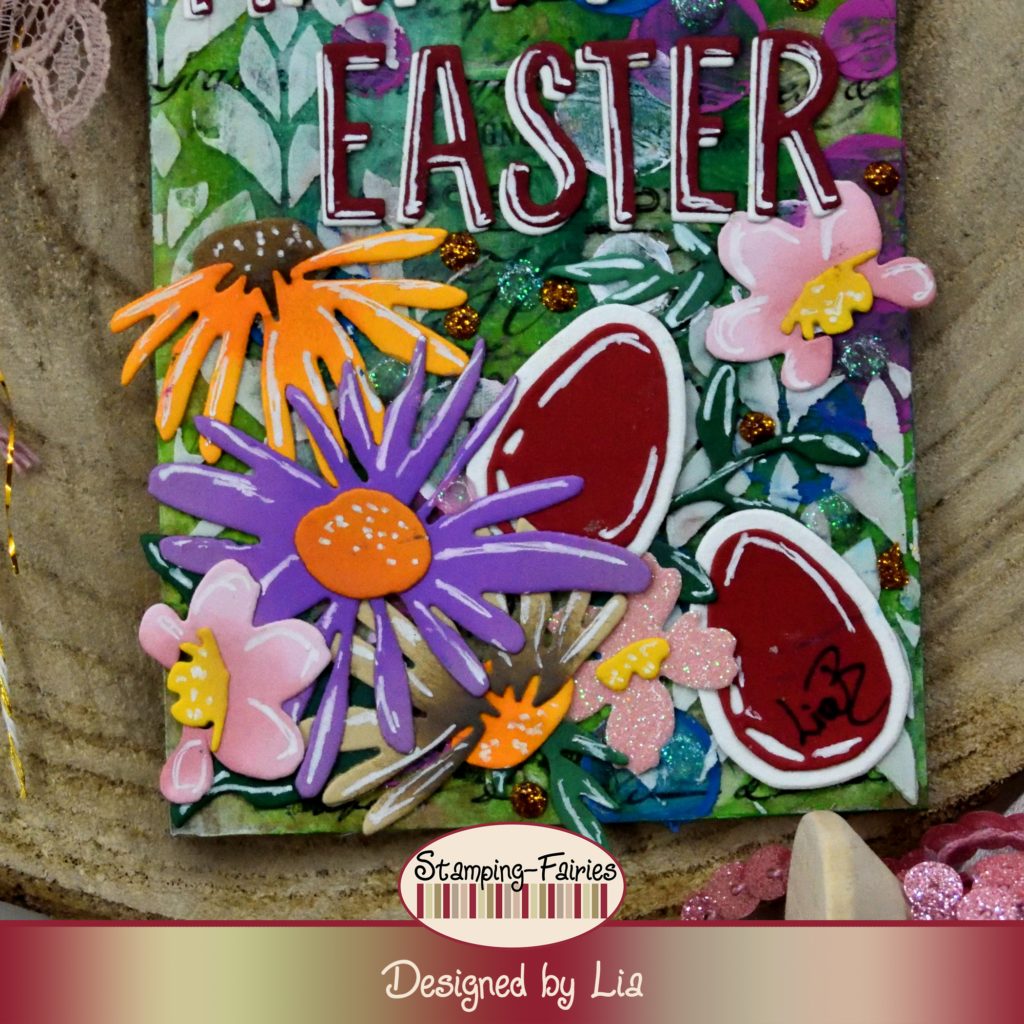
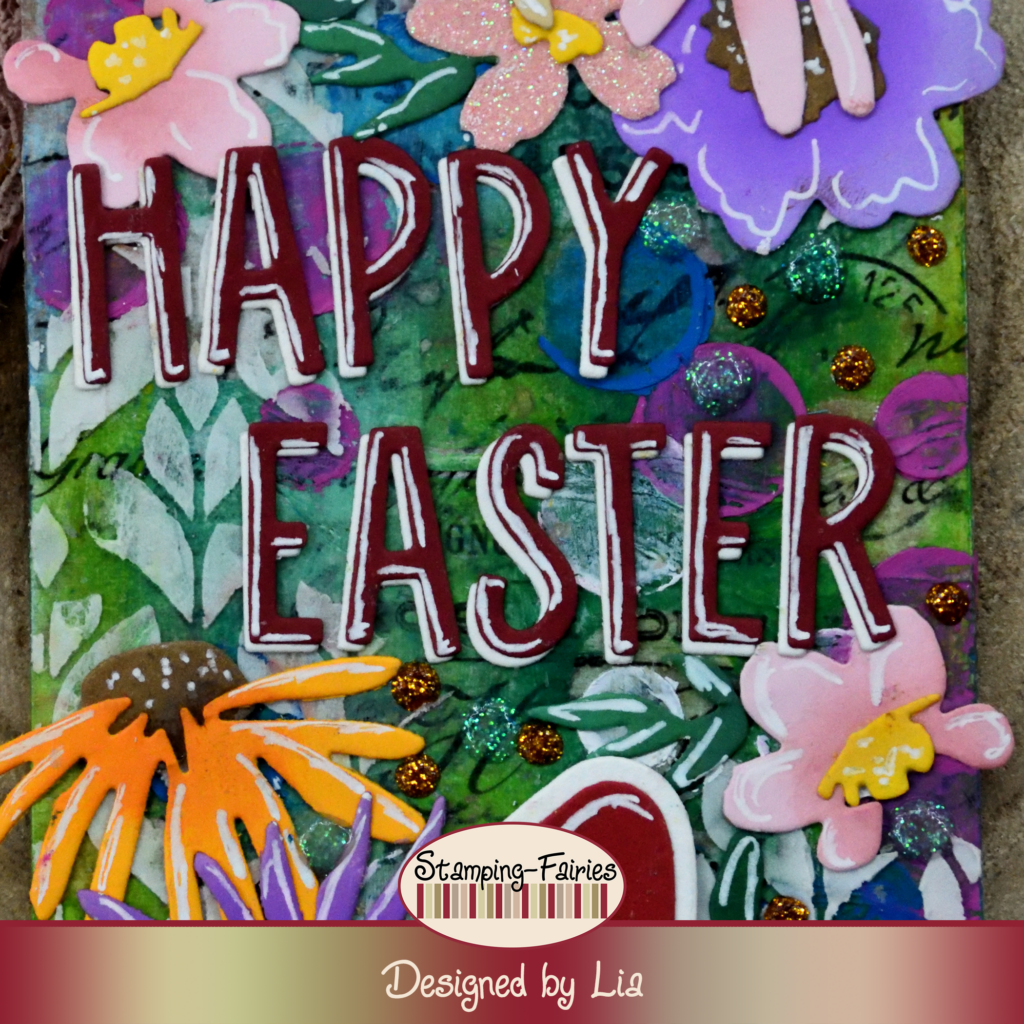
My sentiment is cut with the alphabet dies from the Sizzix Santa Greetings, Colorize Thinlits set. I cut it once, out of red cardstock, and another one, out of white cardstock. I put the letters together, making sure to offset them, so the white part will be visible under the red part. I placed the sentiment on the center of the Tag and then I added some highlights with a white Gelly Roll pen. The sentiment says: „Happy Easter“, just the wish for the season! I used my white pen on the flowers and the eggs as well, to make them pop. As a last little bit of embellishment, I added small dots of the White Blizzard and the Golden Sunset Nuvo Glitter Drops.
And that was the project for today! I needed the colour! The cold haven’t given up yet and my garden still lacks colour. But I can always make colourful paper flowers! Also, I haven’t played with the Distress Crayons like this before. That was fun! They are highly water reactive, so they can be used with water as well. That is really interesting! I really hope you like today’s project! I hope you got inspired! We will see each other again next Monday! Until then, stay creative and have fun!
*Deutsche Version*
Hallo zusammen! Willkommen zurück zu einem weiteren Mixed-Media Projekt. Ostern steht vor der Tür und ich habe beschlossen, es mit einem farbenfrohen Projekt zu begrüßen. Es hat so viel Spaß gemacht! Beginnen wir mit den Materialien, die ich verwendet habe:
Materialien
(wenn etwas nicht auf Lager ist,
bitte einfach auf „Produkterinnerung“ klicken)
- Tim Holtz – Thickboard Tag #8
- Tim Holtz Collage Paper – Serendipity
- Distress Collage Medium
- Tim Holtz Distress Crayons
- Tim Holtz Layering Stencils – Spots and Deco Floral
- Ranger Texture Paste – Opaque Matte
- Coloured Cardstock
- Sizzix Sidekick Side-Order Thinlits/ Texture Fades – Vault Floristry
- Ranger – Tim Holtz Distress Oxide Pads
- Sizzix Tim Holtz Thinlits – Bunny Stitch
- Sizzix Tim Holtz Thinlits – Santa Greetings, Colorize
- Nuvo Glitter Drops
Für dieses Projekt habe ich an einem Etcetera Tag #8 gearbeitet. Diese Tags bestehen aus Thickboard und bieten eine schöne und robuste Arbeitsfläche. Normalerweise würde ich das Tag mit weißem Gesso bedecken, um die braune Papierfarbe abzudecken und die Oberfläche vorzubereiten. Aber dieses Mal nicht. Ich habe ein Stück Collagepapier aus dem Idea-Ology Serendipity Collage Paper Pack mit Distress Collage Medium verwendet und das Tag damit beklebt. Ich habe das Collage Medium getrocknet und dann Farbe mit Distress Crayons in den Farben Peacock Feathers, Mermaid Lagoon, Twisted Citron und Picket Fence (weiß) hinzugefügt. Ich habe die Crayons einfach auf das Tag aufgetragen und sie anschließend mit dem Finger verwischt, wobei die grünen Farben unten und die blauen oben blieben. Anschließend habe ich etwas Worn Lipstick Distress Oxide Tinte hinzugefügt. Ich habe die Tinte auf eine Acetatfolie aufgetragen, sie mit etwas Wasser besprüht und sie anschließend auf das Tag gedrückt. Dieser Teil ist am Ende nicht wirklich sichtbar, aber das macht nichts! Ich hatte einfach Spaß! Ich habe das Etikett getrocknet und dann einige Details hinzugefügt. Zuerst habe ich die Spots Layering Schablone mit einem Babytuch verwendet und etwas von der Buntstiftfarbe abgenommen. Dann habe ich mit derselben Schablone und den Buntstiften Kreisdetails hinzugefügt. Ich habe die Mermaid Lagoon und Picked Raspberry Buntstifte durch die Schablone aufgetragen und sie dann mit meinem Finger verwischt. So entstanden bunte kleine Kreise. Dasselbe habe ich mit dem Picket Fence Crayon (weiß) wiederholt, um etwas mehr Licht ins Projekt zu bringen. Als Nächstes habe ich die Deco Floral Layering Schablone mit Ranger Texture Paste an einigen Stellen des Etiketts verwendet, um meinem Projekt mehr Struktur zu verleihen. Ich habe die Paste trocknen lassen und mein Hintergrund war fertig.

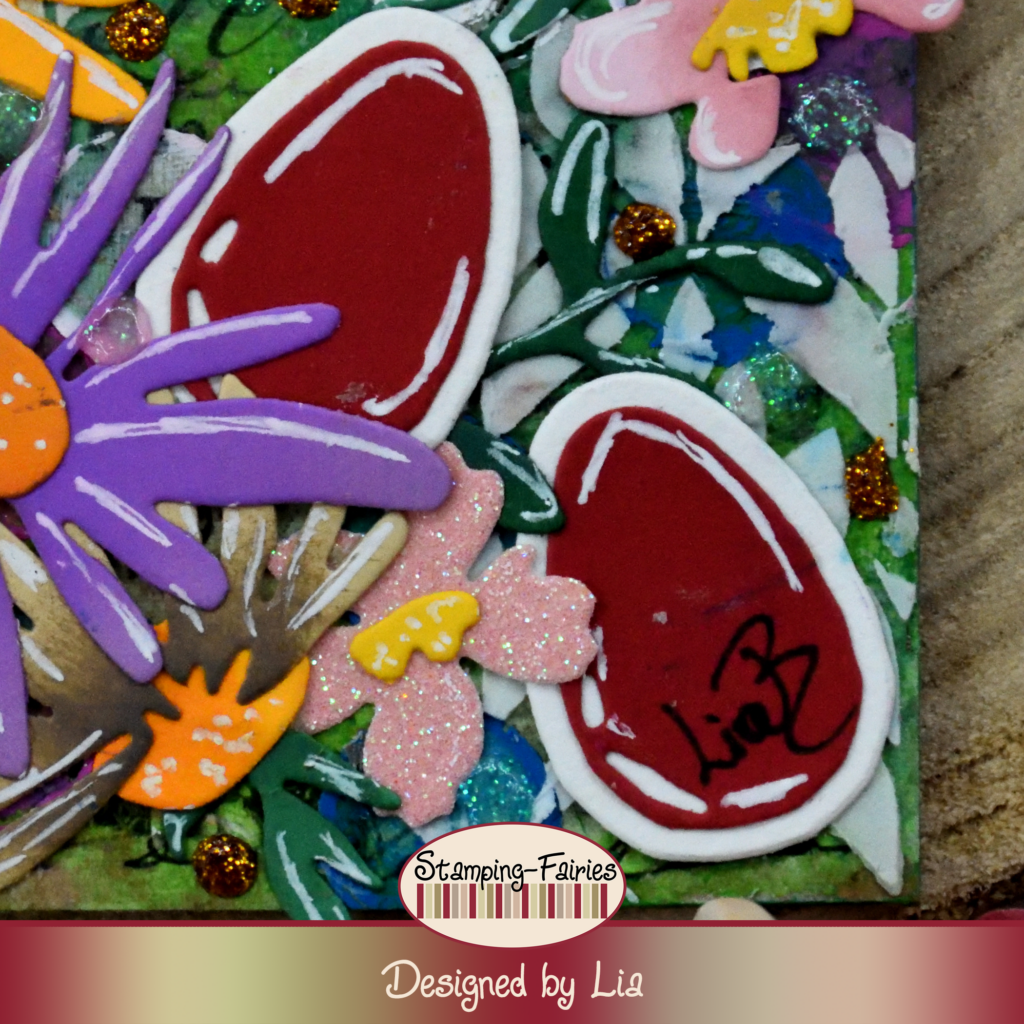
Zeit, meine Bilder vorzubereiten. Ich habe alle meine Blumen und Grünpflanzen aus buntem Karton mit dem Sizzix Vault Floristry Sidekick Side Order Set ausgeschnitten. Bevor ich die Blumen zusammensetzte, habe ich die Mitte mit dunklerer Farbe mit Distress Oxide Tinten in den passenden Farben versehen. Außerdem habe ich mit den Eier Stanzen aus dem Sizzix Bunny Stitch Thinlits Set rote Eier ausgestanzt. Ich habe die Blumen oben und unten auf dem Tag platziert und dabei in der Mitte Platz gelassen. Die Eier habe ich unten auf dem Tag platziert.
Mein Spruch ist mit den Alphabet Stanzen aus dem Sizzix Santa Greetings Colorize Thinlits Set ausgestanzt. Ich habe ihn einmal aus rotem und einmal aus weißem Karton ausgestanzt. Die Buchstaben habe ich versetzt angeordnet, sodass der weiße Teil unter dem roten sichtbar ist. Den Spruch habe ich mittig auf dem Etikett platziert und anschließend mit einem weißen Gelly Roll Stift ein paar Highlights gesetzt. Der Spruch lautet übersetzt: „Frohe Ostern“ – genau der richtige Wunsch für diese Jahreszeit! Auch die Blumen und Eier habe ich mit meinem weißen Stift hervorgehoben. Als letzte kleine Verschönerung habe ich kleine Punkte mit White Blizzard und Golden Sunset Nuvo Glitter Drops hinzugefügt.

Und das war das Projekt für heute! Ich brauchte die Farbe! Die Kälte hat noch nicht nachgelassen und meinem Garten fehlt es immer noch an Farbe. Aber ich kann ja immer noch bunte Papierblumen basteln! Außerdem habe ich noch nie so mit den Distress Crayons gespielt. Das hat Spaß gemacht! Sie reagieren stark mit Wasser und können daher auch mit Wasser verwendet werden. Das ist wirklich interessant! Ich hoffe sehr, dass euch das heutige Projekt gefällt! Ich hoffe, ihr habt euch inspirieren lassen! Wir sehen uns nächsten Montag wieder! Bis dahin bleibt kreativ und habt Spaß!