Happy Easter
*German version below | Deutsche Version unten*
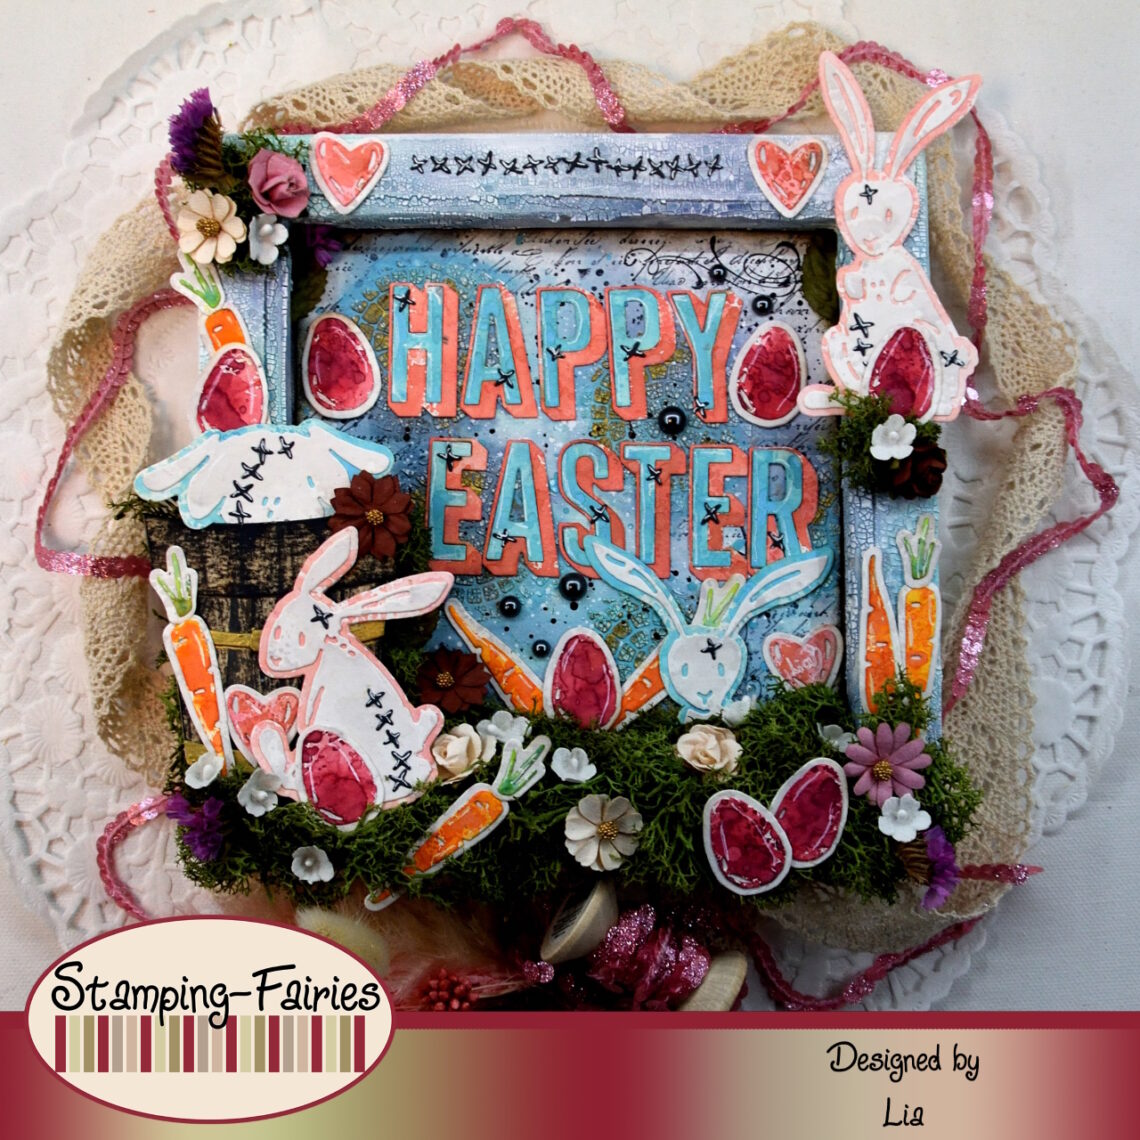
Happy Easter, everyone! Welcome back to another mixed media project. A new Challenge starts today at Stamping Fairies and the Theme is Spring! And because it is the day, I prepared an Easter/Spring project for today. I tried to keep this project mostly in pastel colours. Let’s start with the materials I used:
Materials (If something is not in stock, please simply click on “Product reminder”/ “Produkterinnerung”)
- Canvas
- Finnabair Art Basics – Heavy Gesso White (Tube)
- Mixed-Media Paper
- Tim Holtz Stamp Set – The Poinsettia
- Archival Ink – Jet Black
- Tim Holtz Mini Layering Stencil Collection – Set 28
- Ranger Texture Paste Opaque Crackle
- Distress Oxide Sprays
- Distress – Foundry Wax – Gilded
- Distress Paint
- Ranger Multi Medium – Matte
- Ranger – Tim Holtz Distress Oxide Pads
- Sizzix Tim Holtz Bigz – Potted#2
- Sizzix Tim Holtz Thinlits – Bunny Stitch
- Sizzix Tim Holtz Thinlits – Alphanumerics Shadow Upper
- Prima Marketing Mulberry Paper Flowers
- Tim Holtz idea-ology – Bouquet
- Tim Holtz – idea-ology – Droplets – Halloween

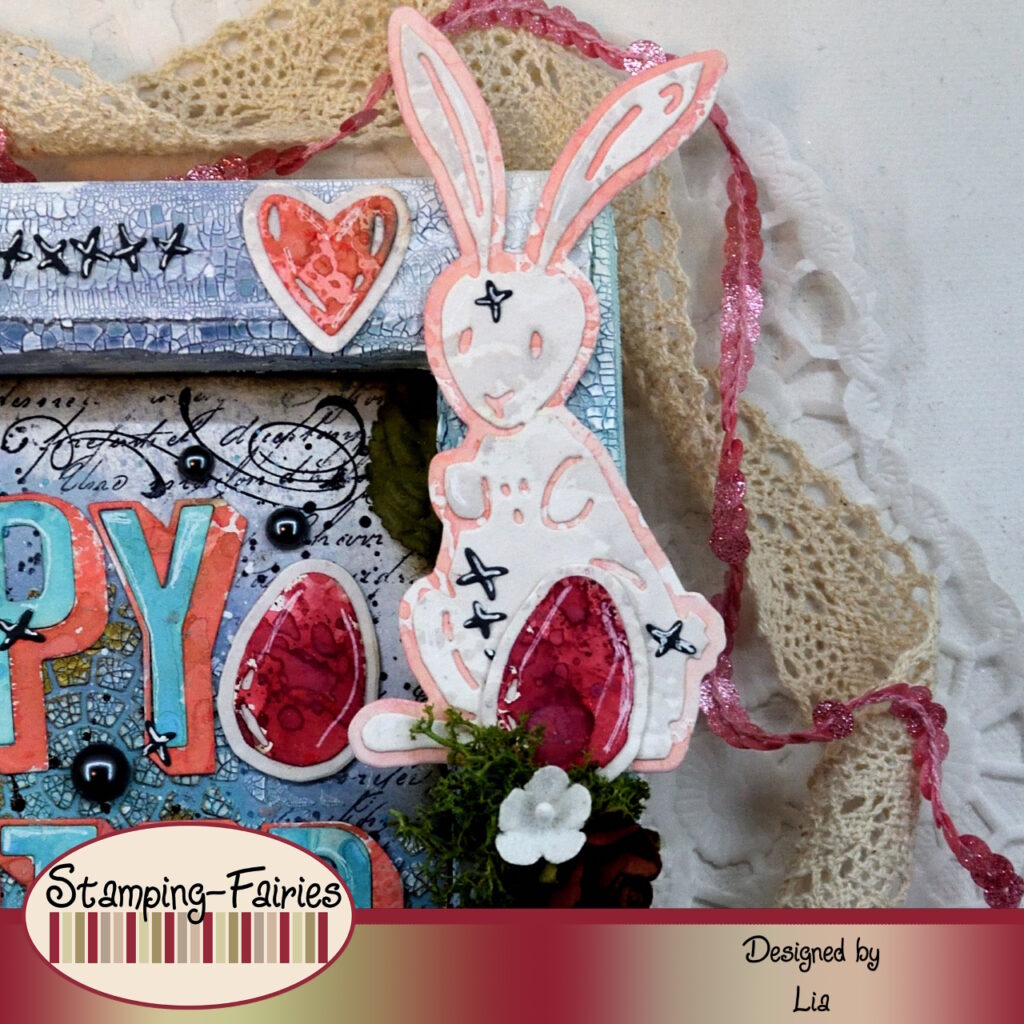
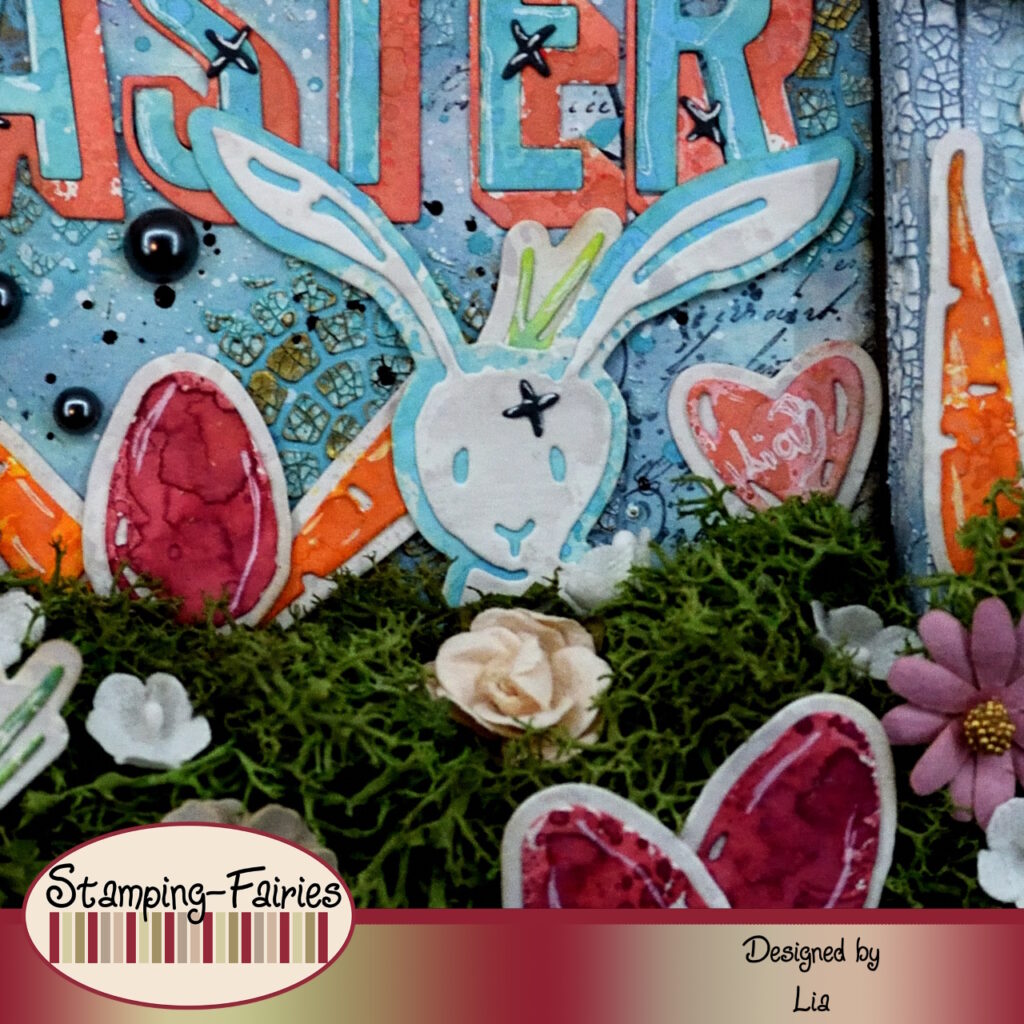
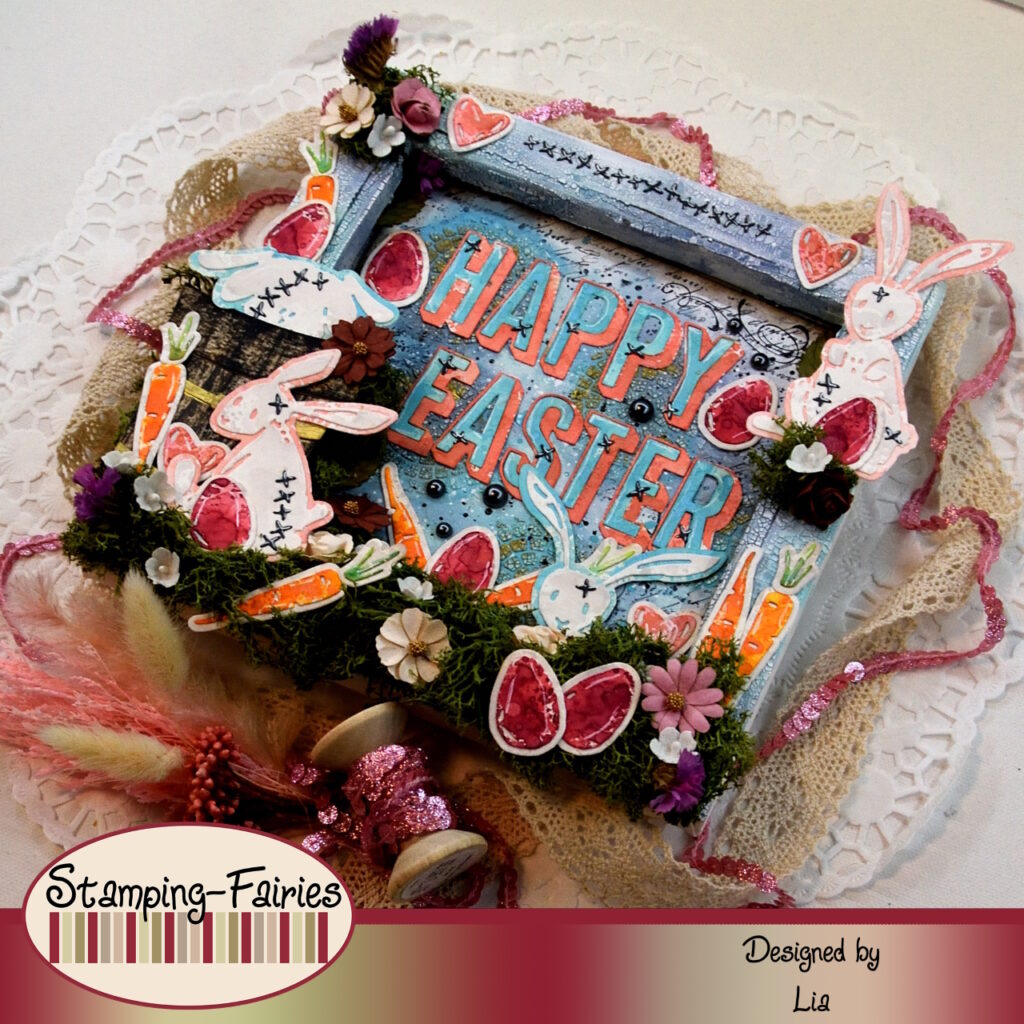
For this project, I worked on the back side of a canvas, because I wanted to have some depth. I started by treating the sides of the canvas with white Gesso, I dried them and then I applied some Ranger Texture Crackle Paste on them. While the Paste was drying, I worked on my background. I cut a panel of Mixed-Media paper and I did some stamping around the edges, using stamps from the Tim Holtz The Poinsettia stamp set and Jet Black Archival ink. I used the Archival ink because I knew I was going to use wet mediums to add colour and I didn’t want the stamped details to fade away. I wanted to add some kind of circle detail on the background, so I chose the stencil with the tiles in circle shapes from the Mini Layering Stencil Set 28 by Tim Holtz and I used it with my Crackle Paste. I left the Paste to dry and then I added some colour using the Salvaged Patina and Stormy Sky Distress Oxide sprays. I sprayed with the coloures, sprayed with water, let the colours run and blend, dabbed off the excess and then I dried my project. Then I took out the sprayer part of the Distress Ink bottles and used a brush to pick up colour and add it on some spots where I wanted more. I used some Gilded Foundry Wax on some spots on the Crackle Paste and then I splattered my panel, first with Picket Fence (white) and then with Black Soot Distress Paint. I used the Salvaged Patina and Stormy Sky Distress Oxide sprays to add some colour on the Crackle Paste on the sides of the canvas. I attached my Mixed Media panel on the canvas, using Multi Medium Matte as glue, and my background was done!
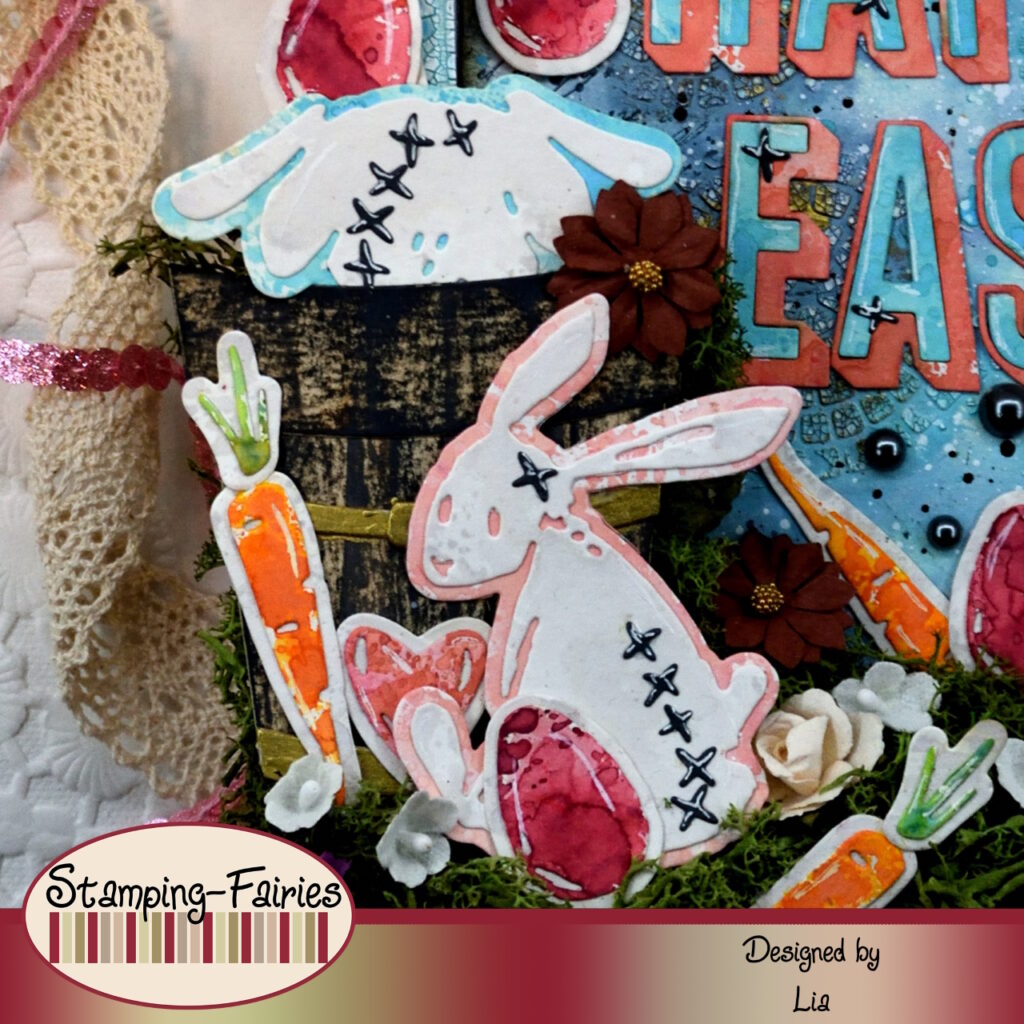
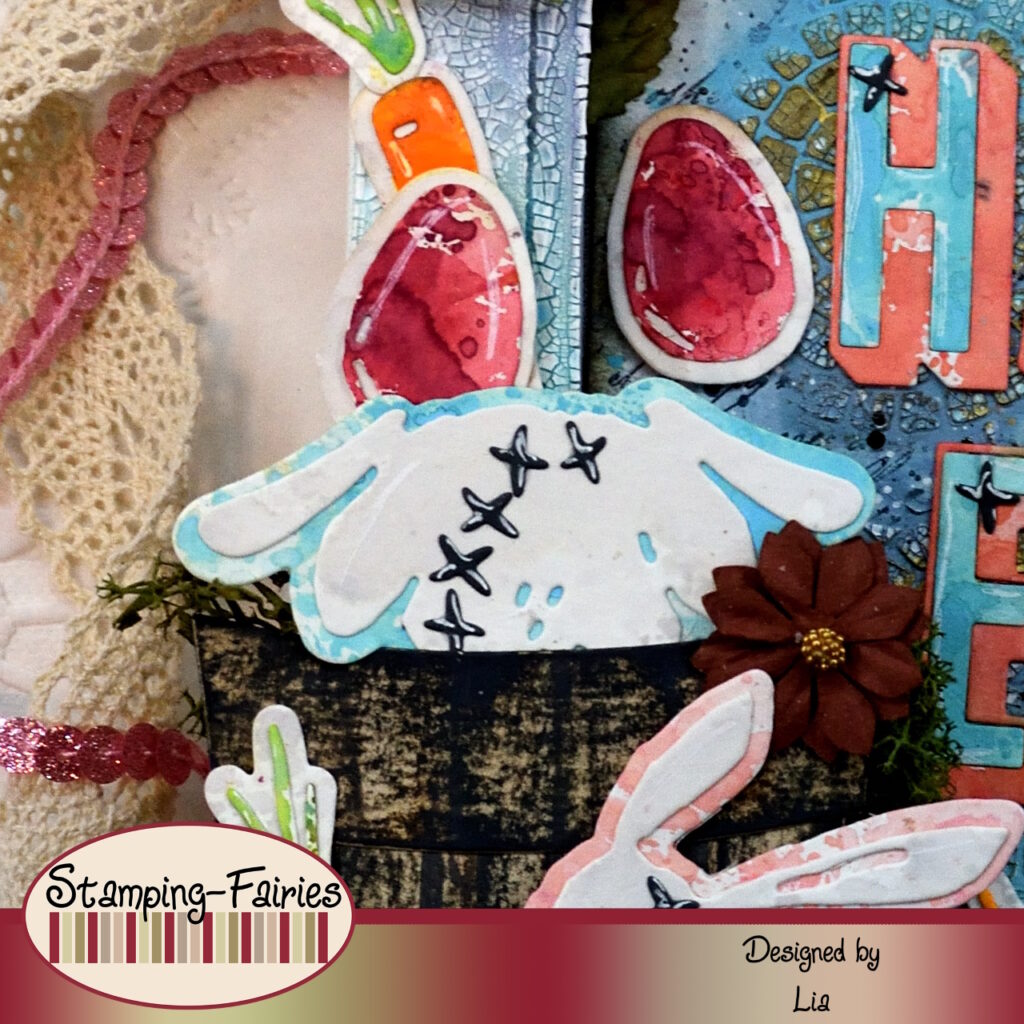
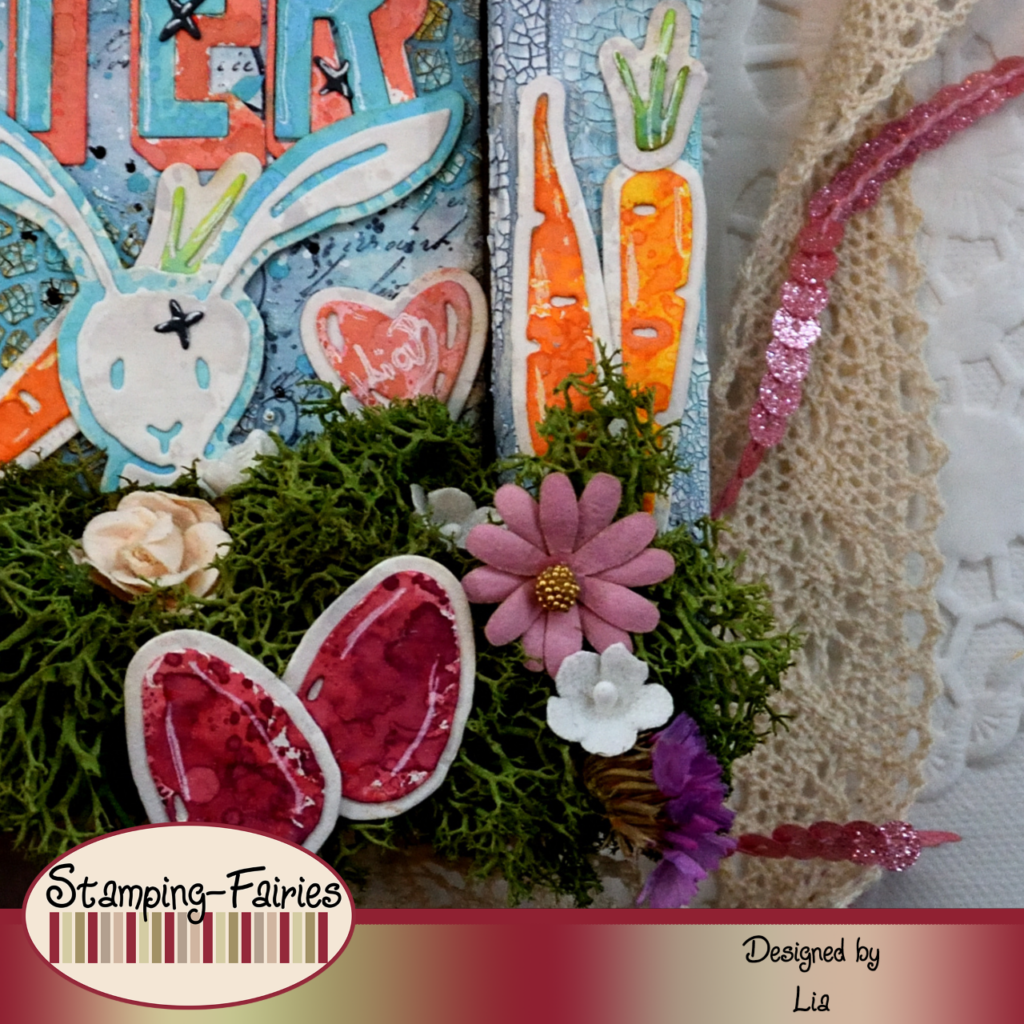
Time to prepare my images! So, I used the Sizzix Potted#2 Bigz set to cut a flowerpot. I coloured the pot pieces with Ground Espresso, Scorched Timber and Black Soot Distress Oxide inks. I simply rubbed the ink pads on the paper, going from up downwards, making sure I leave lines and marks to create something like a wood texture. For the binders of the pot, I used the Gilded Foundry Wax. Then I noticed the pot was too tall, so I cut off a small portion from the lower part of it. For my bunnies and my other paper elements, I used the Sizzix Bunny Stitch Thinlits set. I cut everything out of my Mixed-Media paper and coloured them with Distress Oxide inks, using the ink smooshing technique. Two of my bunnies have their bases coloured with the colour Saltwater Taffy and the last bunny’s base is coloured with Salvaged Patina. That last bunny is cut in half. The upper parts of the bunnies, as well as the bases of all the other elements, are coloured with Lost Shadow. The upper parts of the eggs are coloured with Lumberjack Plaid, the hearts with Abandoned Coral, the carrots with Carved Pumpkin and the carrot greens with Mowed Lawn. I used preserved moss to land my images and I also added some Prima flowers, some little blooms from the Idea-Ology Bouquet and a few little pieces of dried Statice flowers from my garden.
My sentiment is cut with the Sizzix Alphanumeric Shadow Upper Thinlits set out of my Mixed-Media paper. I coloured the letters with the ink smooshing technique, using Abandoned Coral Distress Oxide ink for the shadow parts and Salvaged Patina Distress Oxide ink for the actual letters. It says „Happy Easter“ because it is Easter! After I placed it on the background, I decided to add a few Idea-Ology Droplets around it, for some more interest.

And that was the project for today! For all of you who celebrated Easter yesterday, I hope you had a really good time! Just remember, our Spring Challenge will be running until the end of the month. You can find more information about it in the Stamping Fairies profiles on Instagram and Facebook. I really hope you like today’s project! I hope you got inspired! We will see each other again next Monday! Until then, stay creative and have fun!
*Deutsche Version*
Frohe Ostern zusammen! Willkommen zurück zu einem weiteren Mixed-Media Projekt. Heute startet eine neue Challenge bei Stamping Fairies und das Thema ist Frühling! Und weil es so weit ist, habe ich für heute ein Oster-/Frühlingsprojekt vorbereitet. Ich habe versucht, dieses Projekt hauptsächlich in Pastellfarben zu halten. Beginnen wir mit den Materialien, die ich verwendet habe:
Materialien (wenn etwas nicht auf Lager ist, bitte einfach auf „Produkterinnerung“ klicken)
- Leinwand
- Finnabair Art Basics – Heavy Gesso White (Tube)
- Mixed-Media Papier
- Tim Holtz Stamp Set – The Poinsettia
- Archival Ink – Jet Black
- Tim Holtz Mini Layering Stencil Collection – Set 28
- Ranger Texture Paste Opaque Crackle
- Distress Oxide Sprays
- Distress – Foundry Wax – Gilded
- Distress Paint
- Ranger Multi Medium – Matte
- Ranger – Tim Holtz Distress Oxide Pads
- Sizzix Tim Holtz Bigz – Potted#2
- Sizzix Tim Holtz Thinlits – Bunny Stitch
- Sizzix Tim Holtz Thinlits – Alphanumerics Shadow Upper
- Prima Marketing Mulberry Paper Flowers
- Tim Holtz idea-ology – Bouquet
- Tim Holtz – idea-ology – Droplets – Halloween

Bei diesem Projekt habe ich auf der Rückseite einer Leinwand gearbeitet, weil ich etwas Tiefe haben wollte. Ich habe damit begonnen, die Seiten der Leinwand mit weißem Gesso zu behandeln, sie getrocknet und dann etwas Ranger Texture Crackle Paste darauf aufgetragen. Während die Paste trocknete, habe ich an meinem Hintergrund gearbeitet. Ich habe ein Stück Mixed-Media-Papier ausgeschnitten und an den Rändern etwas gestempelt, wobei ich Stempel aus dem Tim Holtz Stempelset „The Poinsettia“ und Jet Black Archival Tinte verwendet habe. Ich habe die Archival Tinte verwendet, weil ich wusste, dass ich feuchte Medien zum Hinzufügen von Farbe verwenden würde und ich nicht wollte, dass die gestempelten Details verblassen. Ich wollte dem Hintergrund eine Art Kreisdetail hinzufügen, also habe ich die Schablone mit den Kacheln in Kreisform aus dem Mini Layering Schablonenset 28 von Tim Holtz ausgewählt und sie mit meiner Crackle Paste verwendet. Ich habe die Paste trocknen gelassen und dann etwas Farbe mit den Salvaged Patina und Stormy Sky Distress Oxide Sprays hinzugefügt. Ich habe die Farben aufgesprüht, mit Wasser besprüht, die Farben einwirken und sich verblenden lassen, den Überschuss abgetupft und dann habe ich mein Projekt getrocknet. Dann habe ich den Sprühteil der Distress Ink Flaschen herausgenommen und mit einem Pinsel Farbe aufgenommen und sie an einigen Stellen aufgetragen, an denen ich mehr wollte. Ich habe an einigen Stellen der Crackle Paste etwas Gilded Foundry Wax aufgetragen und dann mein Paneel zuerst mit Picket Fence (weiß) und dann mit Black Soot Distress Paint bespritzt. Ich habe die Salvaged Patina und Stormy Sky Distress Oxide Sprays verwendet, um der Crackle Paste an den Seiten der Leinwand etwas Farbe hinzuzufügen. Ich habe mein Mixed-Media Panel auf der Leinwand mit Multi Medium Matte befestigt und mein Hintergrund war fertig!

Zeit, meine Bilder vorzubereiten! Also habe ich das Sizzix Potted#2 Bigz Set verwendet, um einen Blumentopf zu schneiden. Ich habe die Topfteile mit den Farben Ground Espresso, Scorched Timber und Black Soot Distress Oxide eingefärbt. Ich habe einfach die Stempelkissen von oben nach unten über das Papier gerieben und darauf geachtet, dass ich Linien und Markierungen hinterlasse, um so etwas wie eine Holzstruktur zu erzeugen. Für die Bindemittel des Topfes habe ich das Gilded Foundry Wax verwendet. Dann fiel mir auf, dass der Topf zu hoch war, also habe ich einen kleinen Teil vom unteren Teil abgeschnitten. Für meine Hasen und meine anderen Papierelemente habe ich das Sizzix Bunny Stitch Thinlits Set verwendet. Ich habe alles aus meinem Mixed-Media Papier ausgeschnitten und sie mit Distress Oxide Tinten unter Verwendung der Ink-Smooshing Technik koloriert. Bei zwei meiner Hasen ist die Basis mit der Farbe Saltwater Taffy gefärbt und die Basis des letzten Hasen ist mit Salvaged Patina gefärbt. Das letzte Hase wird in zwei Hälften geschnitten. Die oberen Teile der Hasen sowie die Basen aller anderen Elemente sind mit Lost Shadow gefärbt. Die oberen Teile der Eier sind mit Lumberjack Plaid gefärbt, die Herzen mit Abandoned Coral, die Karotten mit Carved Pumpkin und das Karottengrün mit Mowed Lawn. Ich habe für die Landung meiner Bilder konserviertes Moos verwendet und außerdem einige Prima Blumen, einige kleine Blüten aus dem Idea-Ology Bouquet und ein paar kleine Stücke getrockneter Statice Blumen aus meinem Garten hinzugefügt.
Mein Spruch wurde mit dem Sizzix Alphanumeric Shadow Upper Thinlits Set aus meinem Mixed-Media Papier geschnitten. Ich habe die Buchstaben mit der Ink-Smooshing Technik eingefärbt, wobei ich Abandoned Coral Distress Oxide Tinte für die Schattenteile und Salvaged Patina Distress Oxide Tinte für die eigentlichen Buchstaben verwendet habe. Es heißt „Frohe Ostern“, denn es ist Ostern! Nachdem ich es auf dem Hintergrund platziert hatte, beschloss ich, ein paar Idea-Ology Droplets darum herum anzubringen, um es noch interessanter zu machen.
Und das war das Projekt für heute! Ich wünsche allen, die gestern Ostern gefeiert haben, viel Spaß! Denkt ihr daran, dass unsere Frühlings Challenge bis Ende des Monats läuft. Weitere Informationen dazu findet ihr in den Stamping Fairies Profilen auf Instagram und Facebook. Ich hoffe sehr, dass euch das Projekt gefällt! Ich hoffe, ihr habt euch inspirieren lassen! Wir sehen uns nächsten Montag wieder! Bis dahin bleibt kreativ und habt Spaß!

Fröhliches Eiersuchen


