Possibilities
*German version below | Deutsche Version unten*
Hello everyone! Welcome back to another Mixed Media project. Today’s project went through a lot until it took its shape. That happens sometimes. I was in the mood for colour this time! Let’s start with the materials I used:
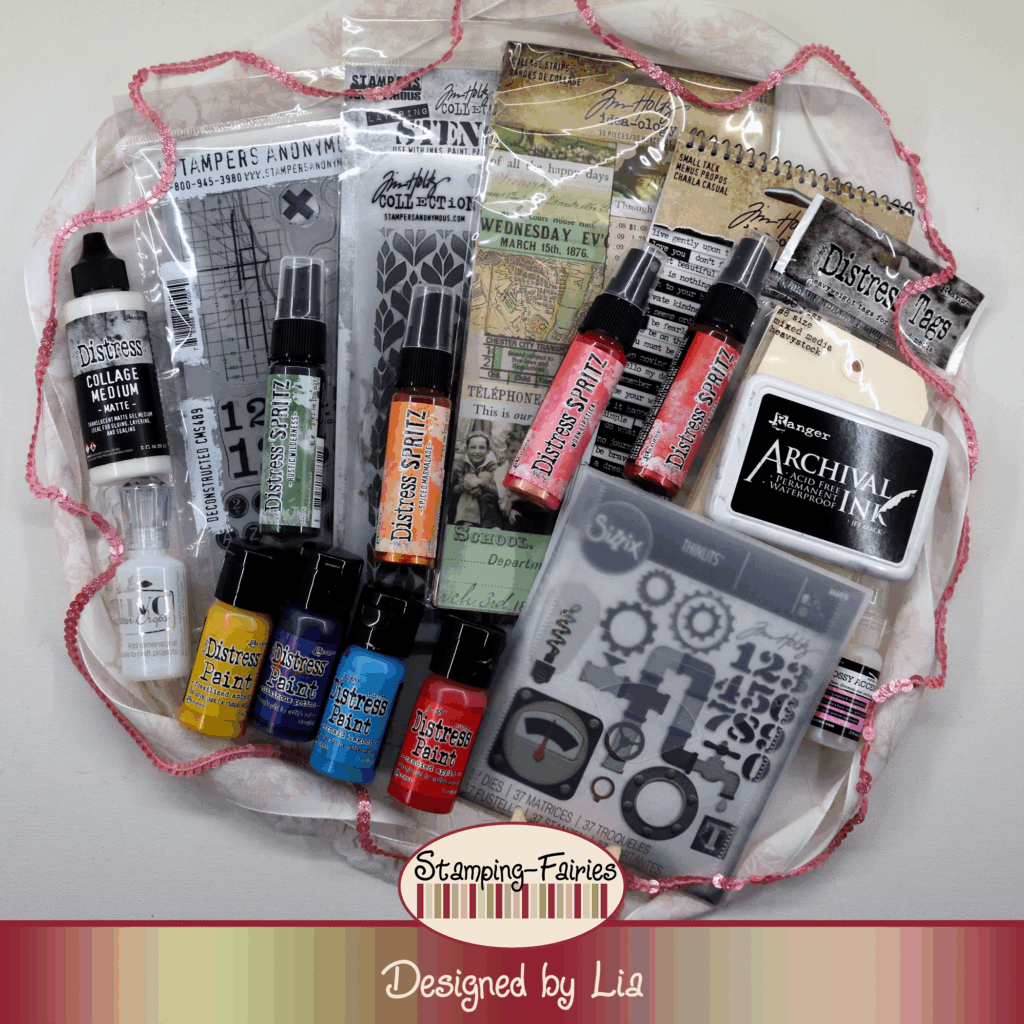
Materials
(If something is not in stock,
please simply click on “Product reminder”/ “Produkterinnerung”)
- Tim Holtz Distress Heavystock Tags #8
- Tim Holtz – Collage Strips – Large
- Distress Collage Medium – matte
- Finnabair Art Basics – Heavy Gesso White
- Tim Holtz Layering Stencil – Deco Floral
- Ranger Texture Paste Opaque Crackle
- Distress Paints
- Tim Holtz Stamp Set – Deconstructed
- Archival Ink – Jet Black
- Distress Spritz
- Sizzix Tim Holtz Thinlits – Vault Industrial
- Coloured Cardstock
- Ranger Glossy Accents
- Tim Holtz Small Talk Sticker
- Nuvo Glitter Drops – White Blizzard
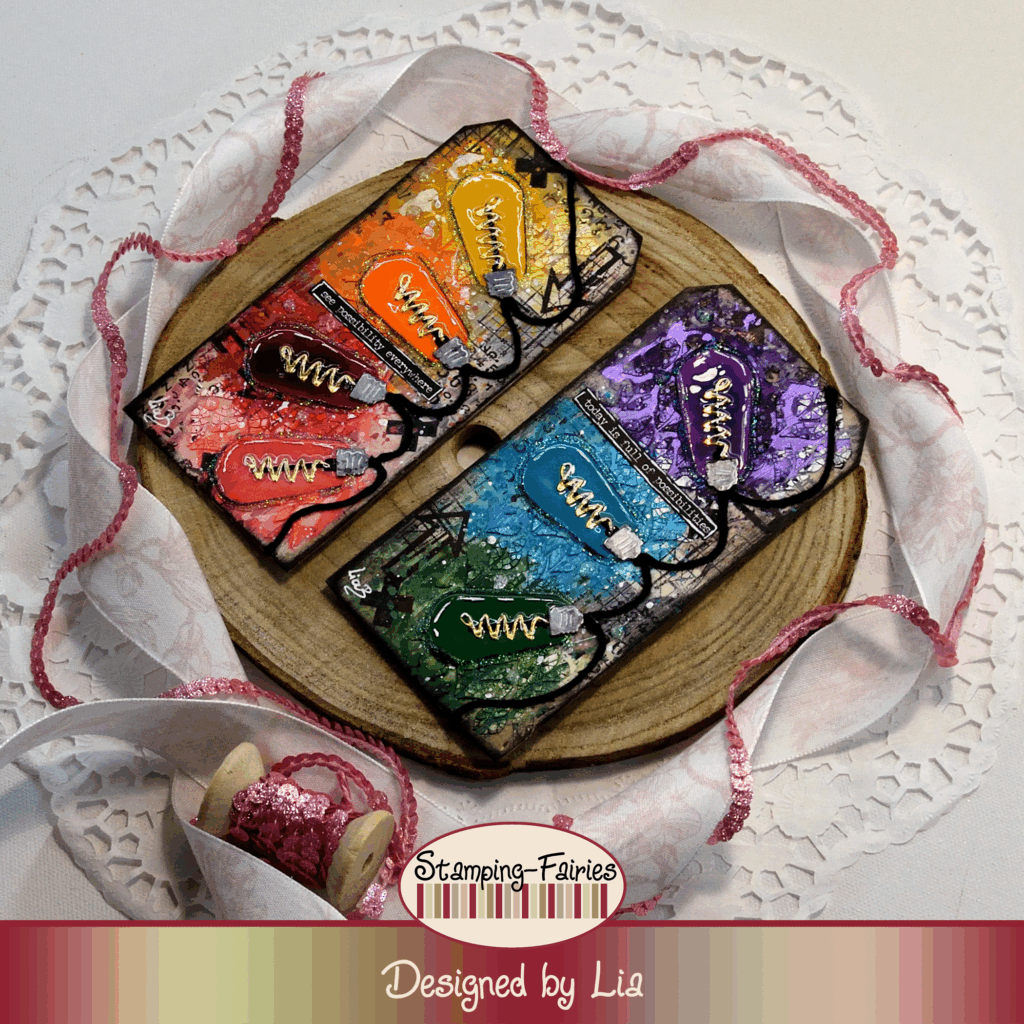
Today’s project had a little bit of a rough start. I made two backgrounds in two different art journals and I didn’t like any of them. So, I left everything aside and started playing with these Ranger Distress Tags. I had the Idea-Ology Large Collage Strips for some time and I wanted to try them, so I glued some of them on the Tags, using Collage Medium. The colours were a bit too vibrant to work as a background, so I added a light wash of white Gesso on top of them. Next, I added some texture, using the Deco Floral Layering stencil with Ranger Texture Crackle Paste. I allowed the Paste to dry and then I added some stamping, using Stamps from the Tim Holtz Deconstructed stamp set with Jet Black Archival ink. Then I took a look at my colouring mediums. I had used Distress Oxide Sprays, Distress Spritz and Distress Mica Stain Sprays on the previous backgrounds, so I left those aside and I chose colours from the Distress Paints for the Tags. I used the colours Villainous Potion, Mermaid Lagoon, Rustic Wilderness, Fossilized Amber, Carved Pumpkin, Candied Apple and Abandoned Coral. I applied the paints with a brush, I sprayed them with water to make them move and spread a little bit, I dabbed off the excess and then I dried them. As you can see, I was trying to create a rainbow, but there was no space for all of these colours on a single Tag, so I shared them on my two Tags. Together, the two Tags still make a rainbow. At this point it was quite obvious to me that I was using these Tags for this project (yeah!!!). I added some white splatter, with Picket Fence Distress Paint and then I looked for some shine. Of course I used Distress Spritz. I love the shine of this product! My Spritz colours are Wilted Violet, Peacock Feathers, Rustic Wilderness, Antique Linen, Spiced Marmalade, Barn Door and Worn Lipstick. I dripped some of the Spritz in between the stencil design and I also added a little bit of splatter with it. I used my black Archival ink to darken the edges of the Tags, and the backgrounds were done!


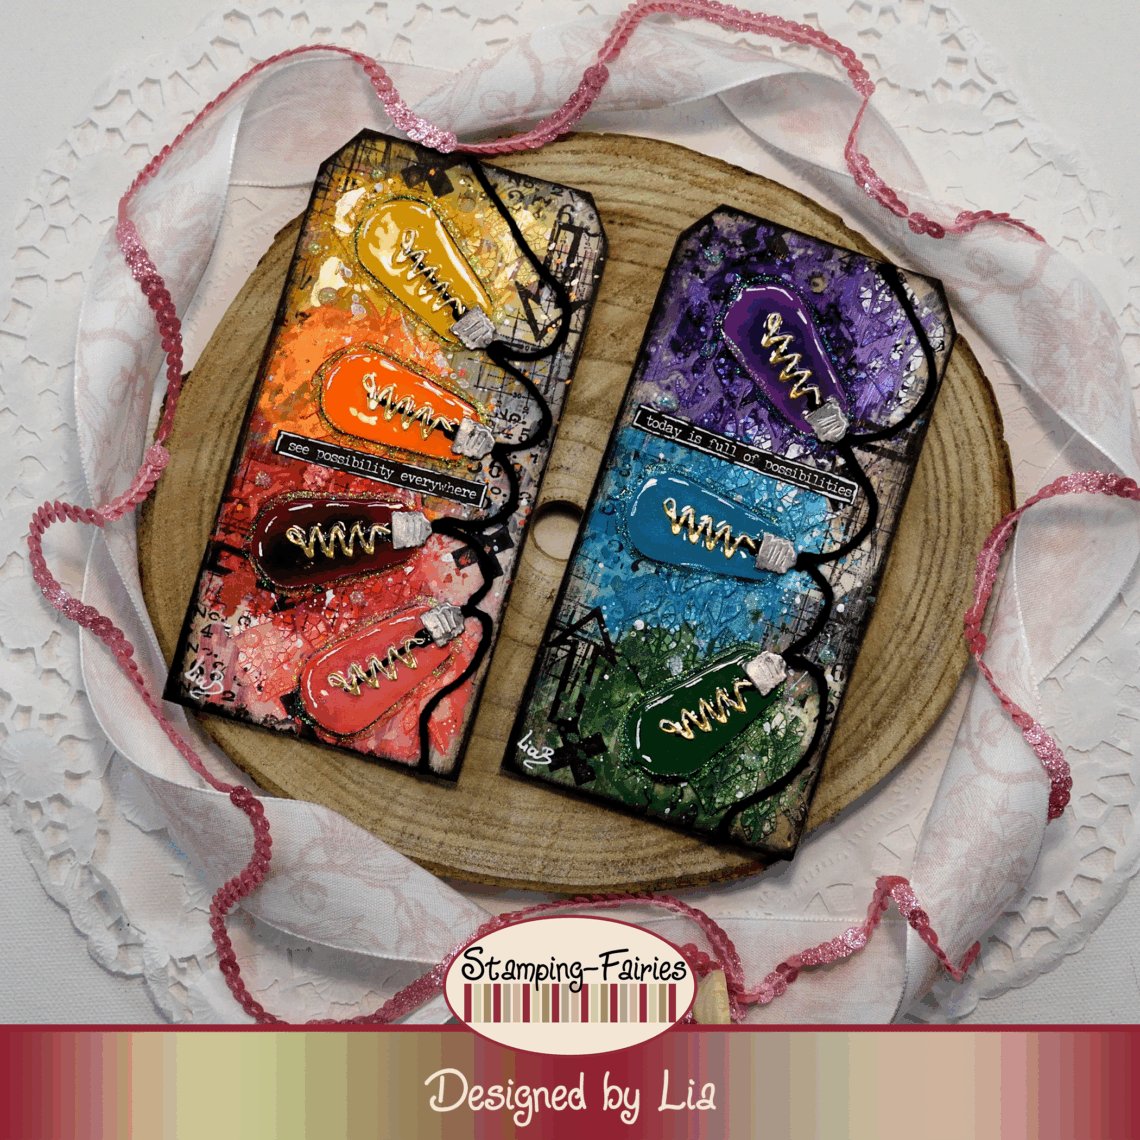
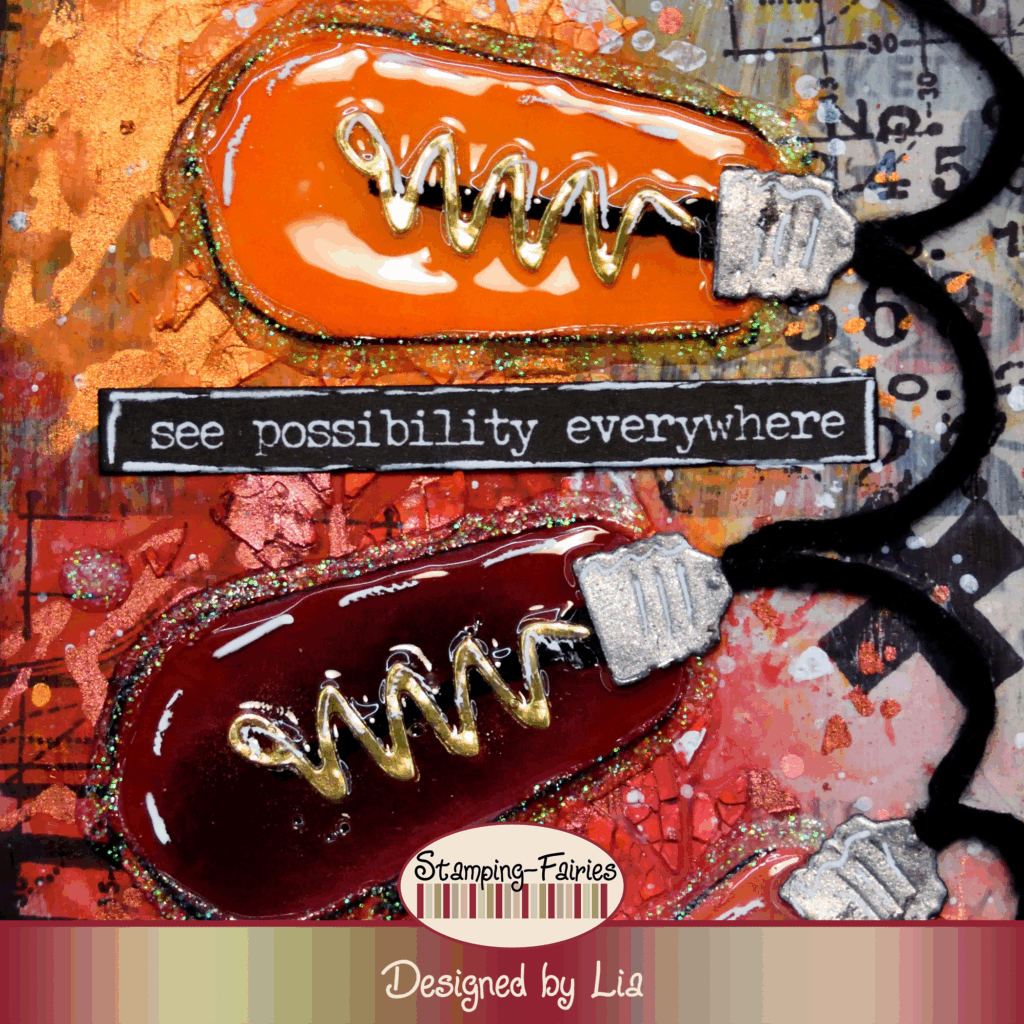
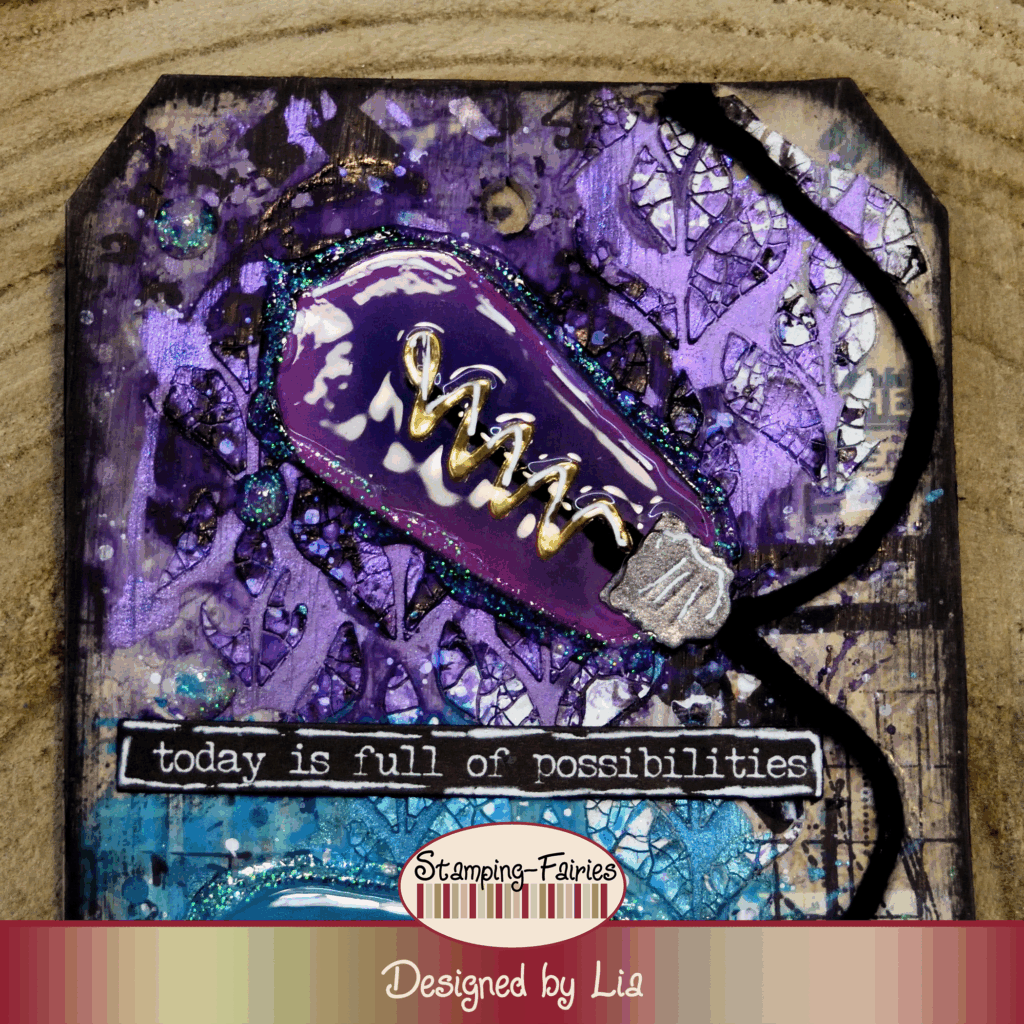
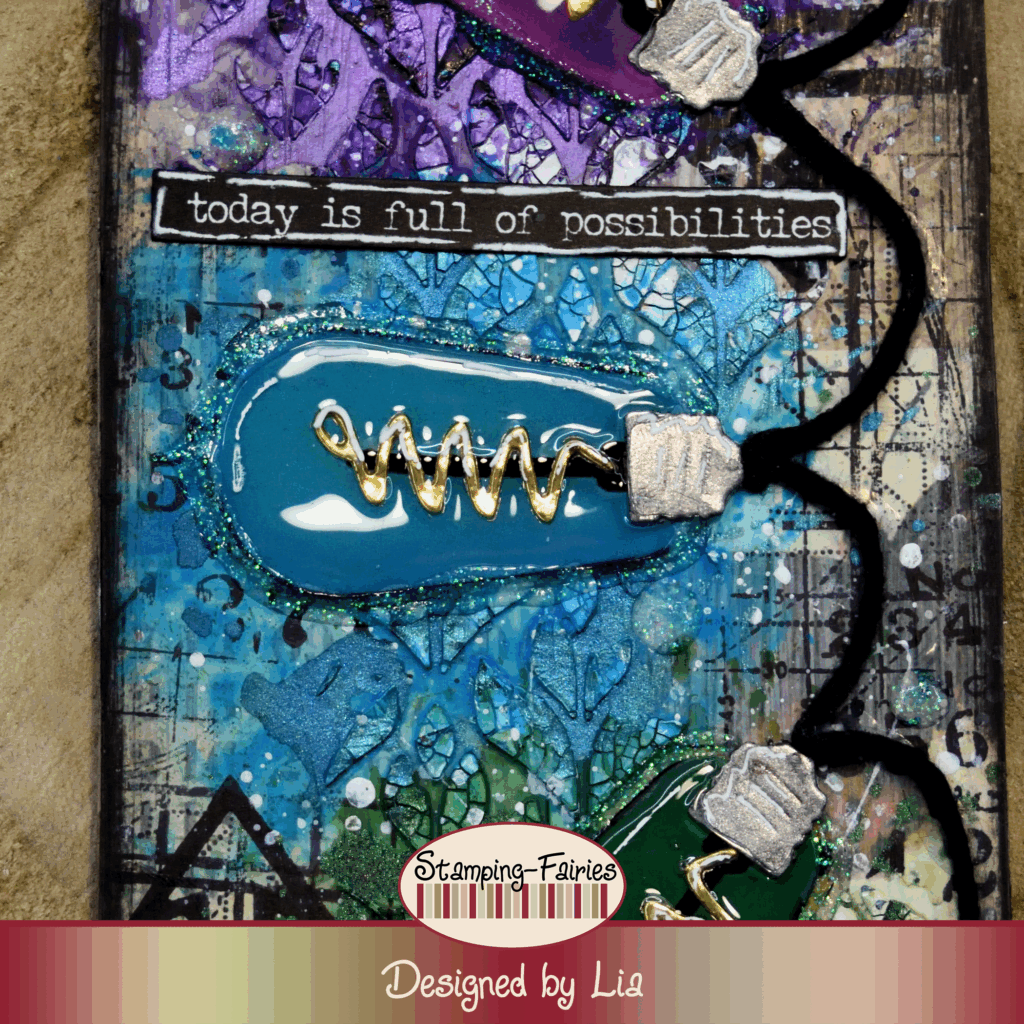
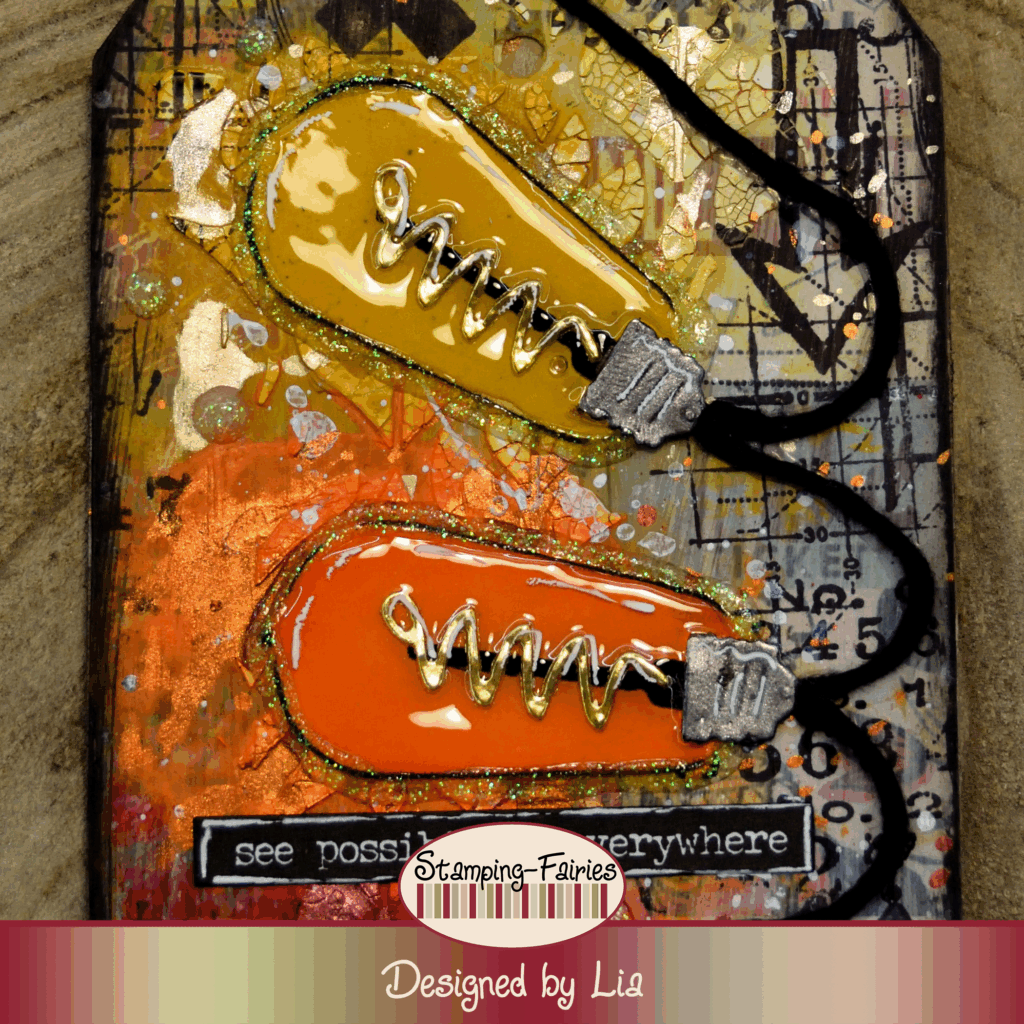
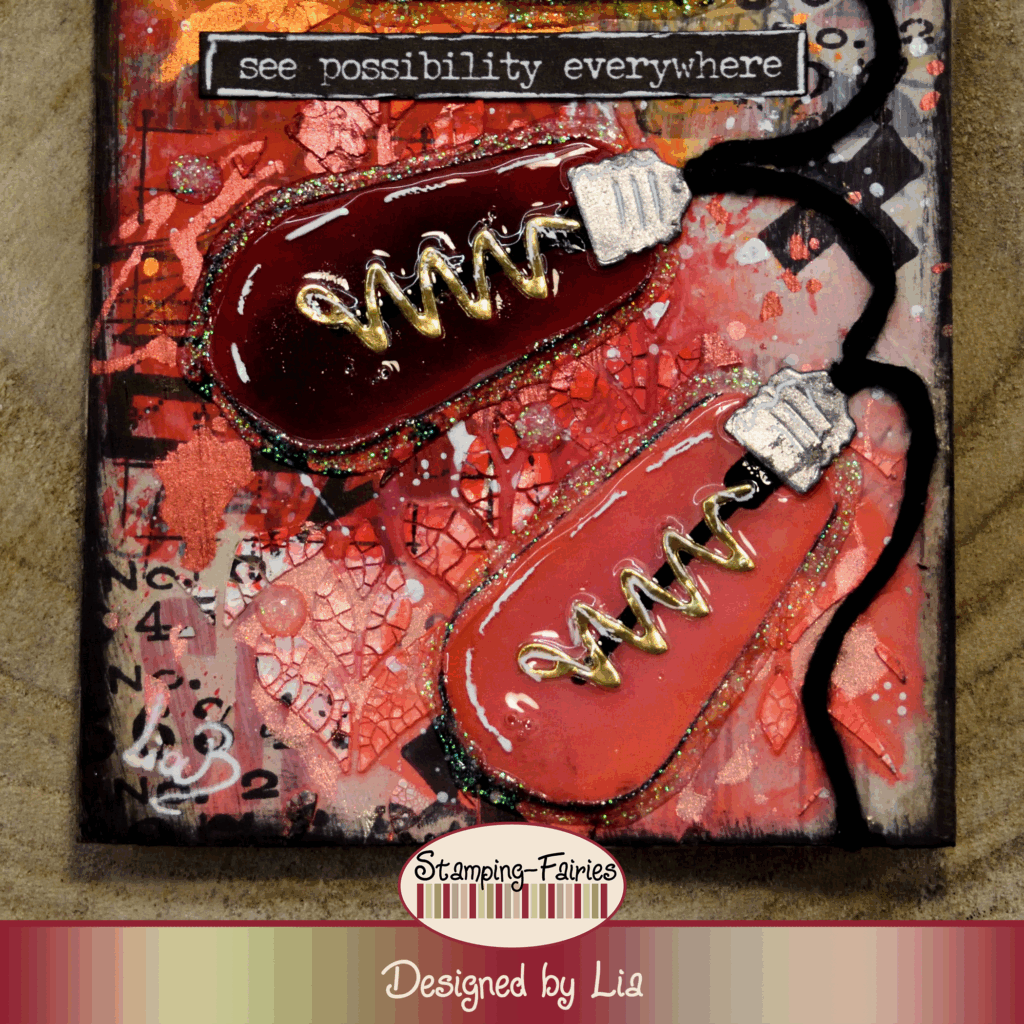
Time to prepare my images. So, I wanted rainbow colours and I wanted them to come out of rainbow light bulbs. I used the light bulb dies from the Sizzix Vault Industrial Thinlits set with coloured cardstocks, to cut my light bulbs. I added some coordinating but darker Distress Oxide ink around the edges of the light bulbs and then I put all the pieces together. I also added some black around the edges of the bulbs, to make the colours pop a little more. I attached the light bulbs on my Tags and then I created the cord connecting them, using black cotton yarn. I am not very good with cords and twine, but I always have yarn laying around (sometimes being a fanatic crocheter helps). I wanted the bulbs to be dimensional and glossy. The best way to achieve this is by using Glossy Accents. So, I covered the bulbs with Glossy Accents and left them aside to dry. This amount of Glossy Accents takes a few hours to dry, so it is easier to let them dry overnight.
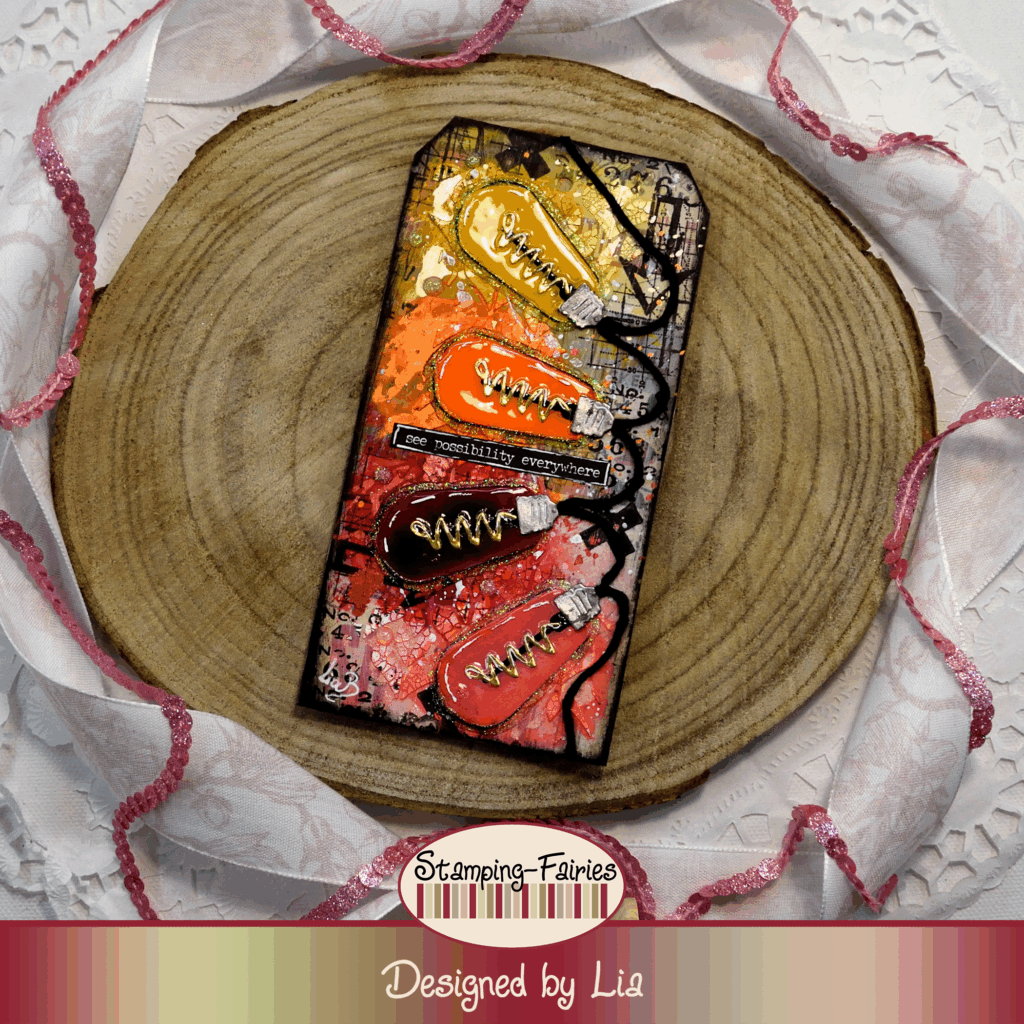

My sentiments come from the Idea-Ology Small Talk Sticker Book. I chose the black strips and I glued them on my Tags. The sentiments says: „Today is full of possibilities“ and „See possibility everywhere“ and I think they fit very well with my light bulbs. Possibilities are everywhere, in different shapes and „colours“. That’s why I chose to portrait them as light bulbs. As a last little bit of embellishment, I used Nuvo Glitter Drops to line my bulbs and create something like a halo around them, and I also to add some dots.

And that was the project for today! That was somewhat frustrating. I guess I was not sure what I wanted to make. For me, it is always easier if I start a project just by playing with the products. Many times I made backgrounds like that and abandoned them for some time, but then I found that they work perfectly for something else I was making. Just play with your materials and have fun! I really hope you like today’s project! I hope you got inspired! We will see each other again next Monday! Until then, stay creative and have fun!
*Deutsche Version*
Hallo zusammen! Willkommen zurück zu einem weiteren Mixed-Media Projekt. Das heutige Projekt hat einiges durchgemacht, bis es seine Form angenommen hat. Das passiert manchmal. Dieses Mal hatte ich Lust auf Farbe! Beginnen wir mit den Materialien, die ich verwendet habe:
Materialien
(wenn etwas nicht auf Lager ist,
bitte einfach auf „Produkterinnerung“ klicken)
- Tim Holtz Distress Heavystock Tags #8
- Tim Holtz – Collage Strips – Large
- Distress Collage Medium – matte
- Finnabair Art Basics – Heavy Gesso White
- Tim Holtz Layering Stencil – Deco Floral
- Ranger Texture Paste Opaque Crackle
- Distress Paints
- Tim Holtz Stamp Set – Deconstructed
- Archival Ink – Jet Black
- Distress Spritz
- Sizzix Tim Holtz Thinlits – Vault Industrial
- Coloured Cardstock
- Nuvo Glitter Drops – White Blizzard
- Ranger Glossy Accents
- Tim Holtz Small Talk Sticker

Das heutige Projekt hatte einen etwas holprigen Start. Ich habe zwei Hintergründe in zwei verschiedenen Art Journals erstellt, und keiner gefiel mir. Also habe ich alles liegen gelassen und mit den Ranger Distress Tags gespielt. Ich hatte die großen Collage-Streifen von Idea-Ology schon länger und wollte sie ausprobieren. Also habe ich einige davon mit Collage Medium auf die Tags geklebt. Die Farben waren etwas zu kräftig für den Hintergrund, daher habe ich sie mit einem leichter dünnen Schicht aus weißem Gesso versehen. Anschließend habe ich mit der Deco Floral Layering Schablone und Ranger Texture Crackle Paste etwas Struktur hinzugefügt. Ich habe die Paste trocknen lassen und dann mit Stempeln aus dem Tim Holtz Deconstructed Stempelset und Jet Black Archivtinte gestempelt. Anschließend schaute ich mir meine Farbmittel an. Für die vorherigen Hintergründe hatte ich Distress Oxide Sprays, Distress Spritz und Distress Mica Stain Sprays verwendet, also habe ich diese liegen gelassen und für die Tags Farben aus den Distress Paints gewählt. Ich habe die Farben Villainous Potion, Mermaid Lagoon, Rustic Wilderness, Fossilized Amber, Carved Pumpkin, Candied Apple und Abandoned Coral verwendet. Ich habe die Farben mit einem Pinsel aufgetragen, sie mit Wasser besprüht, damit sie sich bewegen und verteilen, überschüssiges Wasser abgetupft und getrocknet. Wie ihr seht, wollte ich einen Regenbogen kreieren, aber auf einem Tag war kein Platz für all diese Farben, also habe ich sie über zwei Tags verteilt. Zusammen ergeben die beiden Tags immer noch einen Regenbogen. An diesem Punkt war mir klar, dass ich diese Tags für dieses Projekt verwenden würde (yeah!!!). Ich habe mit Picket Fence Distress Paint ein paar weiße Spritzer hinzugefügt und dann nach etwas Glanz gesucht. Natürlich habe ich Distress Spritz verwendet. Ich liebe den Glanz dieses Produkts! Meine Spritz Farben sind Wilted Violet, Peacock Feathers, Rustic Wilderness, Antique Linen, Spiced Marmalade, Barn Door und Worn Lipstick. Ich habe etwas von dem Spritzer zwischen die Schablonenmuster geträufelt und ein paar Spritzer hinzugefügt. Mit meiner schwarzen Archivtinte habe ich die Ränder der Tags abgedunkelt, und fertig waren die Hintergründe!
Zeit, meine Bilder vorzubereiten. Ich wollte Regenbogenfarben, und sie sollten aus Regenbogenglühbirnen kommen. Ich habe die Glühbirnen Stanzformen aus dem Sizzix Vault Industrial Thinlits Set mit farbigem Karton verwendet, um meine Glühbirnen auszuschneiden. Ich habe etwas passende, aber dunklere Distress Oxide Tinte um die Ränder der Glühbirnen aufgetragen und dann alle Teile zusammengesetzt. Außerdem habe ich etwas Schwarz um die Ränder der Glühbirnen aufgetragen, um die Farben etwas stärker hervorzuheben. Ich habe die Glühbirnen an meinen Tags befestigt und dann die Kordel, die sie verbindet, aus schwarzem Baumwollgarn hergestellt. Ich bin nicht besonders gut im Umgang mit Kordeln und Schnüren, aber ich habe immer Garn herumliegen (manchmal hilft es, ein Häkelfanatiker zu sein). Ich wollte, dass die Glühbirnen dreidimensional und glänzend werden. Das gelingt am besten mit Glossy Accents. Also habe ich die Glühbirnen mit Glossy Accents überzogen und zum Trocknen beiseite gelegt. Diese Menge Glossy Accents braucht einige Stunden zum Trocknen, daher ist es besser, sie über Nacht trocknen zu lassen.

Meine Sprüche stammen aus dem Idea-Ology Small Talk Stickerbuch. Ich habe die schwarzen Streifen gewählt und sie auf meine Tags geklebt. Die Sprüche lauten übersetzt: „Der Tag ist voller Möglichkeiten“ und „Sieh überall Möglichkeiten“ und ich finde, sie passen sehr gut zu meinen Glühbirnen. Möglichkeiten gibt es überall, in verschiedenen Formen und „Farben“. Deshalb habe ich sie als Glühbirnen dargestellt. Als letztes kleines Detail habe ich Nuvo Glitter Drops verwendet, um meine Glühbirnen zu umranden und so etwas wie einen Heiligenschein zu erzeugen, und außerdem ein paar Punkte hinzugefügt.
Und das war das Projekt für heute! Das war etwas frustrierend. Ich war mir wohl nicht sicher, was ich machen wollte. Mir fällt es immer leichter, ein Projekt einfach mit den Produkten zu beginnen. Oft habe ich solche Hintergründe erstellt und sie dann eine Weile liegen gelassen, aber dann habe ich festgestellt, dass sie perfekt zu etwas anderem passen, das ich gerade gemacht habe. Spielt einfach mit euren Materialien und habt Spaß! Ich hoffe sehr, dass euch das heutige Projekt gefällt! Ich hoffe, ihr habt euch inspirieren lassen! Wir sehen uns nächsten Montag wieder! Bis dahin bleibt kreativ und habt Spaß!

Kaffeepause