Use your wings
*German version below | Deutsche Version unten*
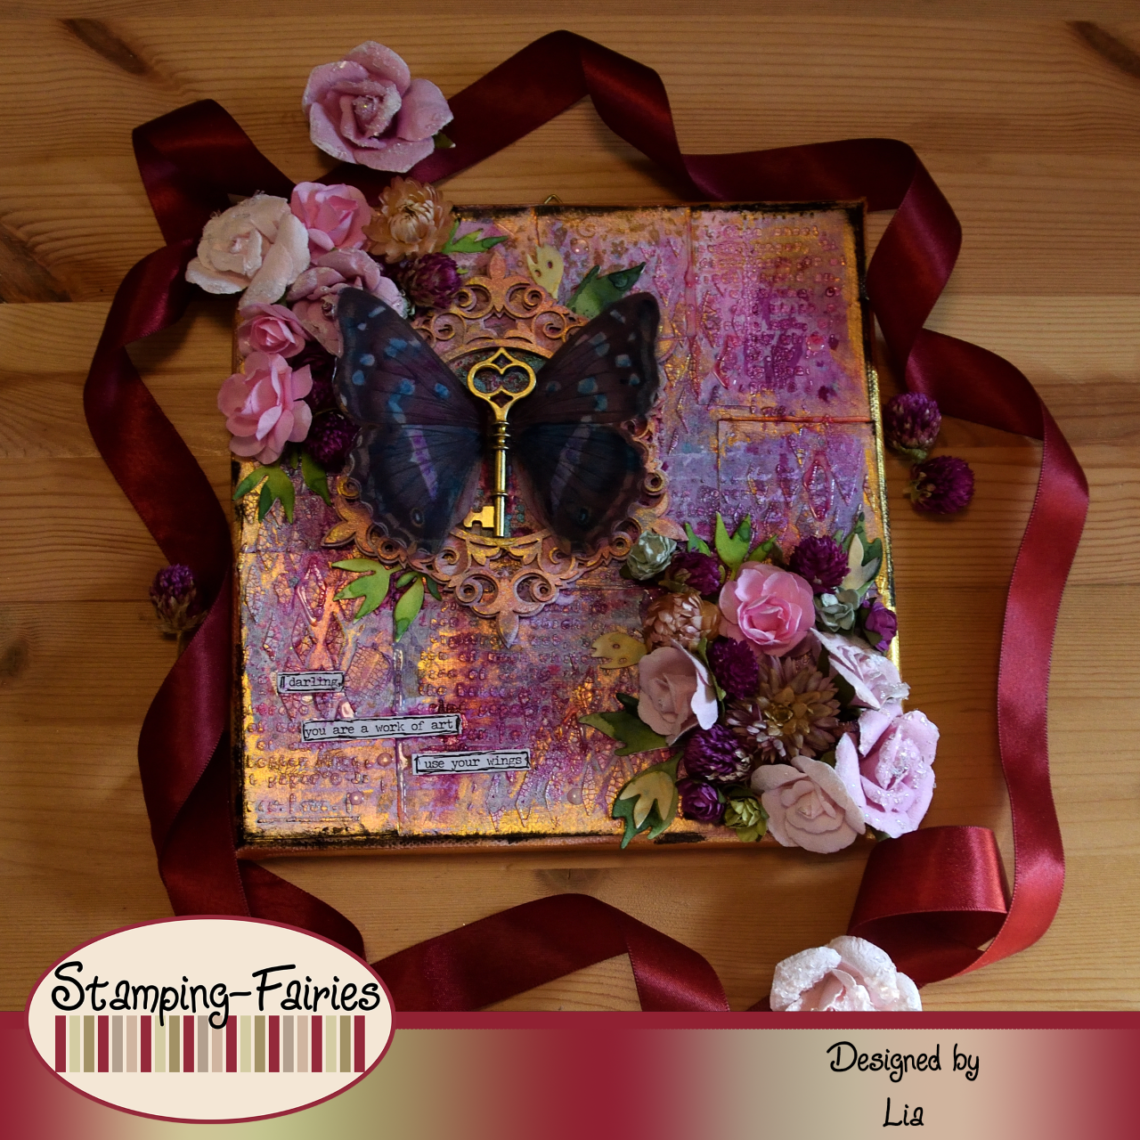
Hello everyone! I am Lia and I am here today with a new project. A new challenge started at Stamping Fairies. It is all about Spring and Flowers! So I decided to make something following this theme. Also, this time I worked on a canvas, which is always exciting because I can use this canvas to decorate my craftroom! Let’s start with the products I used for this project.
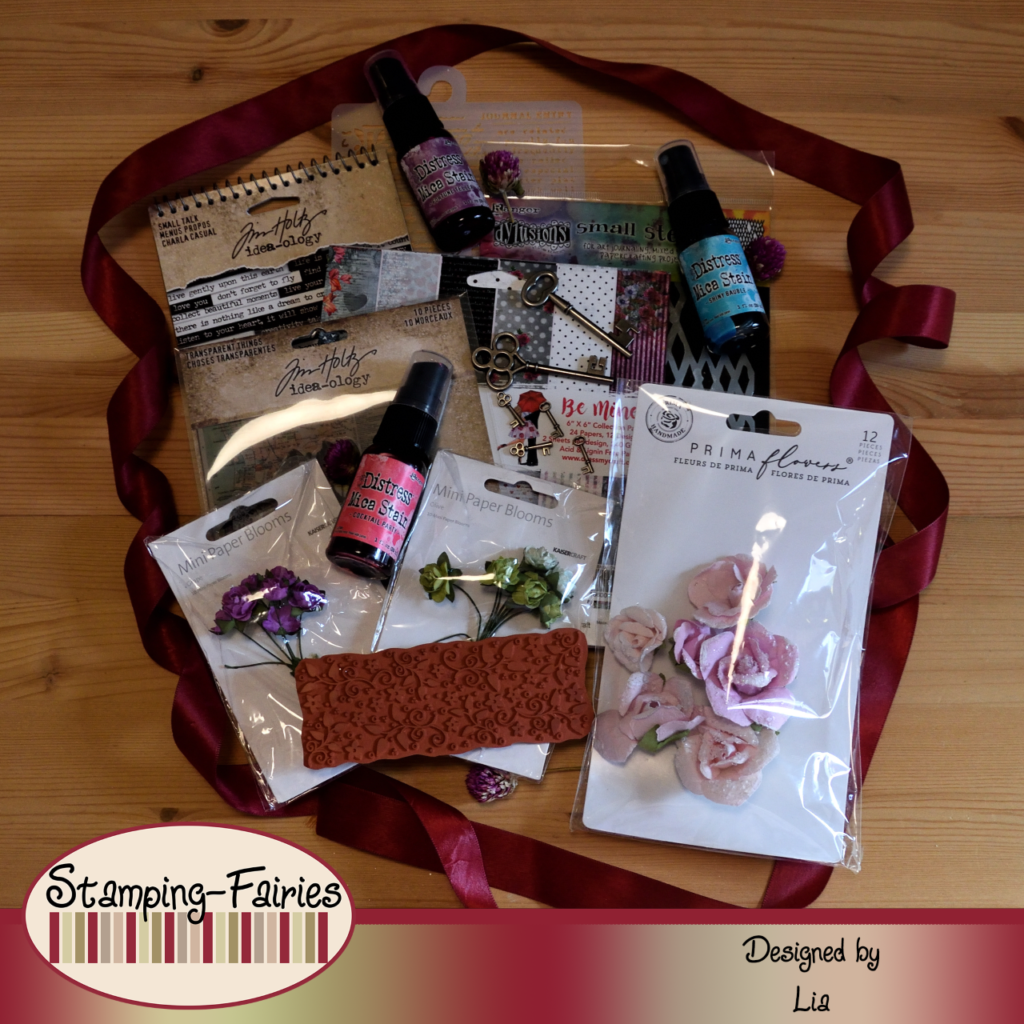
Materials
- A Canvas (or any other sturdy surface you want to work on)
- Dress My Craft Collection – Be Mine
- Ranger Multi Medium – Matte
- Ranger Texture Paste Opaque Crackle
- Dylusions small stencil – Diamond in the Rough Small
- Stamperia Stencil – Postcard
- Distress Mica Stain Sprays
- Gold paint (I used what I had but there are some nice paints in the shop, like the Dina Wakley Heavy Body Acrylic Paint – Gilt / Gold or the Prima Marketing Acrylic Paint – Metallique Gold Rush)
- Ranger Dylusions Paint Flip Cap Bottle
- Stamping Fairies – Flowers and Flourishes Background
- Archival ink
- SnipArt Chipboards Baroque Garden – Layered frame – Hexagon
- Tim Holtz – Transparent Things
- Tim Holtz – idea-ology Adornments Oddities – Keys
- Tim Holtz Ephemera Pack – Memoir
- Prima Mulberry Paper Flowers
- Sizzix Tim Holtz Thinlits – Brushstroke Flowers
- Ranger – Tim Holtz Distress Oxide Pads
- Ranger Glossy Accents
- Tim Holtz Small Talk Sticker
Let’s start with the background. I think I put more work in the background than any other part of this project. My canvas is 20cm x 20cm. I used a few random pages from the Dress My Craft Be Mine Collection paper pad, I cut them in smaller pieces and stuck them on my canvas, using Multi Medium as glue. I chose this paper because the colours of it were close to what I wanted. I ended up covering everything, but the texture is still there and that is all that matters. After the glue was dry, I used the Stamperia Postcard Stencil with Ranger Texture Crackle Paste. I tend to use only small parts of the stencil, on random parts of my project. I dried the Paste and continue with the Dylusions Diamond in the Rough Small Stencil and more Crackle Paste. I really wanted texture and more texture! After that layer of Crackle Paste was dry, I coloured my project using Distress Mica Stain Sprays. I used the Cocktail Party and the Shiny Bauble from the Holiday Set #4 and the Fortune Teller from the Halloween Set #4. I sprayed with the Mica Stain Sprays, I sprayed with water, let the colours mix, add more water, dried and then repeat several times, until I had the result I wanted.
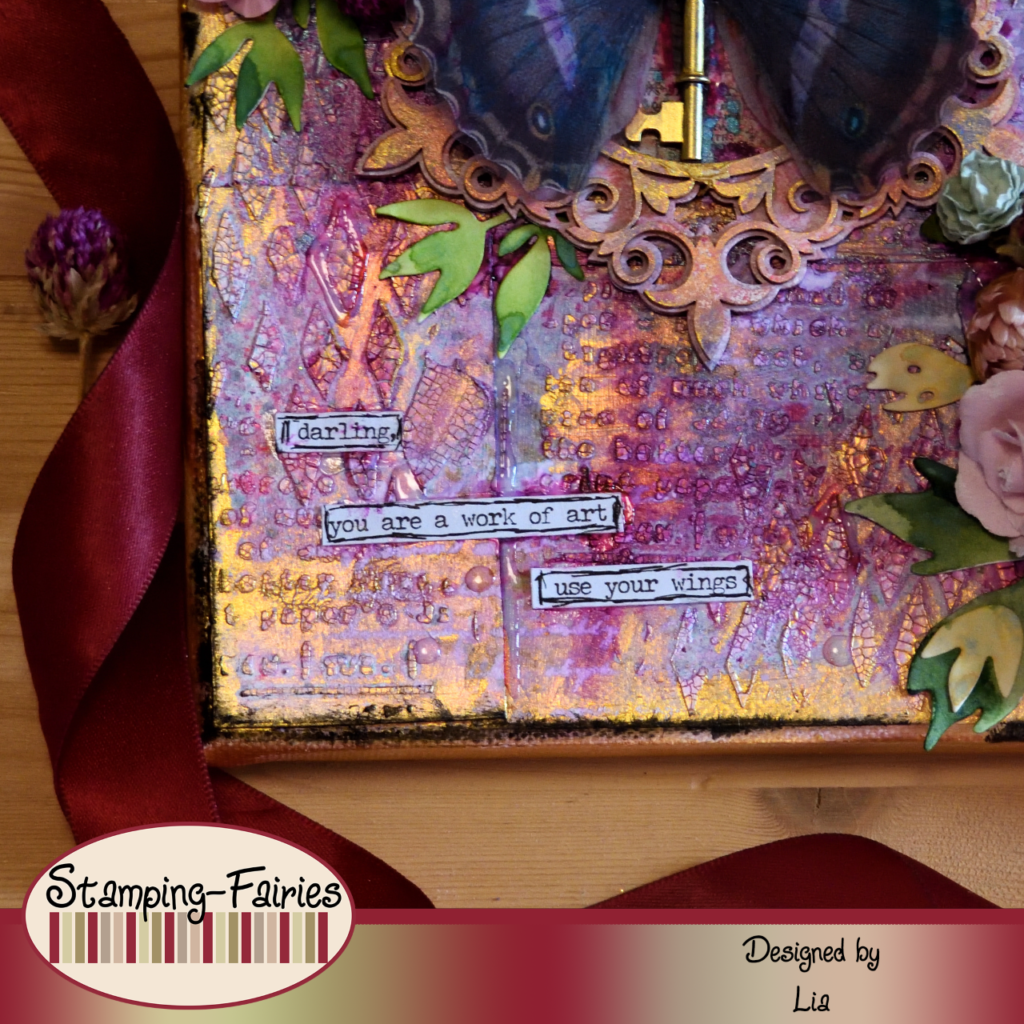
My project had colour, but I wanted more detail! I used this beautiful Stamping Fairies stamp, called Flowers and flourishes background (Blumen & Schnörkel Hintergrund), with Vintage Photo Archival ink. I used it mostly around the edges of the canvas. In most areas it didn’t stamp very well because of the texture of the Crackle Paste, but it is still there and it is a nice detail. Unfortunately, I didn’t manage to find the link for this stamp. It might be out of stock. I am very sorry. After that, I pulled out my gold paint. I used Lukas Acrylic paint, but I have some nice suggestions in the material’s list, just in case you would like to check them. I applied the gold paint on my canvas using my finger and trying to colour the Paste texture as much as I could. I also used the gold paint all around my canvas. I dried the paint and then I used the Stamperia Postcard Stencil again, this time with White Linen Dylusions paint, just to add a little bit more detail and some white areas on my project. And with that, the background was finally done!
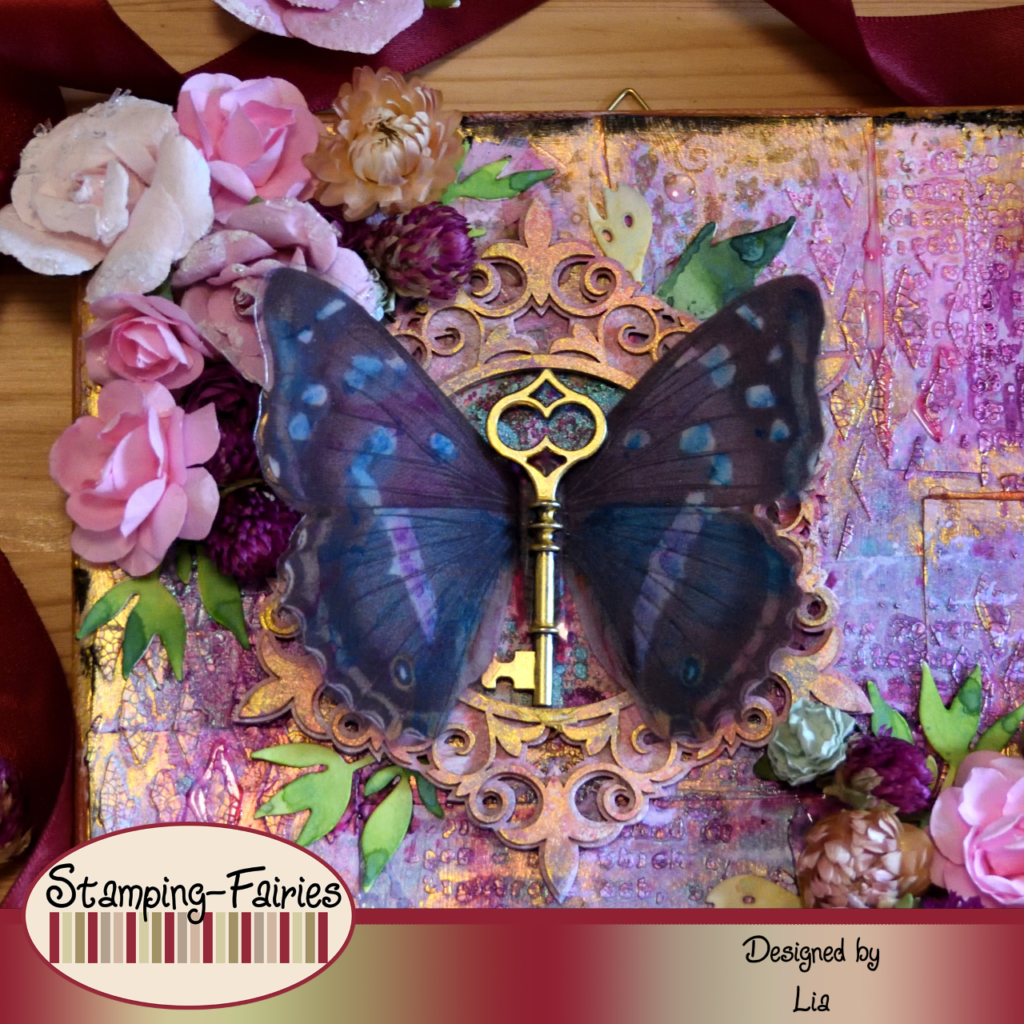
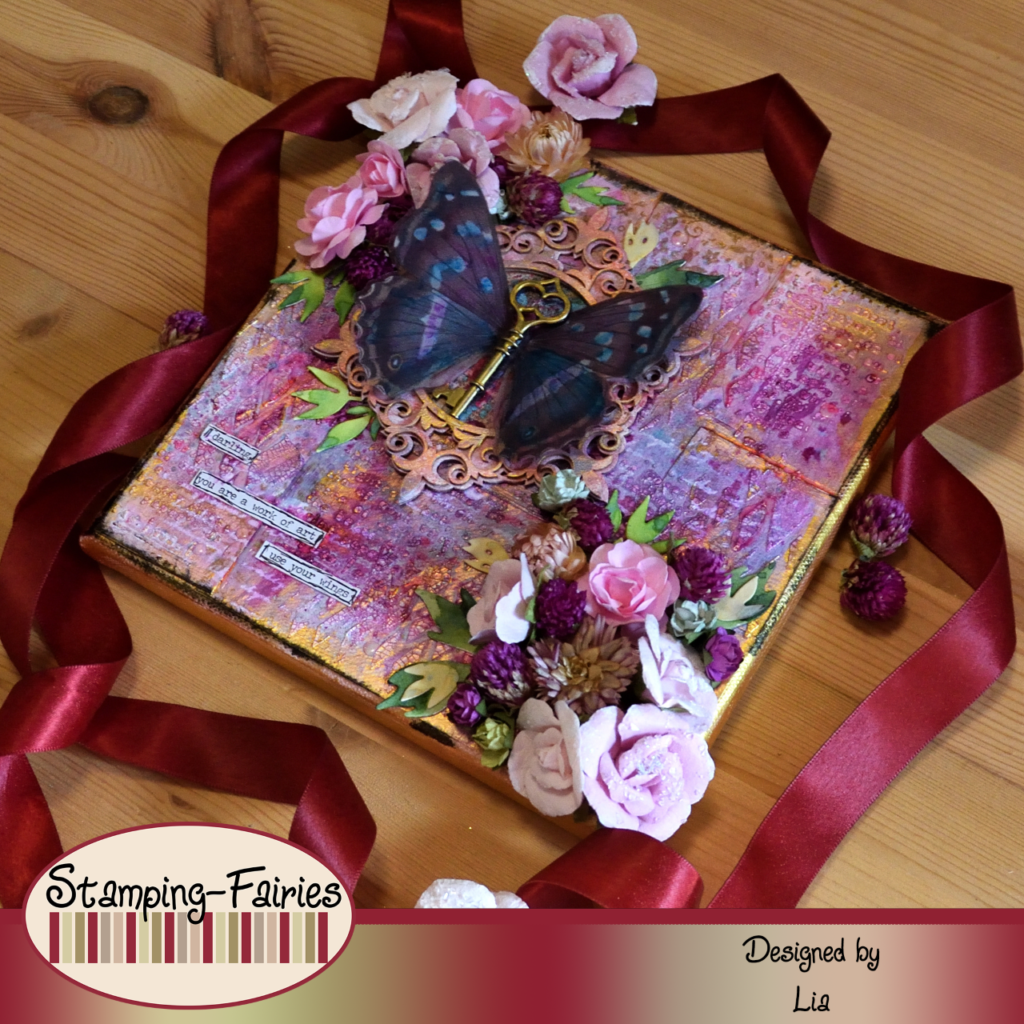
For my focal point, I had this idea of a butterfly key in a frame. So, I pulled out some Tim Holtz and SnipArt goodies. There are some nice butterflies in the Idea-Ology Transparent Things pack. The butterfly I chose was grey, so I used some Faber Castell Pitt Artist Pen brushes to add some colour. These pens are really nice for non porous surfaces. As an alternative, you could use Distress Crayons or even alcohol inks. The key I used as body for my butterfly comes from the Idea-Ology Adornments Oddities – Keys pack. I used my gold paint to turn the key gold, dried it and attached it on my butterfly. For the frame, I used this lovely Layered Hexagon frame Chipboard by SnipArt. It comes in two pieces, the base and the detailed piece. I used Dylusions paints in colours White Linen, Blue Hawaiian and Postbox Red to colour both pieces of the frame. I first applied the white and then I just mixed the red and the blue on the frame to create a colour that matches my background. When the paint was dry, I glued the two pieces together and then I used my finger to apply some gold paint on the frame. I also wanted the frame to have a back, so I chose a piece from the Tim Holtz Memoir Ephemera pack and lightly coloured it with my Mica Stain Sprays, to make it match with the rest of the project. Then I stuck it on the back of the frame and attached my Key Butterfly on the frond.
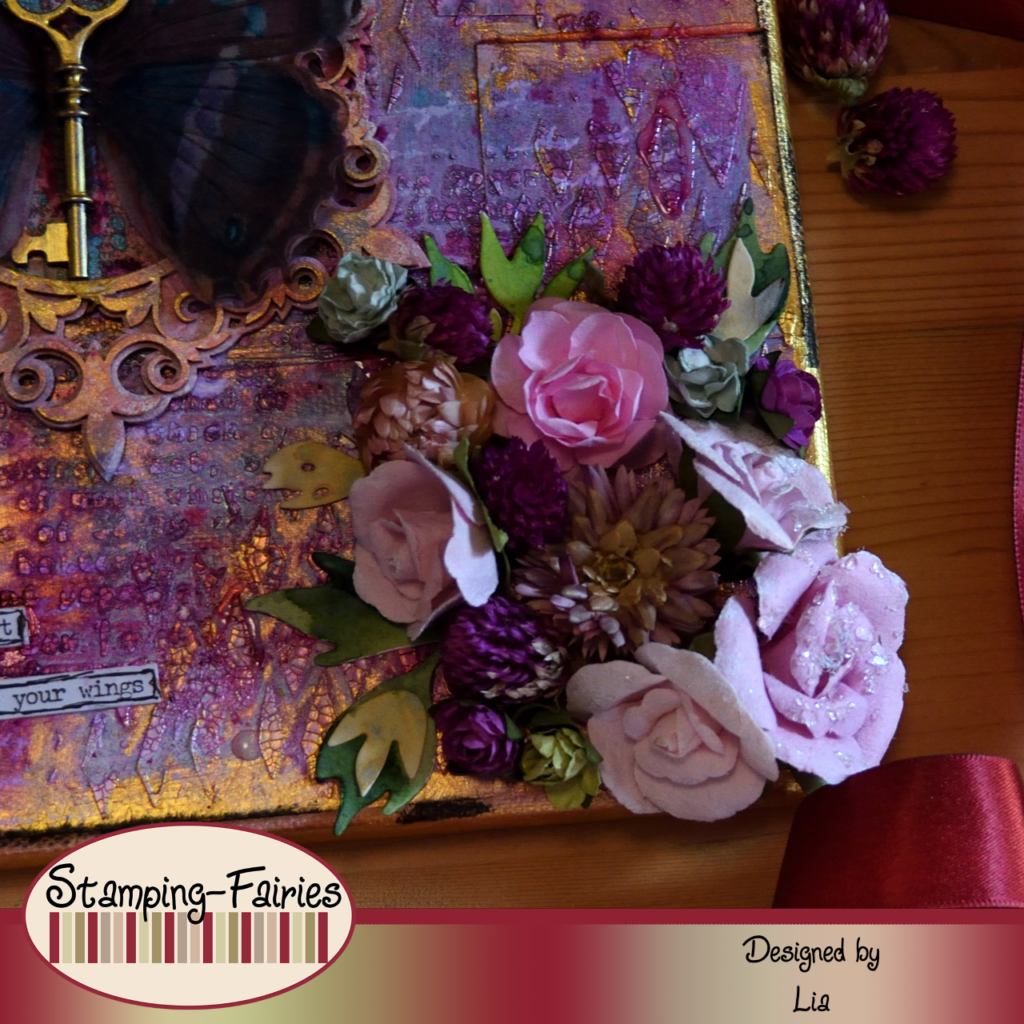
I wanted flowers on the corners of my canvas framing the Key Butterfly and its frame. So I used a few Prima Mulberry Paper Flowers and a few Kaisercraft paper flowers. I also mixed in some dried flowers from my own garden! But I didn’t have any leaves. So, I pulled out the Sizzix Brushstroke Flowers #1 Thinlits set and cut some of the leaves. I used Distress Oxide ink in Green colours to colour the leaves and arranged them around my flowers. My sentiment comes from the Small Talk sticker pad by Tim Holtz. It says „Darling, you are a work of art. Use your wings“. I really love this sort of sentiments. They work as a good reminder that we are all unique and we can all achieve whatever we want! Sometimes we need those reminds! My sentiment stickers didn’t want to stick on all this texture, so I used Glossy Accents to stick them down. And then I thought „let’s add a little more texture to the background“, because it is never enough, I guess. So, I used the Glossy Accents in random areas, creating some dots and lines. In the end, I added some Black Archival ink around the edges of my canvas.
And that was my project for today! I really hope you like it! I hope you got inspired! Do not forget that the Stamping Fairies challenge will be running until the end of March. You can find more information about it in the Stamping Fairies Facebook and Instagram pages. We will see each other again next Monday! Until then, stay creative and have fun!
*Deutsche Version*
Hallo zusammen! Ich bin Lia und ich bin heute mit einem neuen Projekt hier. Bei Stamping Fairies hat eine neue Challenge begonnen. Es dreht sich alles um Frühling und Blumen! Also habe ich beschlossen, etwas zu diesem Thema zu machen. Außerdem habe ich dieses Mal auf einer Leinwand gearbeitet, was immer spannend ist, weil ich mit dieser Leinwand meinen Bastelraum dekorieren kann! Beginnen wir mit den Produkten, die ich für dieses Projekt verwendet habe.
Materialien
- Eine Leinwand (oder eine andere stabile Oberfläche, auf der ihr arbeiten möchtet)
- Dress My Craft Collection – Be Mine
- Ranger Multi Medium – Matte
- Ranger Texture Paste Opaque Crackle
- Dylusions small stencil – Diamond in the Rough Small
- Stamperia Stencil – Postcard
- Distress Mica Stain Sprays
- Goldfarbe (Ich habe verwendet, was ich hatte, aber es gibt einige schöne Farben im Shop, wie die Dina Wakley Heavy Body Acrylic Paint – Gilt / Gold oder die Prima Marketing Acrylic Paint – Metallique Gold Rush)
- Ranger Dylusions Paint Flip Cap Bottle
- Stamping Fairies – Blumen & Schnörkel Hintergrund
- Archival ink
- SnipArt Chipboards Baroque Garden – Layered frame – Hexagon
- Tim Holtz – Transparent Things
- Tim Holtz – idea-ology Adornments Oddities – Keys
- Tim Holtz Ephemera Pack – Memoir
- Prima Mulberry Paper Flowers
- Sizzix Tim Holtz Thinlits – Brushstroke Flowers
- Ranger – Tim Holtz Distress Oxide Pads
- Ranger Glossy Accents
- Tim Holtz Small Talk Sticker
Beginnen wir mit dem Hintergrund. Ich denke, ich habe mehr Arbeit in den Hintergrund gesteckt als in jeden anderen Teil dieses Projekts. Meine Leinwand ist 20cm x 20cm groß. Ich habe ein paar zufällige Seiten aus dem Papierblock Dress My Craft: Be Mine Collection verwendet, sie in kleinere Stücke geschnitten und mit Multi Medium als Kleber auf meine Leinwand geklebt. Ich habe mich für dieses Papier entschieden, weil die Farben dem entsprachen, was ich wollte. Am Ende habe ich alles abgedeckt, aber die Textur ist immer noch da und das ist das worauf es ankommt. Nachdem der Kleber getrocknet war, habe ich die Stamperia Postkartenschablone mit Ranger Texture Crackle Paste verwendet. Ich neige dazu, nur kleine Teile der Schablone für zufällige Teile meines Projekts zu verwenden. Ich habe die Paste getrocknet und mit dem Dylusions Diamond in the Rough Small Stencil und mehr Crackle Paste fortgefahren. Ich wollte wirklich Textur und noch mehr Textur! Nachdem diese Schicht Crackle Paste getrocknet war, habe ich mein Projekt mit Distress Mica Stain Sprays gefärbt. Ich habe die Cocktailparty und die Shiny Bauble aus dem Holliday Set #4 und die Fortune Teller aus dem Halloween Set #4 verwendet. Ich habe Mica Stain Sprays gesprüht, ich habe Wasser gesprüht, die Farben mischen lassen, mehr Wasser hinzugefügt, getrocknet und dann mehrmals wiederholt, bis ich das gewünschte Ergebnis hatte.
Mein Projekt hatte Farbe, aber ich wollte mehr Details! Ich habe diesen wunderschönen Stamping Fairies-Stempel namens Blumen & Schnörkel Hintergrund mit Vintage Photo Archival Tinte verwendet. Ich habe es hauptsächlich an den Rändern der Leinwand verwendet. In den meisten Bereichen hat es wegen der Textur der Crackle Paste nicht sehr gut gestempelt, aber es ist immer noch da und es ist ein schönes Detail. Leider habe ich es nicht geschafft, den Link zu diesem Stempel zu finden. Er könnte ausverkauft sein. Danach habe ich meine Goldfarbe herausgezogen. Ich habe Lukas Acrylfarbe verwendet, aber ich habe einige nette Vorschläge in der Materialliste, nur für den Fall, dass ihr sie überprüfen möchtet. Ich habe die Goldfarbe mit dem Finger auf meine Leinwand aufgetragen und versucht, die Paste-Textur so gut wie möglich einzufärben. Ich habe auch die Goldfarbe rund um meine Leinwand verwendet. Ich habe die Farbe getrocknet und dann wieder die Stamperia-Postkartenschablone verwendet, diesmal mit White Linen Dylusions-Farbe, nur um meinem Projekt ein bisschen mehr Details und einige weiße Bereiche hinzuzufügen. Und damit war der Hintergrund endlich fertig!
Für meinen Schwerpunkt hatte ich diese Idee eines Schmetterlingsschlüssels in einem Rahmen. Also habe ich ein paar Leckereien von Tim Holtz und SnipArt herausgeholt. Es gibt einige schöne Schmetterlinge im Idea-Ology Transparent Things Pack. Der Schmetterling, den ich gewählt habe, war grau, also habe ich einige Faber Castell Pitt Artist Pen-Pinsel verwendet, um etwas Farbe hinzuzufügen. Diese Stifte sind wirklich gut für nicht poröse Oberflächen. Alternativ könnt ihr Distress Crayons oder sogar Alkoholtinten verwenden. Der Schlüssel, den ich als Körper für meinen Schmetterling verwendet habe, stammt aus dem Paket Idea-Ology Adornments Oddities – Keys. Ich habe meine Goldfarbe benutzt, um den Schlüssel in Gold zu verwandeln, ihn getrocknet und ihn an meinem Schmetterling befestigt. Für den Rahmen habe ich diese schöne Layered Hexagon Spanplatte von SnipArt verwendet. Sie kommt in zwei Teilen, der Basis und dem detaillierten Teil. Ich habe Dylusions-Farben in den Farben White Linen, Blue Hawaiian und Postbox Red verwendet, um beide Teile des Rahmens zu färben. Ich habe zuerst das Weiß aufgetragen und dann einfach das Rot und das Blau auf dem Rahmen gemischt, um eine Farbe zu erzeugen, die zu meinem Hintergrund passt. Als die Farbe trocken war, habe ich die beiden Teile zusammengeklebt und dann mit dem Finger etwas Goldfarbe auf den Rahmen aufgetragen. Ich wollte auch, dass der Rahmen eine Rückseite hat, also habe ich ein Stück aus dem Tim Holtz Memoir Ephemera Pack gewellt und es leicht mit meinen Mica Stain Sprays gefärbt, damit es zum Rest des Projekts passt. Dann habe ich es auf die Rückseite des Rahmens geklebt und meinen Key Butterfly an der Vorderseite befestigt.
Ich wollte Blumen an den Ecken meiner Leinwand, die den Schlüsselschmetterling und seinen Rahmen einrahmen. Dafür habe ich ein paar Prima Mulberry Paper Flowers und ein paar Kaisercraft Paper Flowers verwendet. Ich habe auch einige getrocknete Blumen aus meinem eigenen Garten untergemischt! Aber ich hatte keine Blätter. Also habe ich das Sizzix Brushstroke Flowers #1 Thinlits-Set herausgezogen und einige der Blätter abgeschnitten. Ich habe die Blätter mit Distress Oxide-Tinte in Grüntönen gefärbt und sie um meine Blumen herum angeordnet. Mein Gefühl stammt vom Small Talk-Stickerblock von Tim Holtz. Es sagt „Darling, du bist ein Kunstwerk. Benutze deine Flügel“. Ich liebe diese Art von Sprüche. Sie wirken als gute Erinnerung daran, dass wir alle einzigartig sind und wir alle erreichen können, was wir wollen! Manchmal brauchen wir diese Erinnerungen! Meine Stimmungsaufkleber wollten nicht auf all dieser Textur haften, also habe ich Glossy Accents verwendet, um sie aufzukleben. Und dann dachte ich mir „lasst uns dem Hintergrund etwas mehr Textur hinzufügen“, weil es nie genug ist, denke ich. Also habe ich die Glossy Accents in zufälligen Bereichen verwendet und einige Punkte und Linien erstellt. Am Ende habe ich etwas schwarze Archival Tinte an den Rändern meiner Leinwand hinzugefügt.
Und das war mein Projekt für heute! Ich hoffe sehr, dass es euch gefällt! Ich hoffe, ihr habt euch inspirieren lassen! Vergesst nicht, dass die Stamping Fairies Challenge noch bis Ende März läuft. Weitere Informationen dazu findet ihr auf den Facebook- und Instagram-Seiten von Stamping Fairies. Wir sehen uns nächsten Montag wieder! Bis dahin bleibt kreativ und habt Spaß!

Schmetterling im Anflug


