An Artist’s Life
*German version below | Deutsche Version unten*
Hello everyone! Welcome back to another Mixed Media project. The weather is rainy around here, but that has given us some really lovely rainbows! So, I decided to create a rainbow project for today (like I need an excuse to use colour…LOL). Let’s start with the materials I used:
Materials
(If something is not in stock,
please simply click on “Product reminder”/ “Produkterinnerung”)
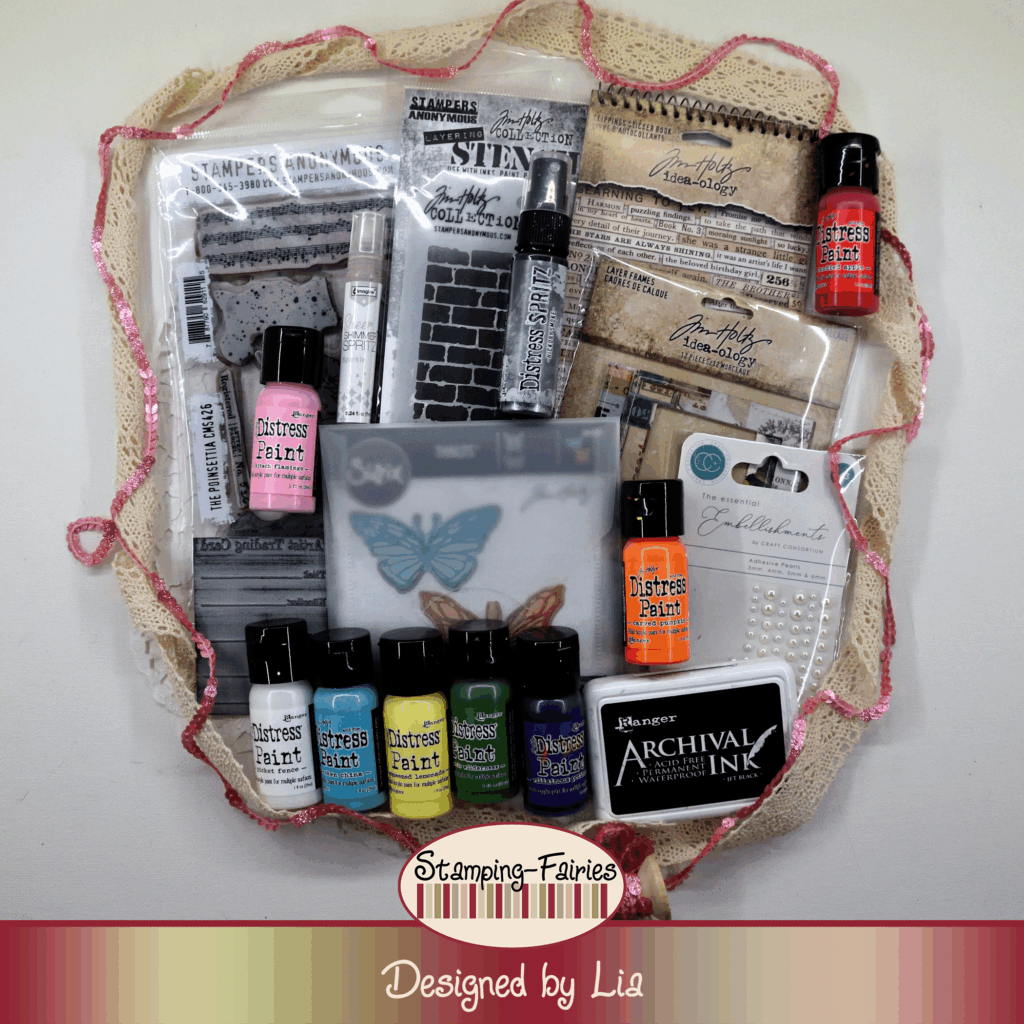
- Stamping-Fairies / BalilleDesign – Artist Trading Card
- Prima Marketing – Art Basic – Heavy Gesso White
- Tim Holtz Layering Stencil – Bricked
- Ranger Texture Paste – Opaque Matte
- Distress Paints
- Tim Holtz Stamp Set – The Poinsettia
- Archival Ink – Jet Black
- Distress Spritz – Hickory Smoke
- Sheer Shimmer Spritz Spray – Sparkle (7ml)
- Tim Holtz Layer Frames – Collage
- Sizzix Tim Holtz Thinlits – Vault Scribbly Butterfly
- Tim Holtz Sticker Book – Clippings
- Craft Consortium Essential Adhesive Pearls – Natural
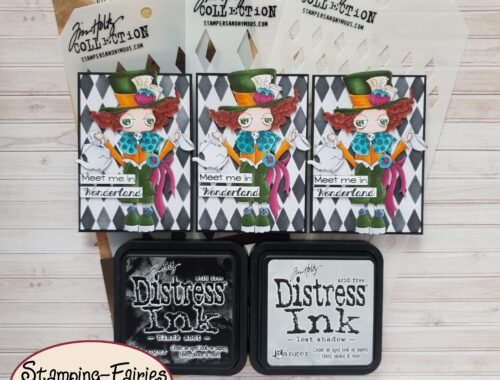
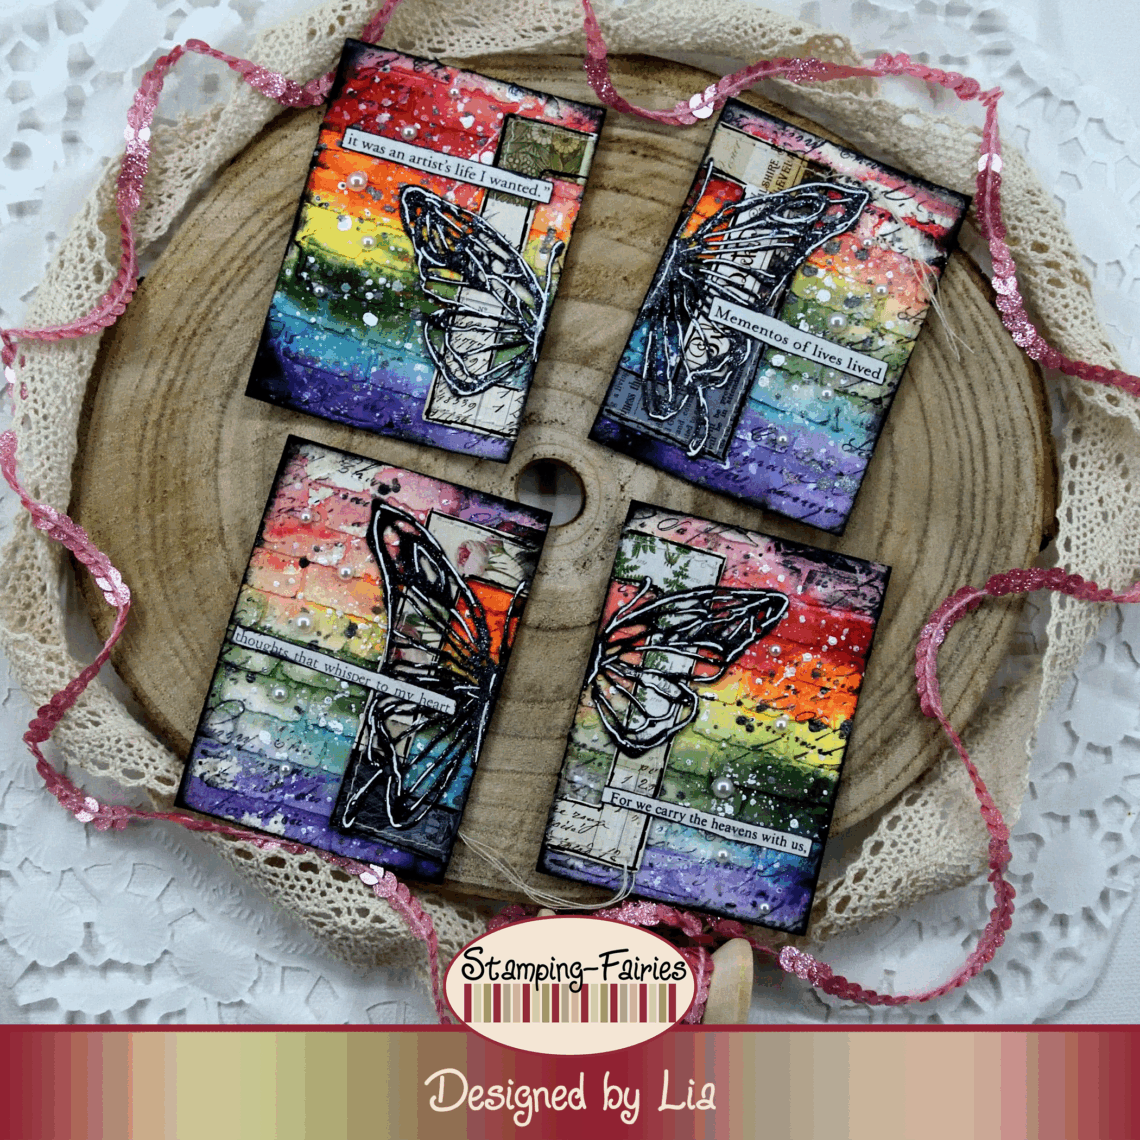
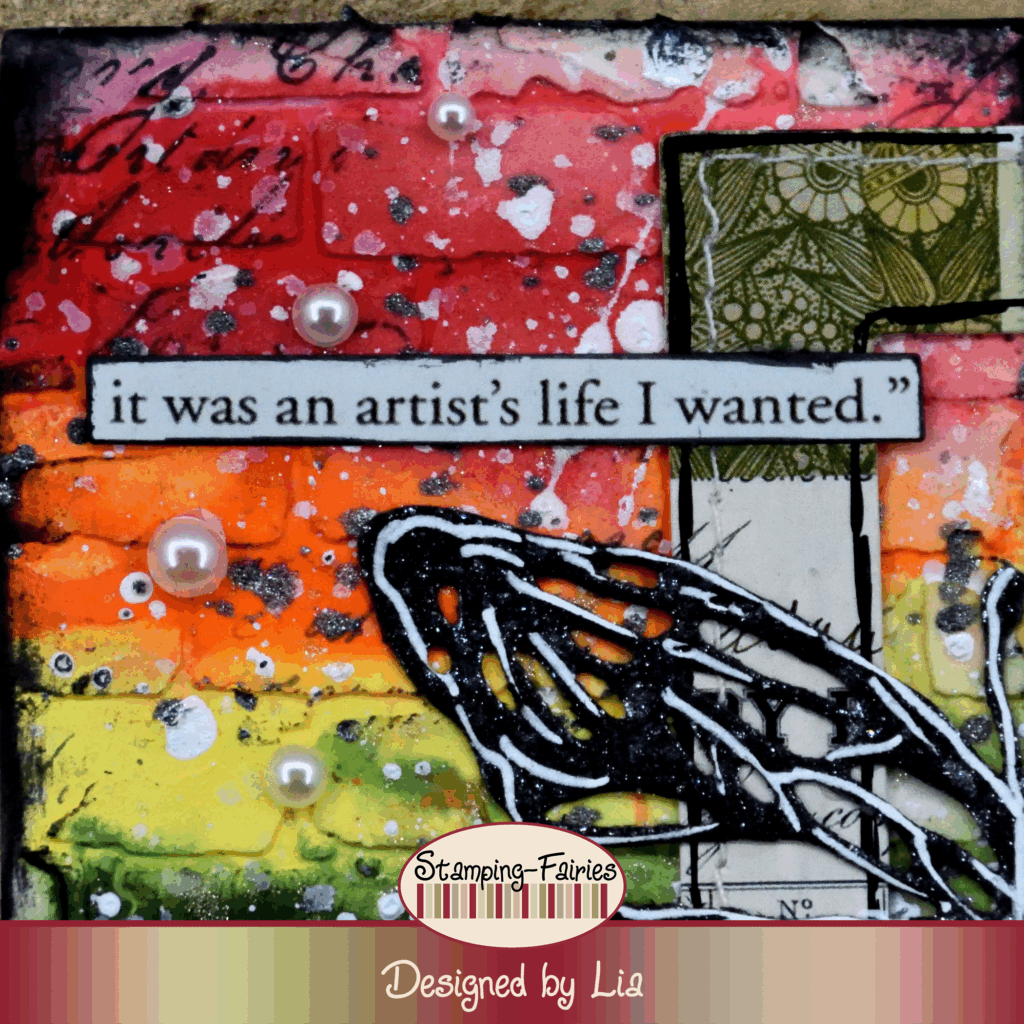
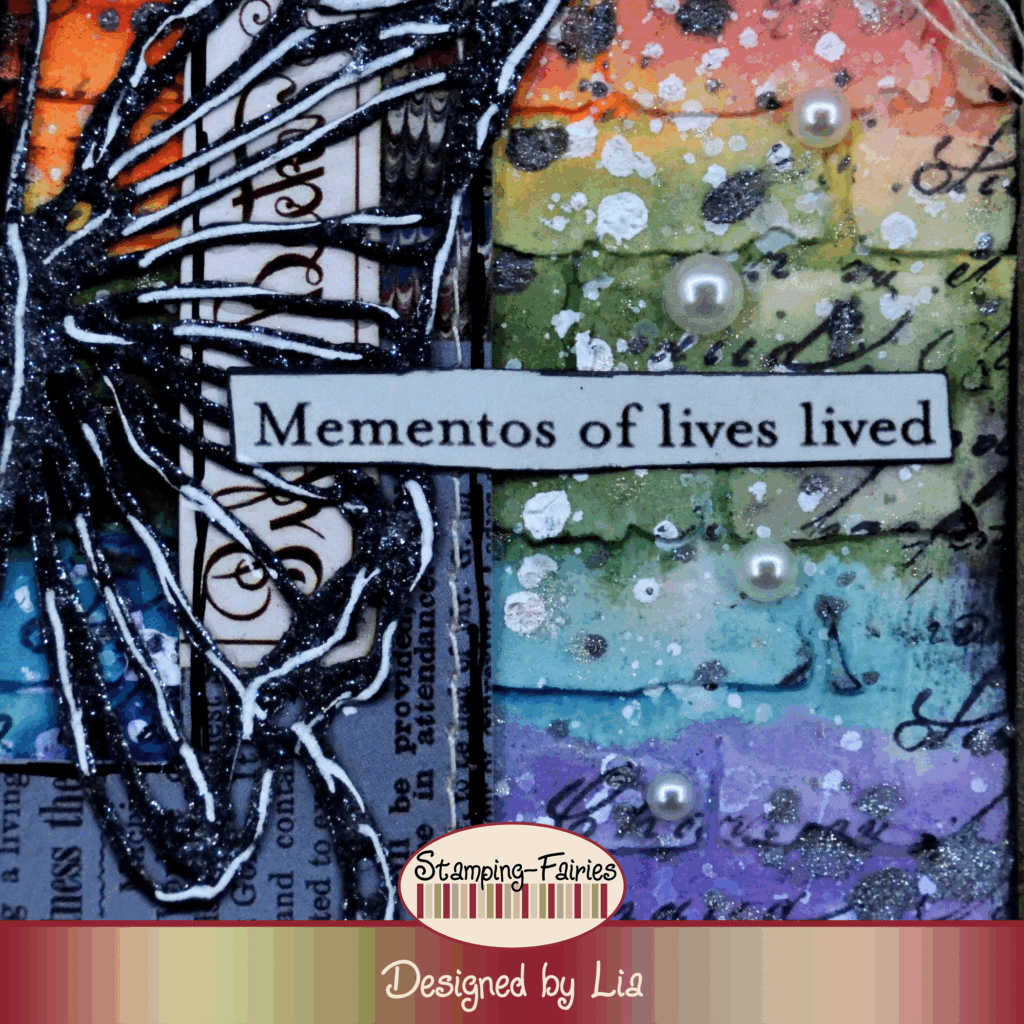
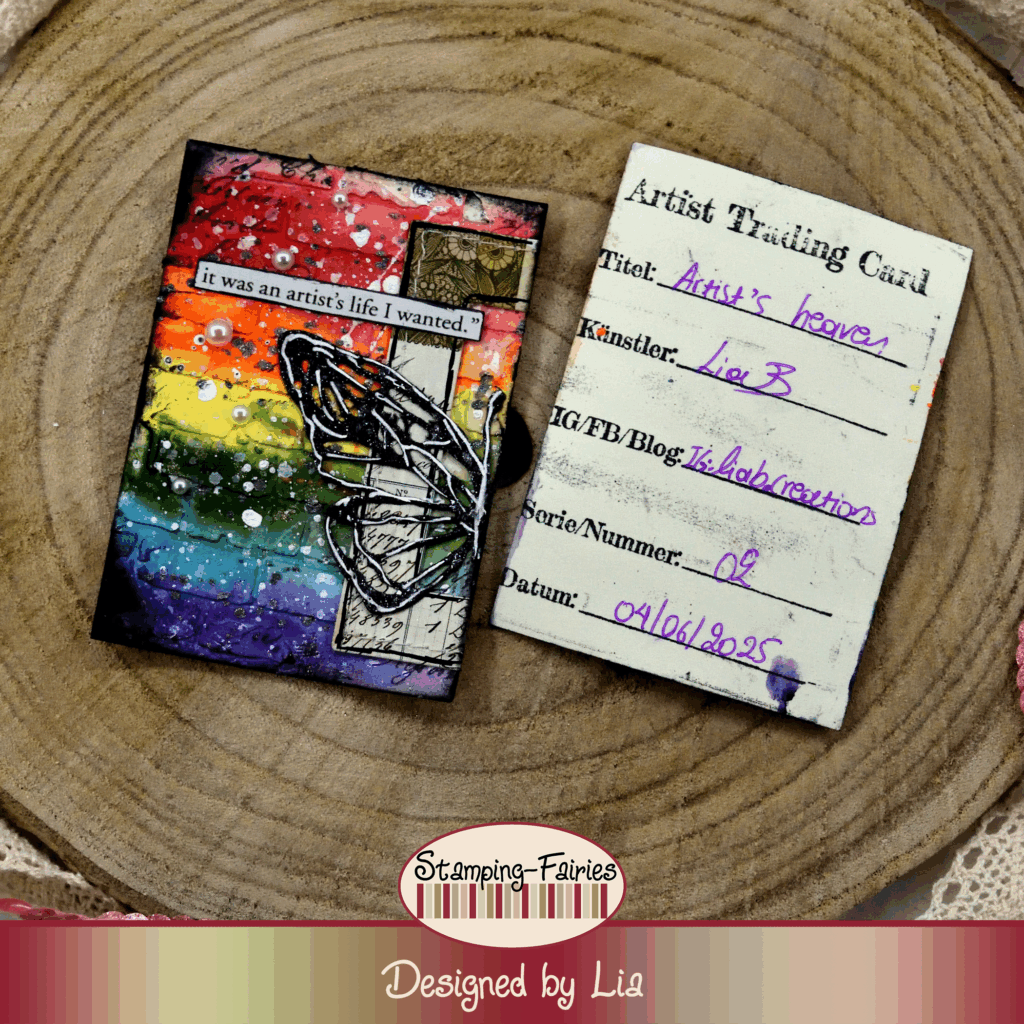
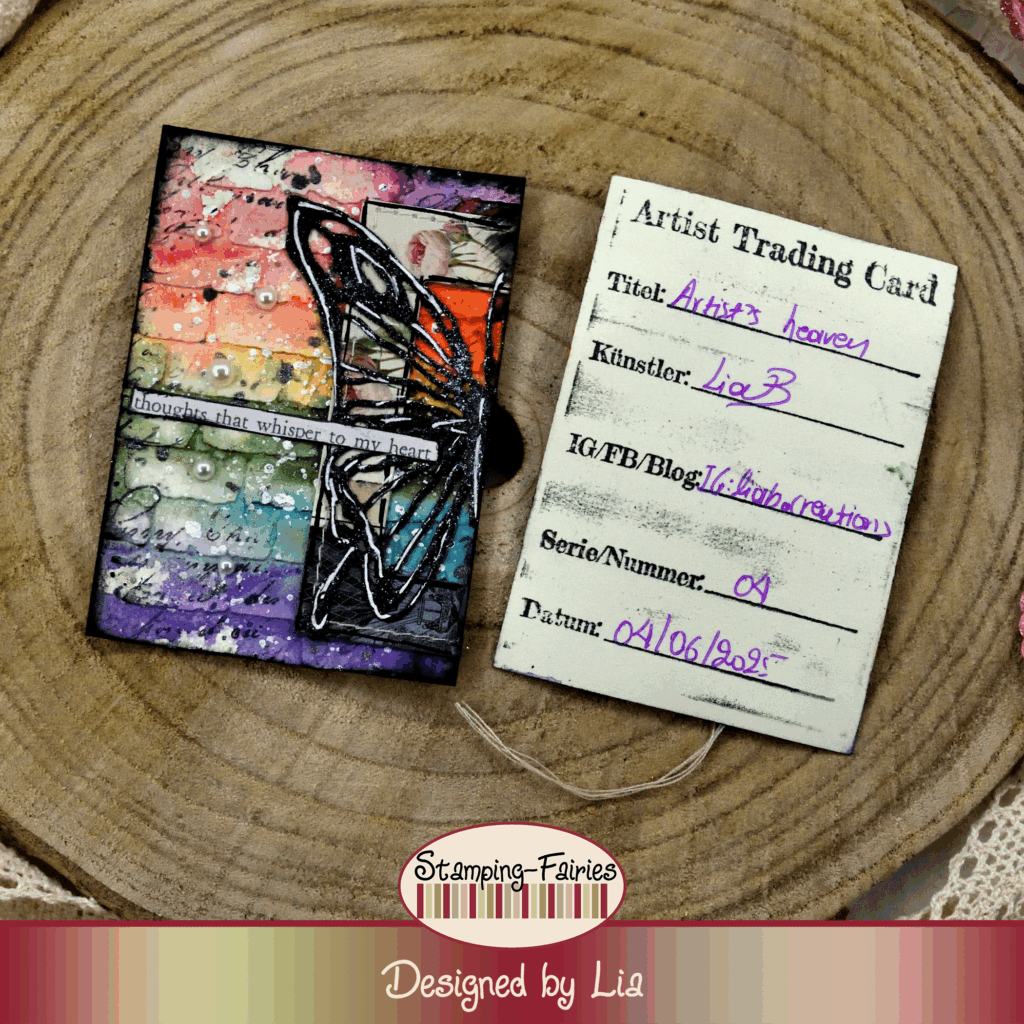
For today’s project, I made a set of Artist Trading Cards. I started by cutting my cards. The Artist Trading Cards are usually 2,5 by 3,5 inches, which translate into about 6,5 by 9 cm. Then I stamped my Artist Trading Card stamp on the back side of my paper. A lot of artists prefer to create a secondary set of cards just with this stamp and glue it on their actual cards in the end. That prevents the back side from getting all inky and dirty. But I do not mind the mess…in fact, I like it! So, that is what we are doing! To actually start the project, first I covered my cards with Gesso. It doesn’t matter if it is white or clear Gesso. We are just doing this to prepare our surface. Then, I used the Bricked Layering stencil with Ranger Opaque Matte Texture Paste, to add some texture to the project. I left the Paste to dry and then it was time to add colour. I used Distress Paints, in colours Kitsch Flamingo, Candied Apple, Carved Pumpkin, Squeezed Lemonade, Rustic Wilderness, Broken China and Villainous Potion. I applied the paints on one side of my cards, I sprayed them with water and I left them drip and cover the cards. As a result, one side of the cards is darker and the other lighter in colour. Distress Paints are acrylics and they dry pretty fast. Once the paints were dry, I added some text details, using the text stamp from the Tim Holtz The Poinsettia stamp set with Jet Black Archival ink. It was time to add splatter and I added a lot! I started with Picket Fence (white) Distress Paint, then moved to Hickory Smoke Distress Spritz and ended with the Sheer Shimmer Spritz in Sparkle. I made sure to dry my cards in between the different kinds of splatter, because I did not want them to mix, I wanted them to layer! Once everything was dry, I darkened the edges of the cards with my Jet Black Archival ink, and the backgrounds were done!
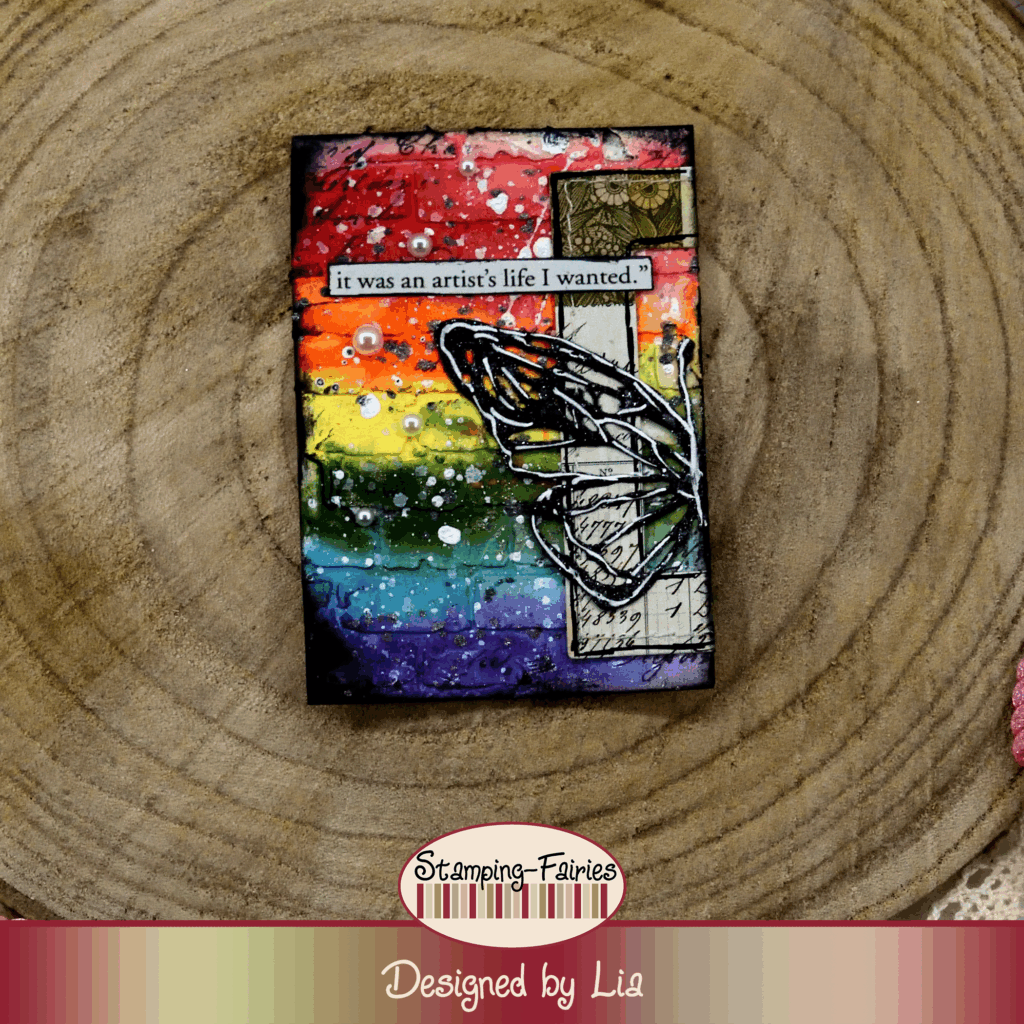
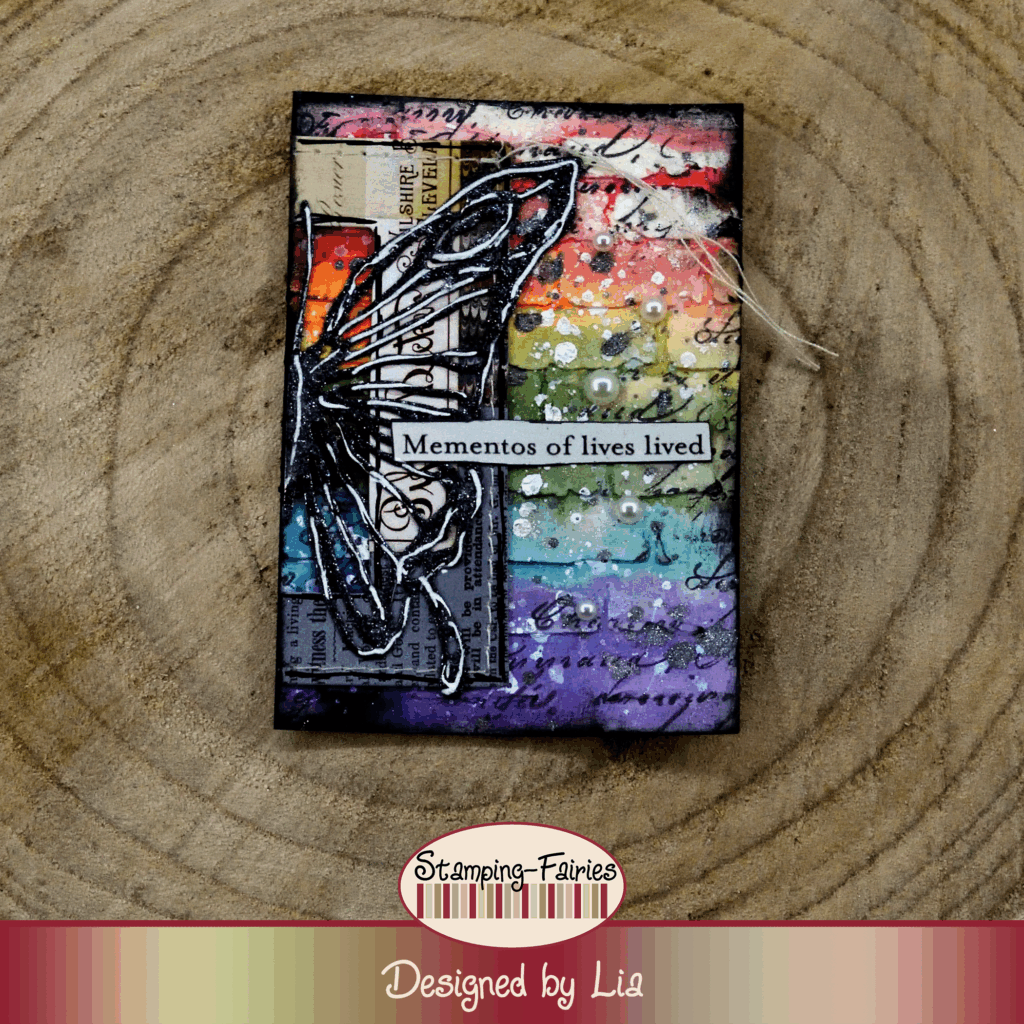
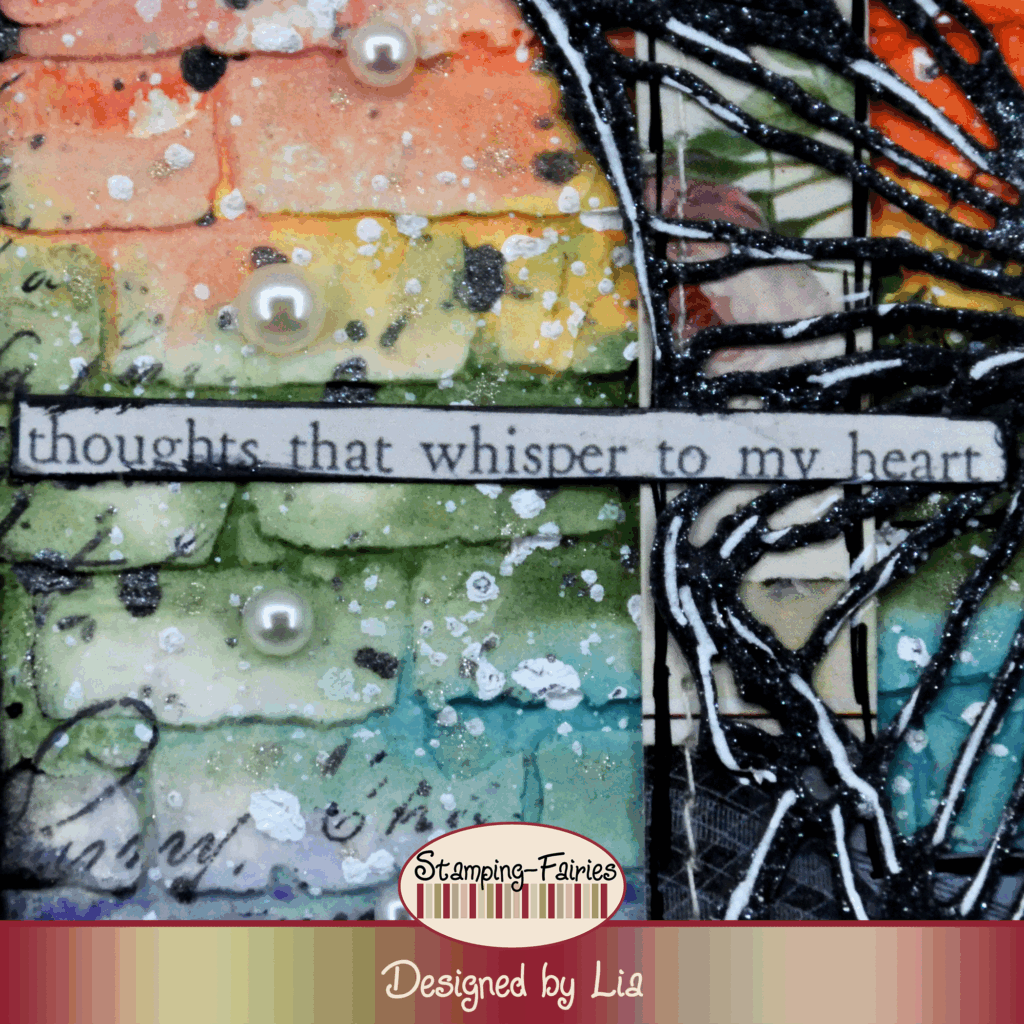
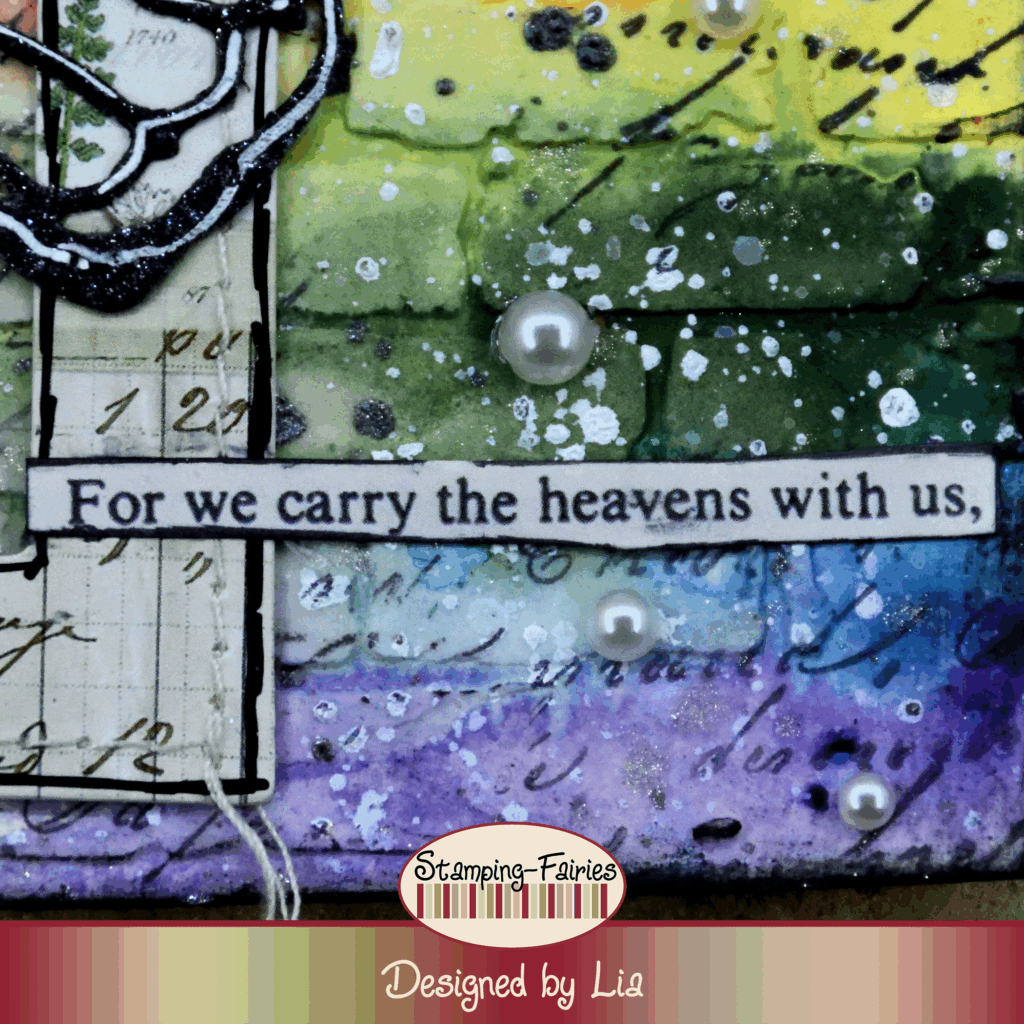
Time to prepare my images. I used frames and butterflies on these cards. My frames come from the Idea-Ology Collage Layer Frames pack. I cut them to the size I needed and attached them to the sides of my cards. I cut my butterflies out of black cardstock, using the Sizzix Vault Scribbly Butterfly Thinlits set. I sprayed them with the Distress Hickory Smoke Spritz, to make them sparkly, and then I cut them in half. I used half a butterfly on each card. I wanted the butterflies to look like they are coming out of the frames, so I placed them accordingly. To make them stand out a little better, I added some white highlights on them, using a white pen.
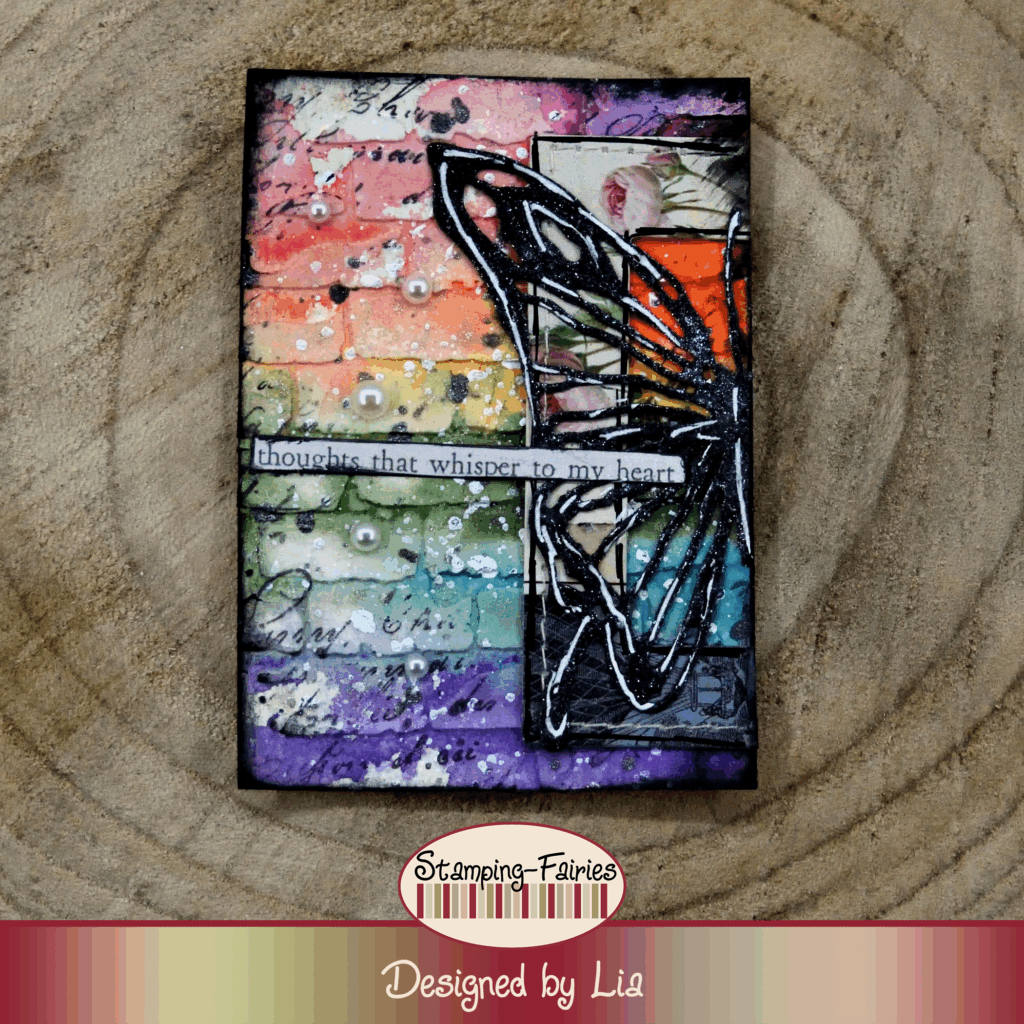
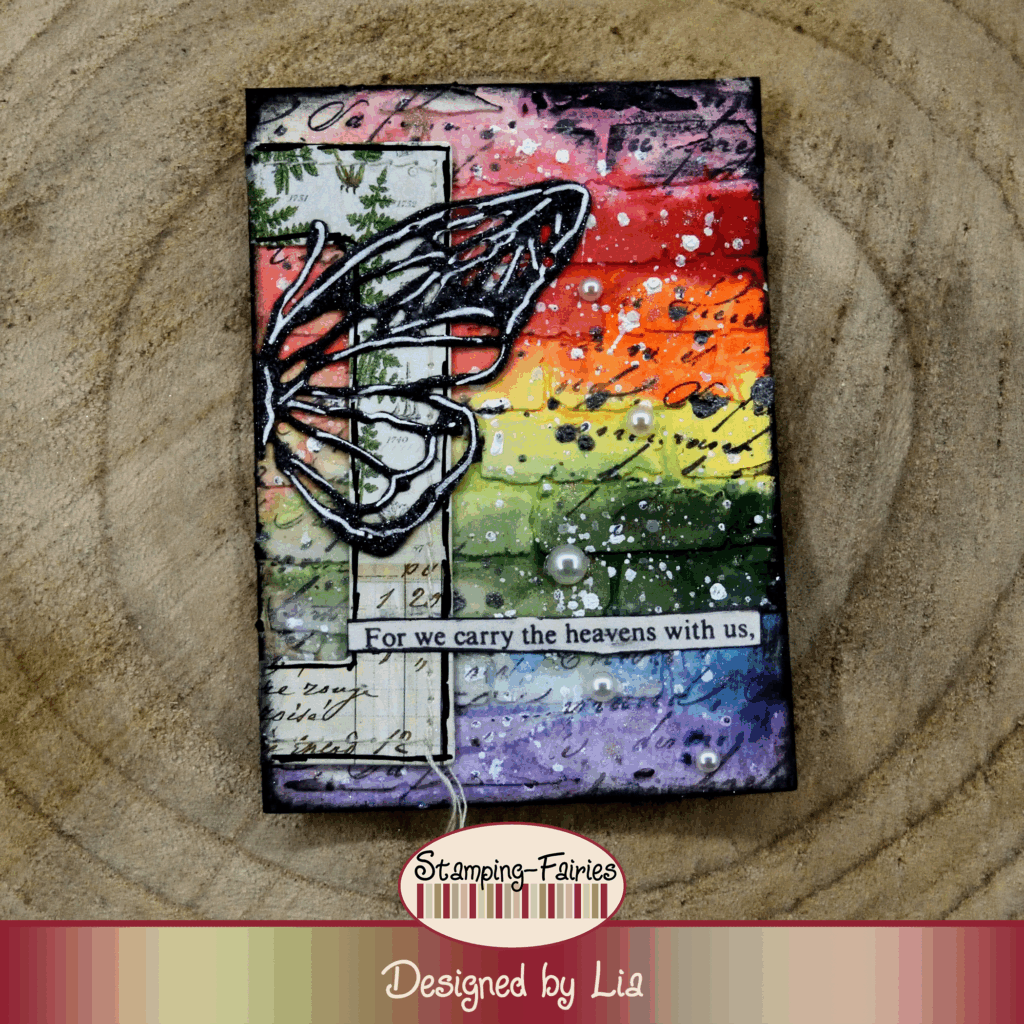
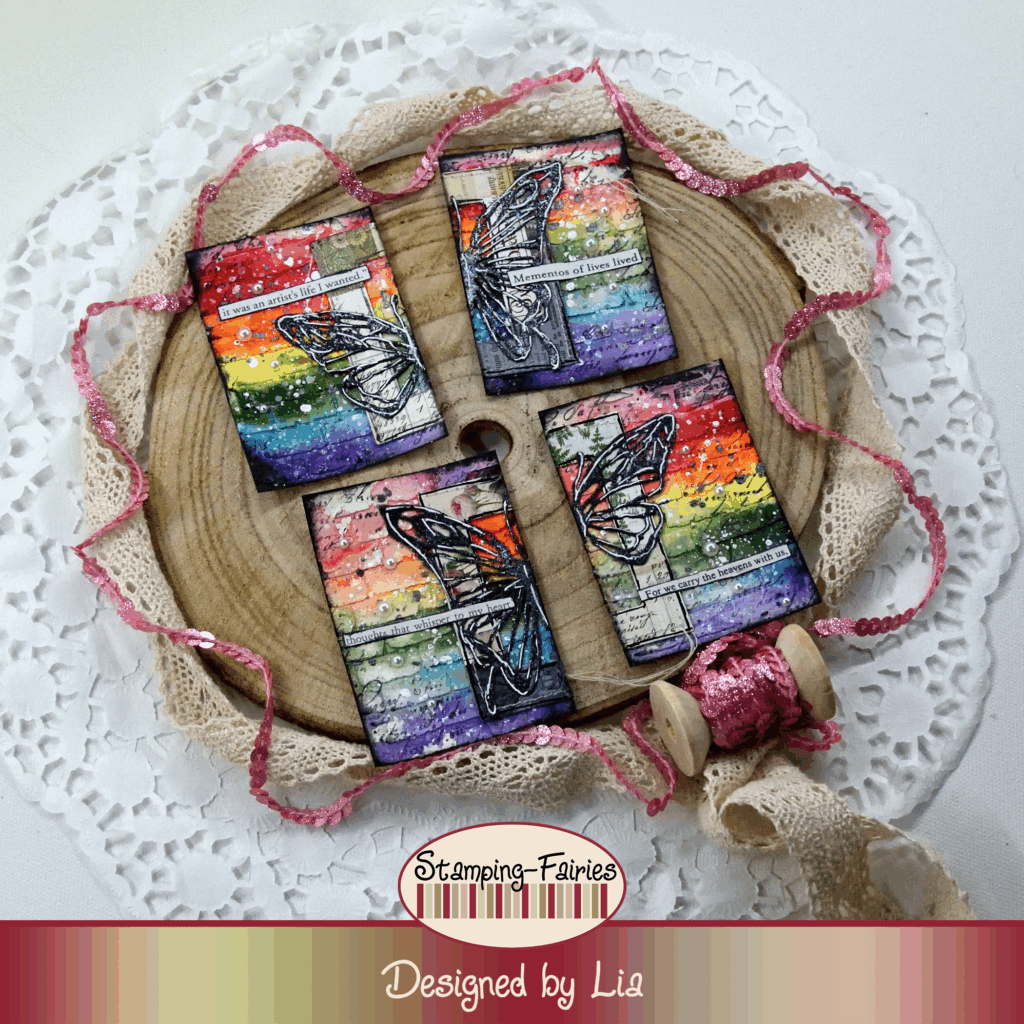
My sentiments come from the Idea-Ology Clippings Sticker Book. These sentiment stripes are beige in colour and they already look distressed. They are beautiful! I placed them on the cards and then I outlined them with a black pen. I chose these sentiment stripes, intending to create a little story. The sentiments say: „It was an artist’s life I wanted.“, „Mementos of lives lived“, „Thoughts that whisper to my heart“, „For we carry the heavens with us“. I really loved these little sentences! They are true, for me at least! As a last little bit of embellishment, I added some Craft Consortium Pearls on the cards.
And that was the project for today! I gave my fingers a very colourful make up while making these cards. I love getting messy! I think that it is fun, as creating should be. It is all about being happy! I really hope you like today’s project! I hope you got inspired! We will see each other again next Monday! Until then, stay creative and have fun!
*Deutsche Version*
Hallo zusammen! Willkommen zurück zu einem weiteren Mixed-Media Projekt. Das Wetter hier ist zwar regnerisch, aber das hat uns einige wirklich schöne Regenbögen beschert! Deshalb habe ich beschlossen, heute ein Regenbogenprojekt zu erstellen (als ob ich eine Ausrede bräuchte, um Farbe zu verwenden … haha). Beginnen wir mit den Materialien, die ich verwendet habe:
Materialien
(wenn etwas nicht auf Lager ist,
bitte einfach auf „Produkterinnerung“ klicken)
- Stamping-Fairies / BalilleDesign – Artist Trading Card
- Prima Marketing – Art Basic – Heavy Gesso White
- Tim Holtz Layering Stencil – Bricked
- Ranger Texture Paste – Opaque Matte
- Distress Paints
- Tim Holtz Stamp Set – The Poinsettia
- Archival Ink – Jet Black
- Distress Spritz – Hickory Smoke
- Sheer Shimmer Spritz Spray – Sparkle (7ml)
- Tim Holtz Layer Frames – Collage
- Sizzix Tim Holtz Thinlits – Vault Scribbly Butterfly
- Tim Holtz Sticker Book – Clippings
- Craft Consortium Essential Adhesive Pearls – Natural
Für das heutige Projekt habe ich ein Set Artist Trading Cards erstellt. Ich habe zunächst meine Karten ausgeschnitten. Artist Trading Cards sind normalerweise 2,5 x 3,5 Zoll groß, also etwa 6,5 x 9 cm. Anschließend habe ich meinen Artist Trading Card Stempel auf die Rückseite meines Papiers gestempelt. Viele Künstler bevorzugen es, ein zweites Kartenset nur mit diesem Stempel zu erstellen und es anschließend auf ihre eigentlichen Karten zu kleben. So wird verhindert, dass die Rückseite tintenverschmiert und schmutzig wird. Aber mir macht die Sauerei nichts aus … im Gegenteil, ich mag sie! Also, genau das machen wir! Um mit dem Projekt zu beginnen, habe ich meine Karten zunächst mit Gesso überzogen. Dabei ist es egal, ob es weißes oder klares Gesso ist. Wir machen das nur, um unsere Oberfläche vorzubereiten. Anschließend habe ich die Bricked Layering Schablone mit Ranger Opaque Matte Texture Paste verwendet, um dem Projekt etwas Struktur zu verleihen. Ich habe die Paste trocknen lassen und dann war es Zeit, Farbe hinzuzufügen. Ich habe Distress Paints in den Farben Kitsch Flamingo, Candied Apple, Carved Pumpkin, Squeezed Lemonade, Rustic Wilderness, Broken China und Villainous Potion verwendet. Ich habe die Farben auf eine Seite meiner Karten aufgetragen, sie mit Wasser besprüht und sie dann auf die andere Seite laufen lassen, sodass sie die Karten bedeckten. Dadurch ist eine Seite der Karten dunkler und die andere heller. Distress Paints sind Acrylfarben und trocknen recht schnell. Nachdem die Farben getrocknet waren, habe ich mit dem Textstempel aus dem Stempelset „The Poinsettia“ von Tim Holtz und Jet Black Archival Ink ein paar Textdetails hinzugefügt. Es war Zeit, Spritzer hinzuzufügen, und ich habe eine Menge hinzugefügt! Ich habe mit Picket Fence (weiß) Distress Paint angefangen, bin dann zu Hickory Smoke Distress Spritz übergegangen und habe mit Sheer Shimmer Spritz in Sparkle abgeschlossen. Ich habe darauf geachtet, meine Karten zwischen den verschiedenen Spritzern trocknen zu lassen, denn ich wollte, dass sie sich nicht vermischen, sondern dass sie sich übereinanderlegen! Nachdem alles trocken war, habe ich die Ränder der Karten mit meiner Jet Black Archival Ink abgedunkelt und die Hintergründe waren fertig!
Zeit, meine Bilder vorzubereiten. Ich habe Rahmen und Schmetterlinge für diese Karten verwendet. Meine Rahmen stammen aus dem Idea-Ology Collage Layer Frames Paket. Ich habe sie auf die gewünschte Größe zugeschnitten und an den Seiten meiner Karten befestigt. Ich habe meine Schmetterlinge aus schwarzem Karton ausgeschnitten, mit dem Sizzix Vault Scribbly Butterfly Thinlits Set. Ich habe sie mit Distress Hickory Smoke Spritz besprüht, damit sie funkeln, und sie dann halbiert. Für jede Karte habe ich einen halben Schmetterling verwendet. Ich wollte, dass die Schmetterlinge aussehen, als kämen sie aus den Rahmen, also habe ich sie entsprechend platziert. Damit sie besser hervorstechen, habe ich mit einem weißen Stift weiße Highlights gesetzt.
Meine Sprüche stammen aus dem Idea-Ology Clippings Sticker Book. Diese Sprüchestreifen sind beige und wirken schon abgenutzt. Sie sind wunderschön! Ich habe sie auf die Karten gelegt und anschließend mit schwarzem Stift umrandet. Ich habe diese Sprüchestreifen gewählt, um eine kleine Geschichte zu erzählen. Die Sprüche lauten: „Ich wollte ein Künstlerleben“, „Erinnerungen an gelebte Leben“, „Gedanken, die meinem Herzen zuflüstern“, „Denn wir tragen den Himmel mit uns“. Ich fand diese kleinen Sätze wirklich toll! Sie stimmen, zumindest für mich! Als letzte kleine Verzierung habe ich noch ein paar Craft Consortium Pearls auf die Karten geklebt.

Und das war das Projekt für heute! Ich habe meine Finger beim Basteln dieser Karten bunt geschminkt. Ich liebe es, mich schmutzig zu machen! Ich finde, es macht Spaß, so wie es beim Gestalten sein sollte. Es geht darum, glücklich zu sein! Ich hoffe sehr, dass euch das heutige Projekt gefällt! Ich hoffe, ihr habt euch inspirieren lassen! Wir sehen uns nächsten Montag wieder! Bis dahin bleibt kreativ und habt Spaß!

Ein Licht im Dunkeln

Two for One
Das könnte dich auch interessieren

The Queen of everythink…

Welcome to Charmingville