All you need is love
*German version below | Deutsche Version unten*
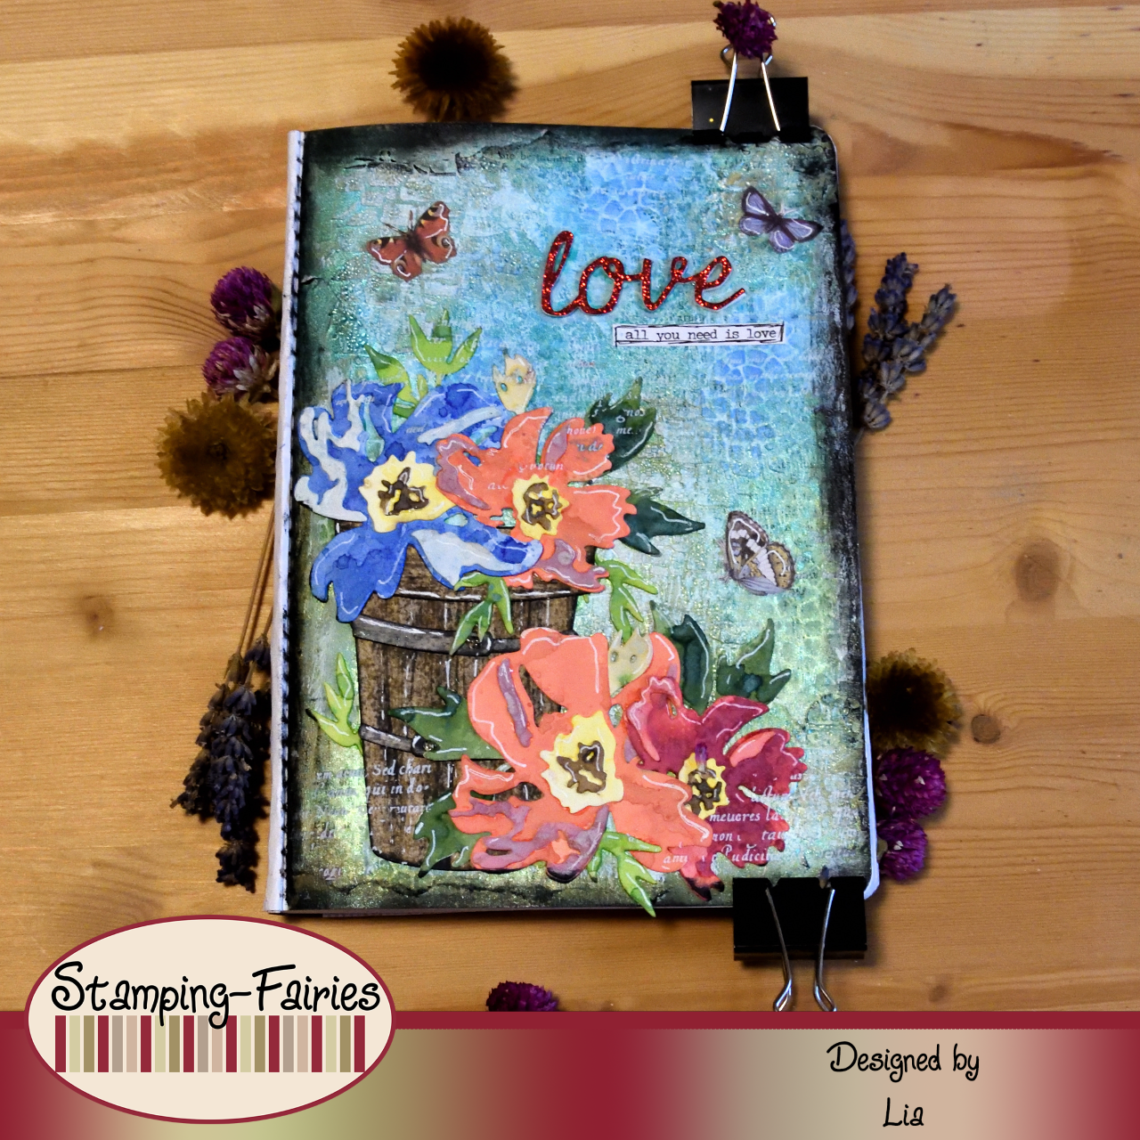
Hello everyone! I am Lia and I am here today with a new art journal page. The weather is getting better so my head is filled with flowers!!! Since I can not have flowers in my garden yet, I decided to create this page with flowers! So, let’s start with the materials I used.
Materials
- Tim Holtz Mini Layering Stencil Collection
- Distress Mica Stain Sprays
- Ranger Texture Paste Opaque Crackle
- Sizzix Tim Holtz Bigz – Potted#2
- Sizzix Tim Holtz Thinlits – Brushstroke Flowers
- Sizzix Tim Holtz DIE Set – Shadow Script
- Tim Holtz Small Talk Sticker
- Stamperia Rub On Transfers
- Ranger – Tim Holtz Distress Oxide Pads
- Archival Ink
- Tim Holtz Ephemera Pack

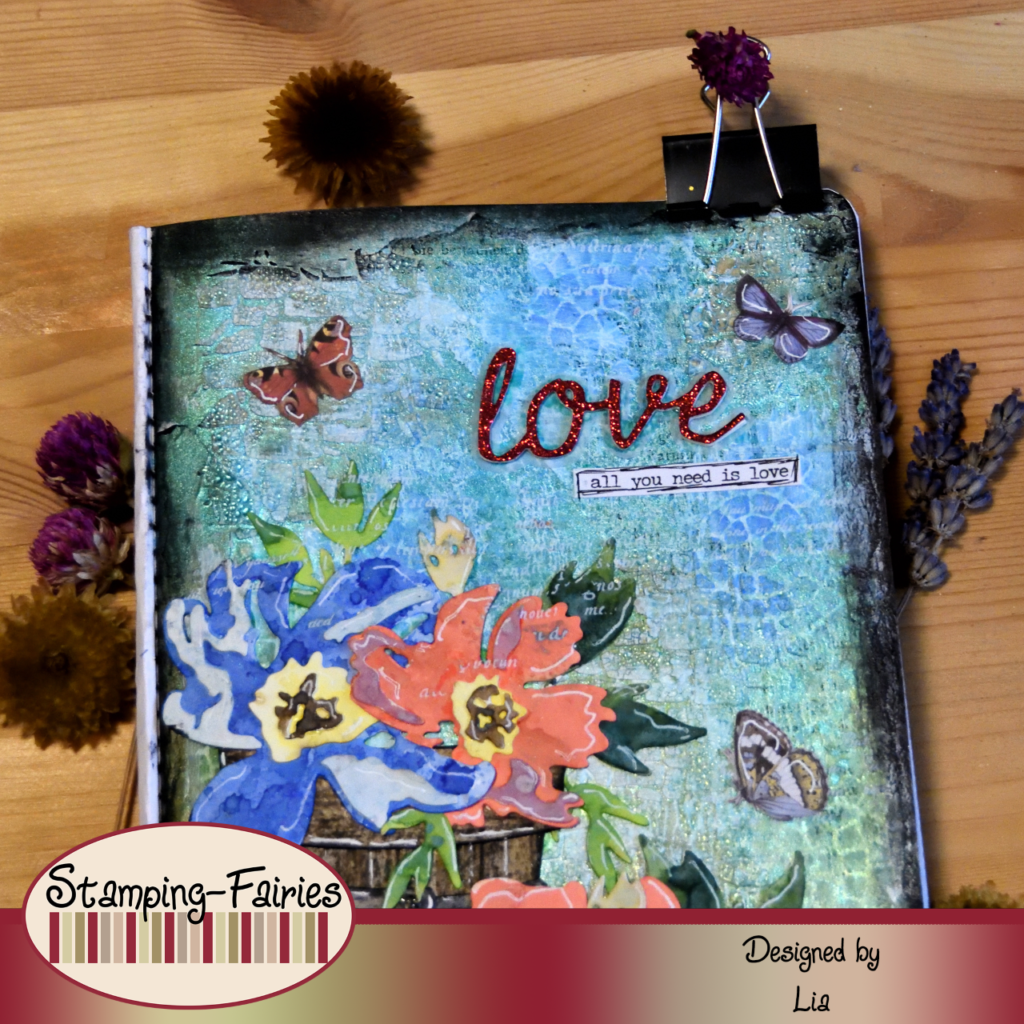
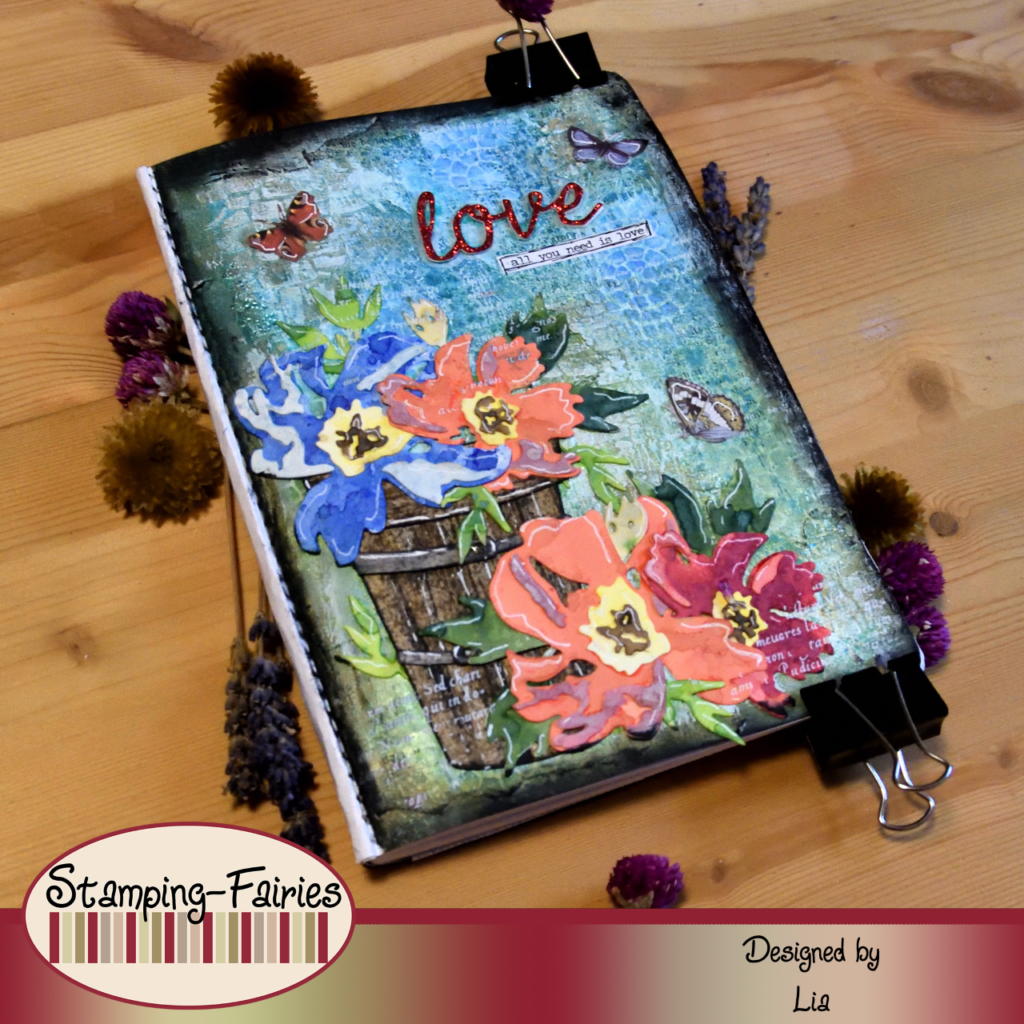
As always, I started with the background. The first thing I did was to tear a page from an old book and glue the pieces diagonally on opposite corners of my page. It is not very visible in the end but it does provide some extra texture. Then, I used the stencil with the stone pattern from the Tim Holtz Mini Layering Stencil Set 28 with Opaque Texture Crackle Paste on random areas on my page. For my colours, I used Distress Mica Stain sprays. I used the Shiny Bauble and the Merry Mint from the Holiday Set# 4, and the Wicket Elixir from the Halloween #4. I kept the greens on the lower part of my page and the blues on the top part. Then, I used the stencil with the circle pattern, from the same stencil set, along with Distress Oxide Prize Ribbon ink, just to add a little bit more interest on my background. I darkened the edges of my page with Black Soot Archival ink and my background was done.
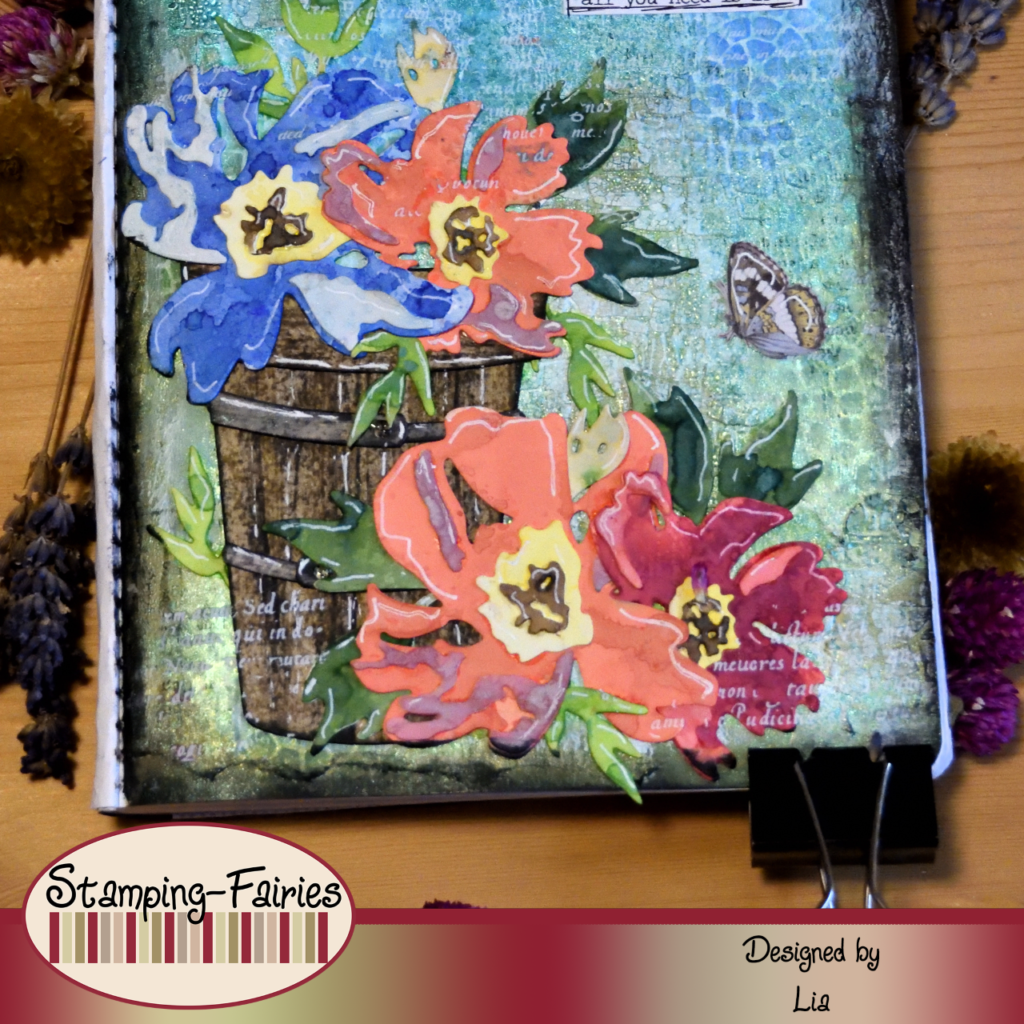
It was time to create my images! I used the Bigz – Potted#2 dies to cut the pot and then I coloured the pieces with Archival inks in colours Vintage Photo, Ground Espresso, Hickory Smoke and Black Soot. I simply dragged the ink pads on the paper, making sure to create lines, so it would look like wood. This sort of colouring can be done with Distress Oxide inks and it would be easier to do, but I wanted to make sure that my colours would not move as I was going to glue more things on them. I used the Brushstroke Flowers #1 Thinlit set to cut my flowers and then I coloured them with a variety of Distress oxide inks. I really like how they turned out to be! I arranged the pot and the flowers on my page.
For my sentiment, I used a stripe of the Small Talk Sticker, but it was a little bit too small. I needed something to stand out a little bit more. So, I used the Shadow Script #1 Thinlits set by Tim Holtz and I cut out the word „love“. I cut this word two times out of pink cardstock and another one time out of glitter cardstock. I also cut the shadow part of the word out of Vellum. I just need to inform you that this Thinlits set is no longer available in the shop. I am very sorry about that! But you can find a lot of other available dies for the same word, if you would like to! So, after I was done with my sentiment, I pulled out the Field Notes Tim Holtz Ephemera Pack and chose a few butterflies out of it. I attached those butterflies around the sentiment and my flowers. I still felt like I needed something more, so I used the Writing/White Stamperia Rub On Transfers on random spots, both on the background and on the flowers. In the end, I darkened the edges of my page a little more, just to make the colours pop up.
And that was my project for today! I really hope you like it! I hope you got inspired! I hope you all enjoy the good weather and get excited for Spring! We will see each other again next Monday! Until then, stay creative and have fun!
*Deutsche Version*
Hallo zusammen! Ich bin Lia und bin heute hier mit einer neuen Kunstjournalseite. Das Wetter wird besser, also ist mein Kopf voller Blumen!!! Da ich noch keine Blumen in meinem Garten haben kann, habe ich mich entschlossen, diese Seite mit Blumen zu gestalten! Beginnen wir mit den Materialien, die ich verwendet habe.
Materialien
- Tim Holtz Mini Layering Stencil Collection
- Distress Mica Stain Sprays
- Ranger Texture Paste Opaque Crackle
- Sizzix Tim Holtz Bigz – Potted#2
- Sizzix Tim Holtz Thinlits – Brushstroke Flowers
- Sizzix Tim Holtz DIE Set – Shadow Script
- Tim Holtz Small Talk Sticker
- Stamperia Rub On Transfers
- Ranger – Tim Holtz Distress Oxide Pads
- Archival Ink
- Tim Holtz Ephemera Pack
Wie immer habe ich mit dem Hintergrund begonnen. Das Erste, was ich tat, war, eine Seite aus einem alten Buch zu reißen und die Stücke diagonal auf gegenüberliegende Ecken meiner Seite zu kleben. Es ist am Ende nicht sehr sichtbar, bietet aber eine zusätzliche Textur. Dann habe ich die Schablone mit dem Steinmuster aus dem Tim Holtz Mini Layering Stencil Set 28 mit Opaque Texture Crackle Paste an zufälligen Stellen auf meiner Seite verwendet. Für meine Farben habe ich Distress Mica Stain Sprays verwendet. Ich habe Shiny Bauble und Merry Mint aus dem Holiday Set # 4 und das Wicket Elixir aus Halloween # 4 verwendet. Ich habe die Grüntöne im unteren Teil meiner Seite und die Blautöne im oberen Teil beibehalten. Dann habe ich die Schablone mit dem Kreismuster aus demselben Schablonenset zusammen mit Distress Oxide Prize Ribbon-Tinte verwendet, um meinem Hintergrund ein wenig interessanter zu machen. Ich habe die Ränder meiner Seite mit Black Soot Archival Ink abgedunkelt und mein Hintergrund war fertig.
Zeit meine Bilder zu erstellen! Ich habe die Bigz – Potted # 2 Stanzen verwendet, um den Topf zu schneiden, und dann habe ich die Teile mit Archival Inks in den Farben Vintage Photo, Ground Espresso, Hickory Smoke und Black Soot coloriert. Ich habe einfach die Stempelkissen auf das Papier gezogen und darauf geachtet, dass Linien entstehen, damit es wie Holz aussieht. Diese Art der Färbung kann mit Distress Oxide-Tinten durchgeführt werden und es wäre einfacher, aber ich wollte sicherstellen, dass sich meine Farben nicht bewegen, da ich mehr Dinge darauf kleben würde. Ich habe das Brushstroke Flowers #1 Thinlit-Set verwendet, um meine Blumen zu schneiden, und dann habe ich sie mit einer Vielzahl von Distress-Oxidtinten coloriert. Ich mag wirklich, wie sie geworden sind! Den Topf und die Blumen habe ich auf meiner Seite arrangiert.
Für meinen Spruch habe ich einen Streifen des Small Talk Sticker verwendet, der aber etwas zu klein war. Ich brauchte etwas, um ein bisschen mehr hervorzustechen. Also habe ich das Shadow Script #1 Thinlits-Set von Tim Holtz verwendet und das Wort „Love“ ausgeschnitten. Ich habe dieses Wort zweimal aus rosa Cardstock und ein weiteres Mal aus Glitter Cardstock ausgeschnitten. Ich habe auch den Schattenteil des Wortes aus Pergament geschnitten. Ich muss euch nur mitteilen, dass dieses Thinlits-Set nicht mehr im Shop erhältlich ist. Das tut mir sehr leid! Aber es sind viele andere Stanzen für dasselbe Wort verfügbare! Also, nachdem ich mit meinem Sentiment fertig war, habe ich das Field Notes Tim Holtz Ephemera Pack herausgezogen und ein paar Schmetterlinge daraus ausgewählt. Ich habe diese Schmetterlinge um den Spruch und meine Blumen befestigt. Ich hatte immer noch das Gefühl, dass ich etwas mehr brauchte, also habe ich die Writing/White Stamperia Rub On Transfers an zufälligen Stellen verwendet, sowohl auf dem Hintergrund als auch auf den Blumen. Am Ende habe ich die Ränder meiner Seite noch etwas dunkler gemacht, nur um die Farben hervortreten zu lassen.
Und das war mein Projekt für heute! Ich hoffe sehr, dass es euch gefällt! Ich hoffe, ihr habt euch inspirieren lassen! Ich hoffe ihr genießt alle das gute Wetter und freut euch auf den Frühling! Wir sehen uns nächsten Montag wieder! Bis dahin bleibt kreativ und habt Spaß!

Neue Abenteuer